You can easily book multiple listings in one reservation with a single payer (“group reservation”), by using the availability search of the Multi-Calendar. This option allows you to reserve properties from different locations or different sub-units of the same multi-unit or complex, and even to select different date ranges for different listings.
Before you begin
- When a group reservation is created, several “sub” reservations are generated, with each shown as a separate event in the calendar.
- Each sub-reservation can be managed separately. For example, you can set a different status for each sub-reservation. In addition, you can conveniently see an overview of the group reservation via the summary tab on the reservation page.
- Once the group reservation is saved, you cannot add more "sub" reservations to it.
- You can also send a quote for multiple listings.
- Group reservations must include listings with the same currency. If needed, change the listing’s currency.
Create a group reservation for multiple listings
Follow the instructions below or watch our video.
Step by step:
- Sign in to your Guesty account.
- In the top navigation bar, click
 .
. - Click Availability search (or Find availability Beta users) at the top right of the Multi-Calendar.
- To narrow down the search results, you can use the following filters:
- Click Dates to search for available listings in a chosen date range.
- Click Guests per unit to set the number of guests per room. For example, if there are three guests in the group, select "3" to display units with at least three available beds.
- Click Filters to add additional filters, such as amenities or cities.
- Check the Add blocked properties checkbox to include properties that are under flexible blocks for the selected dates. You can remove flexible blocks if needed. Properties with inflexible blocks won't be shown.
- Check the Ignore minimum nights checkbox to include properties whose minimum number of nights per stay is higher than the date range you selected.
- Check the Ignore maximum guests checkbox to include properties whose maximum occupancy is lower than the number of guests you selected.
- Click Find properties
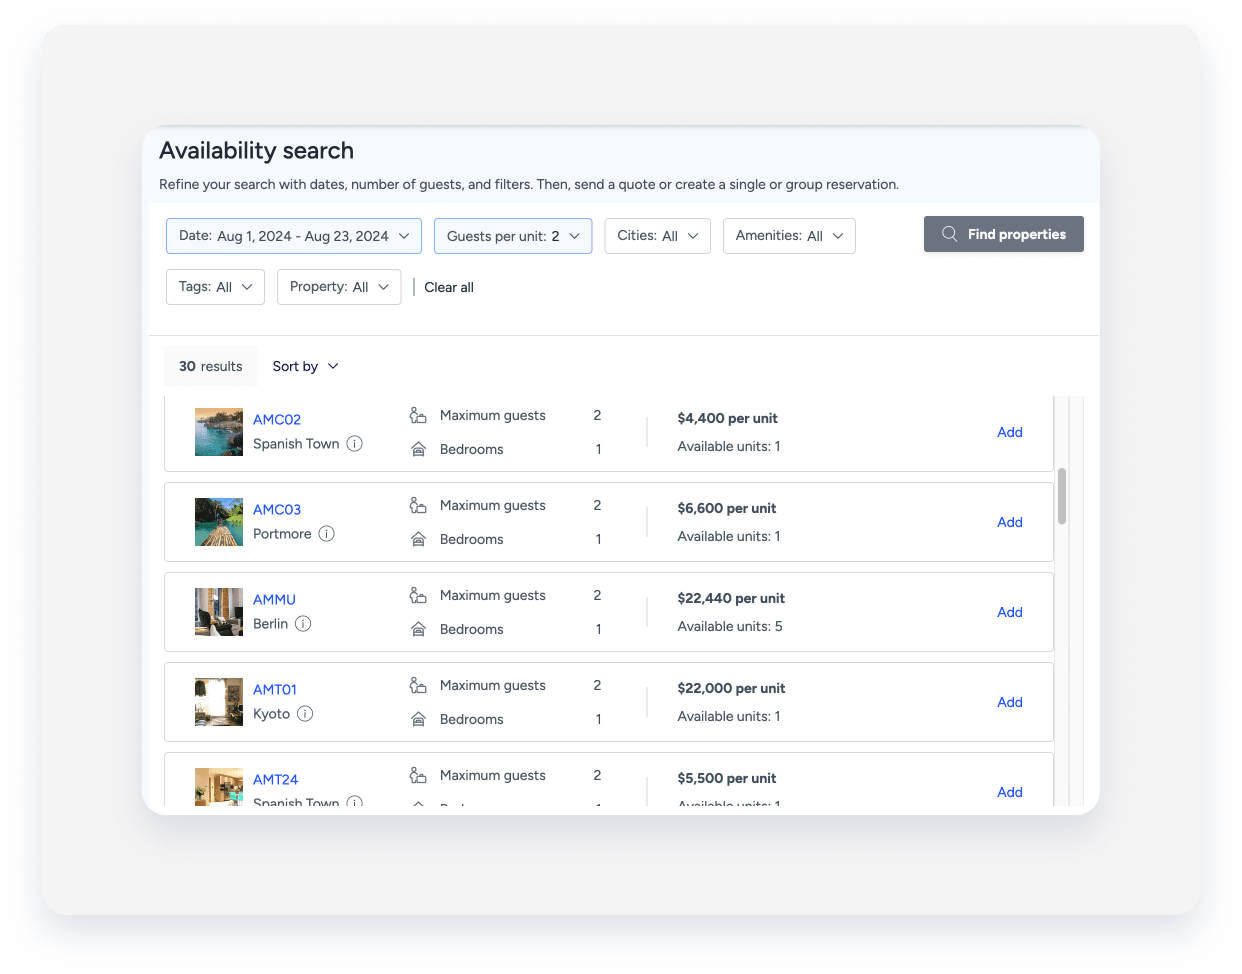
- Listings will appear in the search results if they are available to book for the selected dates. Learn when a listing won't be available to book.
In the search results, you can see all available listings, their maximum guest occupancy per unit, the total number of bedrooms in the properties, and the number of available room types for each listing.
If a listing is a multi-unit, all its sub-units will be shown under the same result. For example, if you have 15 similar standard rooms in one multi-unit, all rooms are displayed in the same row.
For complexes, each room type is displayed as a different result. For example, suites and standard rooms that are part of the same complex are shown as two separate results. If one of the room types is a multi-unit (for example, a “standard room” type with 15 similar rooms), all its sub-units will be displayed in the same result.
Tip:
- Sort the results by using the “Sort by” button.
- Click on the listing name to open the property page (if you’d like to explore the listing’s specific monthly calendar, etc.).
- Hover over the tooltip next to the listing city to view the full address.
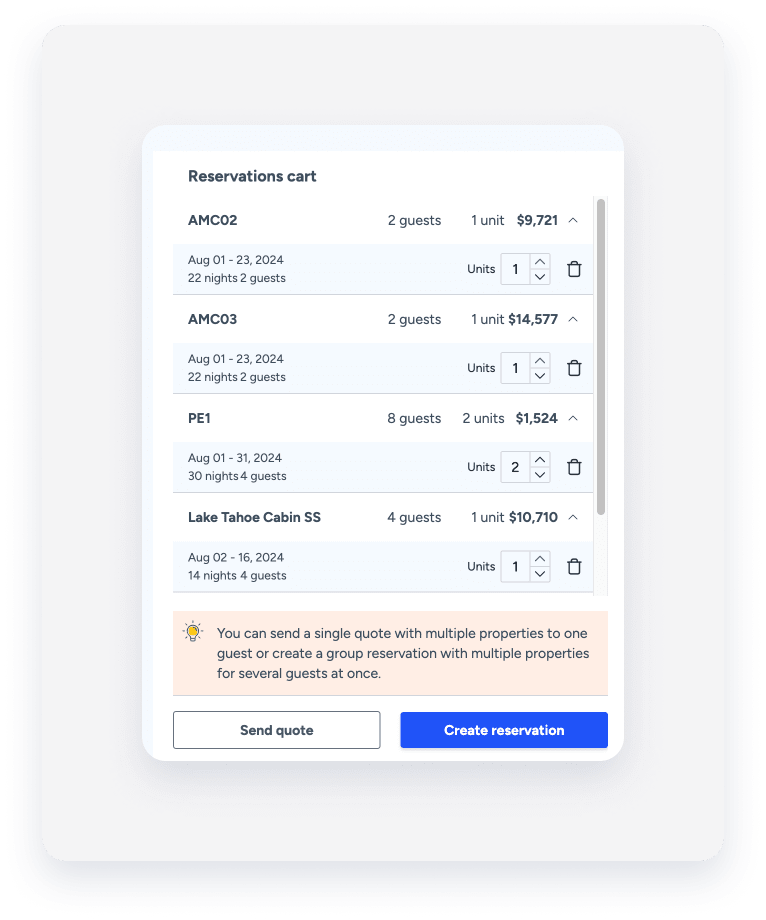
- Click Add next to all the listings you’d like to include in the reservation. All the selected listings will be shown under “Summary” to the right.
- You can add up to 25 listings to the "Summary" page.
- If more than one listing is available for booking, use the arrows in the listing row to increase or decrease the number of selected units.
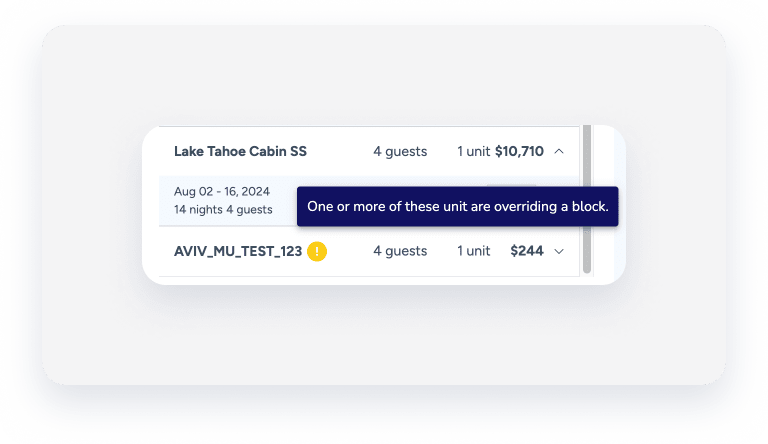
- You can add listings that have a flexible block. In this case, a yellow exclamation mark will appear next to the listing's name. If you hover over the icon, you can see a pop-up indicating that you'll be overriding a block by selecting the listing.
- Click Create a reservation.
- In the next screen, check the summary of the details at the upper bar, displaying the overall date range, total number of guests, total number of booked nights, total (distinct) properties, and the total price (/price range). If needed, return to the previous screen to adjust the details.

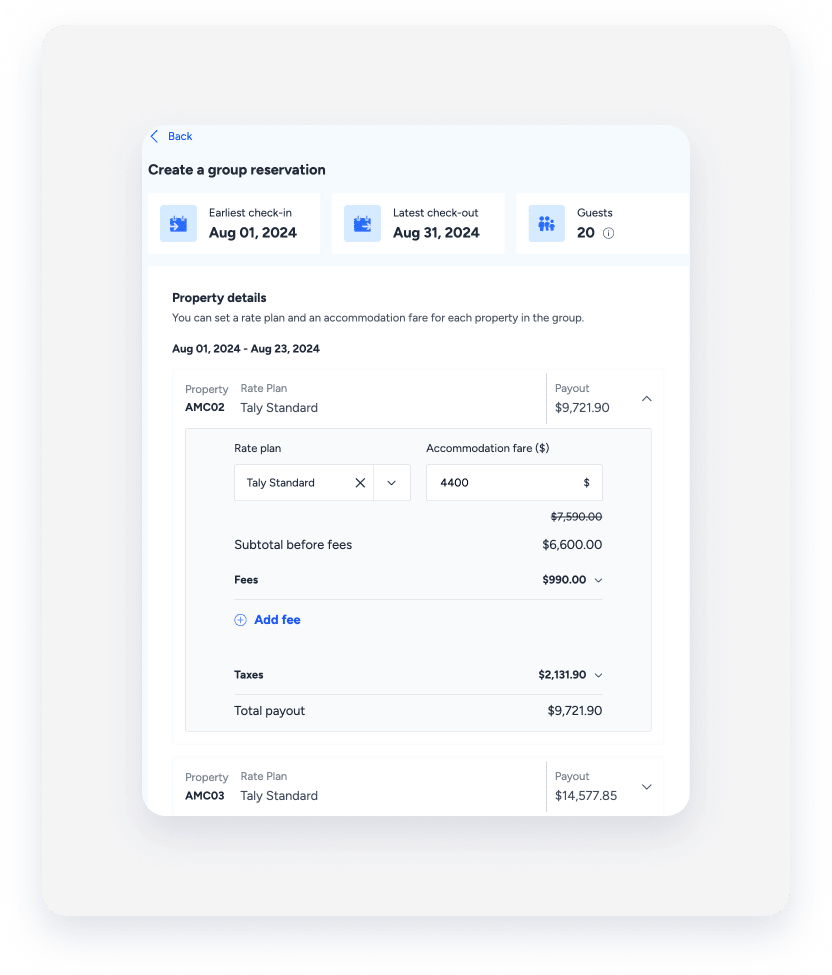
- Under the “Property details” section, adjust the pricing per booked property if needed by adding a coupon, overriding the accommodation fare, fees, or taxes, or changing the applied rate plan.
If you selected multiple listings, each listing will be displayed under a different section, allowing you to adjust their fees separately. Click the down arrow in the relevant row to expand it.
Note:
- If you've edited the additional fees, they won't automatically be recalculated if an alteration is made to the reservation. For example, if you edit the cleaning fee for a night and then add an additional night to the reservation, the cleaning fee for the added night will be according to the original pricing.
- When creating a reservation, the default check-in and check-out times will be set. If you wish to change these times, first create the reservation, then return to edit the reservation.
- In “Booker contact details”, add the booker details by either clicking Add details to add a new guest or by selecting an existing guest from the upper dropdown menu. The booker will be assigned to the group reservation and will be the reservation’s payer.
- Under “Assign guests to properties” at the bottom right, choose a main guest for each of the units included in the reservation using one of the following options:
-
Use booker contact info
By using this option, you won’t assign a main guest to the listing. Instead, the booker’s saved information (added in step 9) will be duplicated, such that a new guest entity will be created in Guesty having the same details of the booker.
We recommend that you later change the name and email address of the guest assigned to the unit, renaming the duplicated booker name to a specific guest name, and using a different email than the booker’s. Otherwise, multiple entities with the same name and email address of the booker will be created, and may cause missing input about returning guests.
-
Name a guest
Enter a guest’s information for the listing (only one is required per listing). You can select an existing guest from the dropdown menu or create a new guest.
-
Booker is the guest
Assign the booker as the guest in the listing (should be used only once).
-
Use booker contact info
- Under “Reservation notes”, click Add notes to add any internal information about the reservation.
- Under “Reservation status”, select the relevant reservation source, and the status of the group reservation as a whole, using one of the statuses below. You’ll be able to later change the reservation status for each listing via the reservation page.
-
Confirmed
Use this status for a reservation to instantly approve it.
-
Inquiry
Use this status to leave the calendar unblocked for the selected listings and dates.
-
Reserved
Use this status to block the calendar for the selected listings and dates. To remove the calendar block, you will need to change a “Reserved” status to either “Confirmed”, if approving the reservation, or to “Closed”.
-
- Click Create a group reservation or Create a single reservation at the top right.
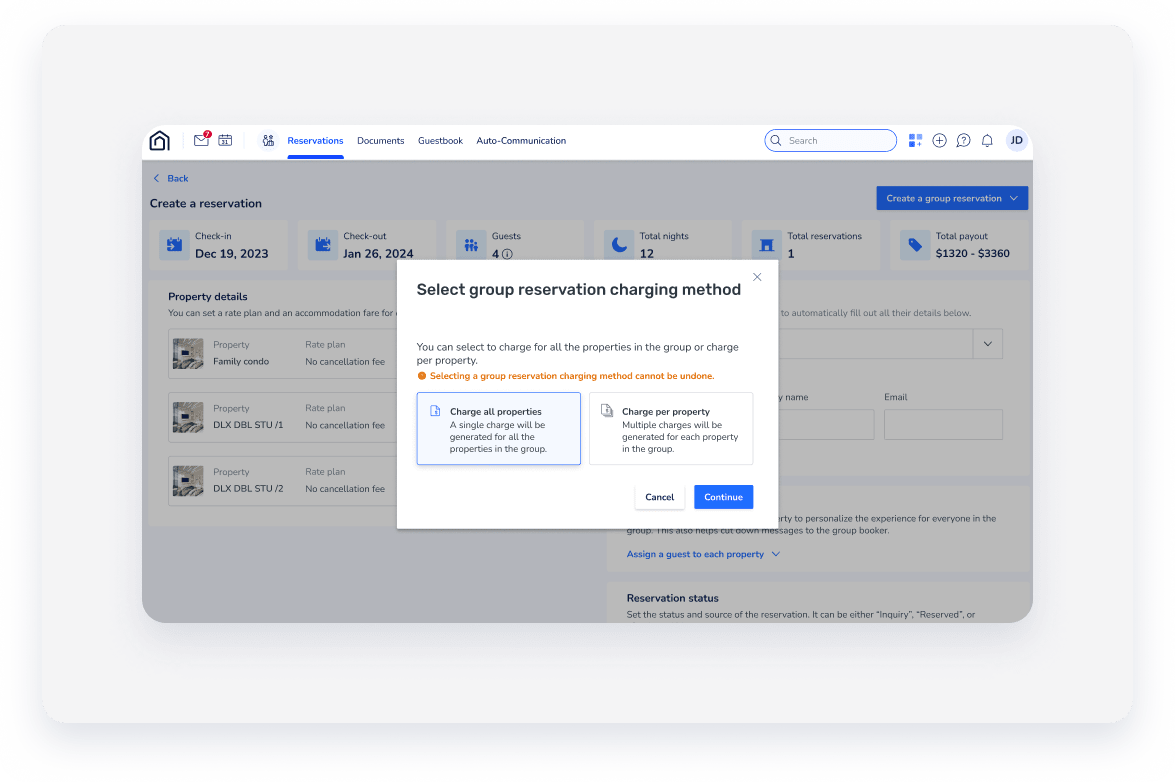
- In case of a group reservation: Select Charge per property if you want to split the payment between the guests (i.e., the payment will be separated per listing). Otherwise, click Charge all properties. Learn how to collect payments for group reservations.
Note:
Accounting users must select "Per property", charging for all properties is not available.
