With Guesty's message automations, you can simplify and automate guest communication by sending automated messages to reservations with a "Confirmed" status.
Note:
Automated messages can't be assigned to reservations marked as "Inquiry" or "Reserved".
Determine why the message wasn't sent
Follow the troubleshooting guide below to resolve issues with scheduled messages that didn't send for "Confirmed" reservations.
-
Confirm you assigned the correct properties and channels to your template
- Confirm the message automation wasn't deleted or deactivated.
-
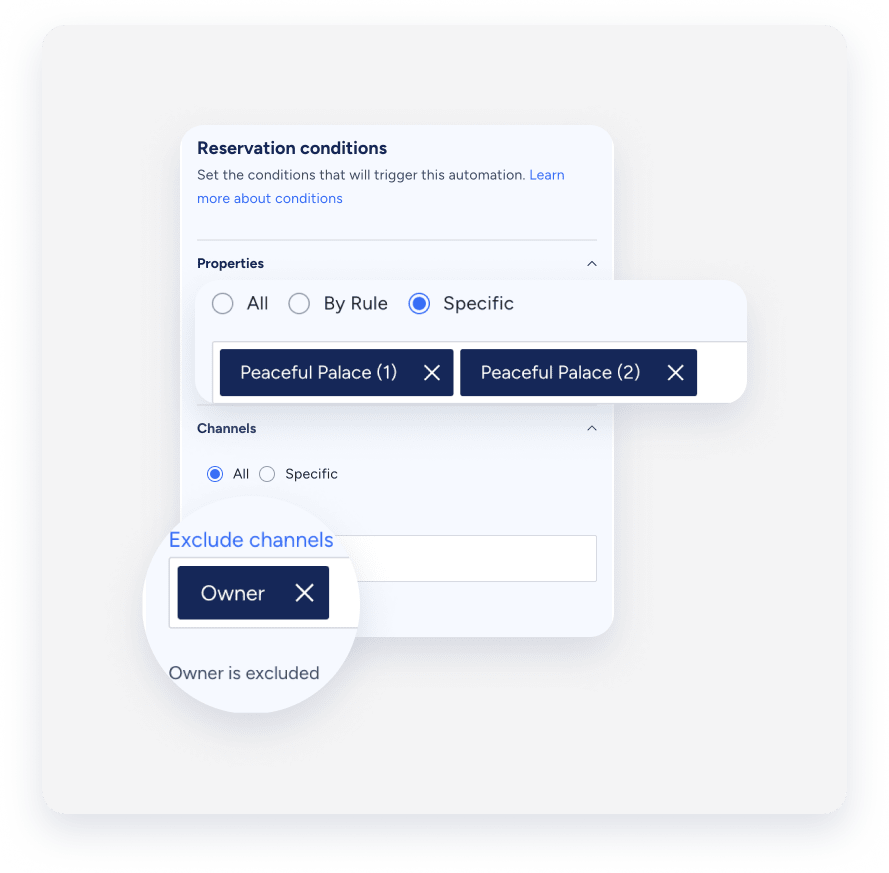
Ensure the correct listings and channels were added―or excluded―to your “Properties” and “Channels” reservation conditions.
-
Check scheduling and activation timing
Activating a message automation schedules messages for all matching reservations. This includes reservations created before the automation was active. Guesty doesn't schedule messages for times that have already passed. For example, if an automation triggers "at booking confirmation" and you activate it for a reservation confirmed yesterday, that specific message is skipped.
If you set up automations for reservation alterations, messages only trigger for these changes:
- Reservations status
- Number of nights
- Number of guests
- Assigned listing
- Check-in or check-out time
-
Check which conditions were set
You can choose whether an automated message is sent based on the message conditions you set:
- If you add a reservation-level custom field as a message condition, Guesty checks it before sending out the message per its schedule. The message will not be sent if the custom field's toggle does not match the reservation details.
- When a property-level custom field is added as a message condition, Guesty checks it only when the reservation status is "Confirmed". The message will not be sent if the custom field's toggle does not match the reservation details at confirmation.
If you delete the custom field without removing the condition from the automated message, it will not be sent. When this happens, a "null" sending condition appears instead of the deleted custom field in the relevant message template. Contact us to remove this "null" condition. This action enables the automated message to be reapplied to existing and future reservations.
-
Check the custom fields
The following limitations will cause an automated message to fail:
- Custom fields can't contain default variables or other custom fields.
- The custom field for the listing or reservation was not set up.
- The custom field was set up for the listing or reservation after the message was sent.
- The custom variable contains a dash, which is not supported.
-
Check the reservation settings
Check if multiple automated messages or if a single message is disabled for the reservation.
-
Check if the reservation was imported
An automated message that is triggered by a confirmation of a reservation will not be sent if the reservation was imported to Guesty.
-
Check the guest's contact details
Check when the guest's phone number and email address were added to the reservation. The correct guest phone number and email should be updated in the guest profile before the scheduled sending time of the automated message. If there is no email address or if the primary email address is not set, the automated messages won't be sent. If the guest details are incorrect, the automated message can't be received.
-
Check your Airbnb listing settings
Automated messages will only work when both an Airbnb listing and a host account are active and connected to Guesty. Airbnb messages must be sent via channel, not email.
Locate details for contacting support
If you confirm the configuration is correct and the issue persists, contact us to begin troubleshooting.
To help us triage the issue quickly and accurately, provide the following details along with a screenshot showing any error messages:
The reservation code is a unique identifier assigned to each booking. The code's format depends on the booking channel.
Code formats
- Airbnb: Starts with "H" (e.g., HMEXF9BKQ4).
- Booking.com: Starts with "BC" (e.g., BC-1000gAmP).
- Vrbo: Starts with "HA" (e.g., HA-8XTV36).
- Manual/Direct Bookings: Have their own specific format.
Location
-
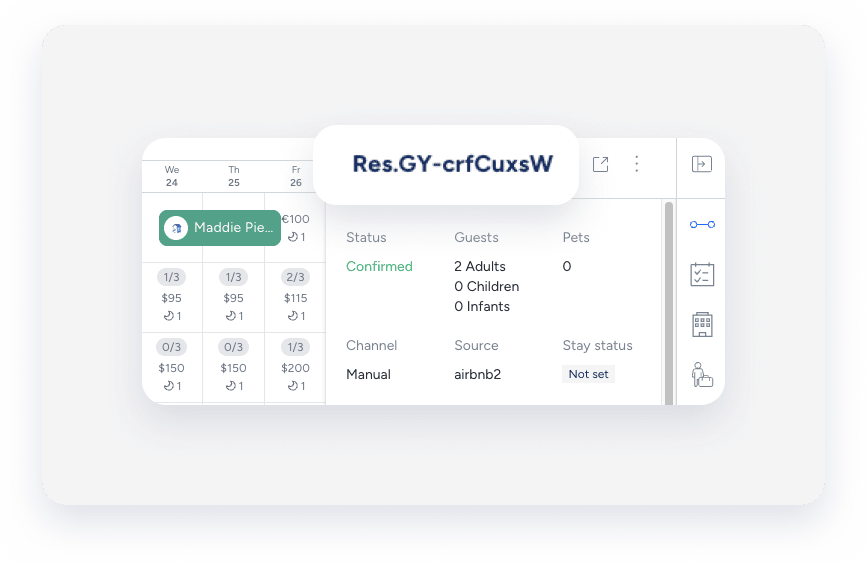
On the Reservation Page: Select the relevant reservation. The reservation code displays at the top of the reservation card, in the top left corner.

-
On the Multi-Calendar: Click a reservation in the Multi-Calendar to access its details. The reservation code displays in the side panel.
-
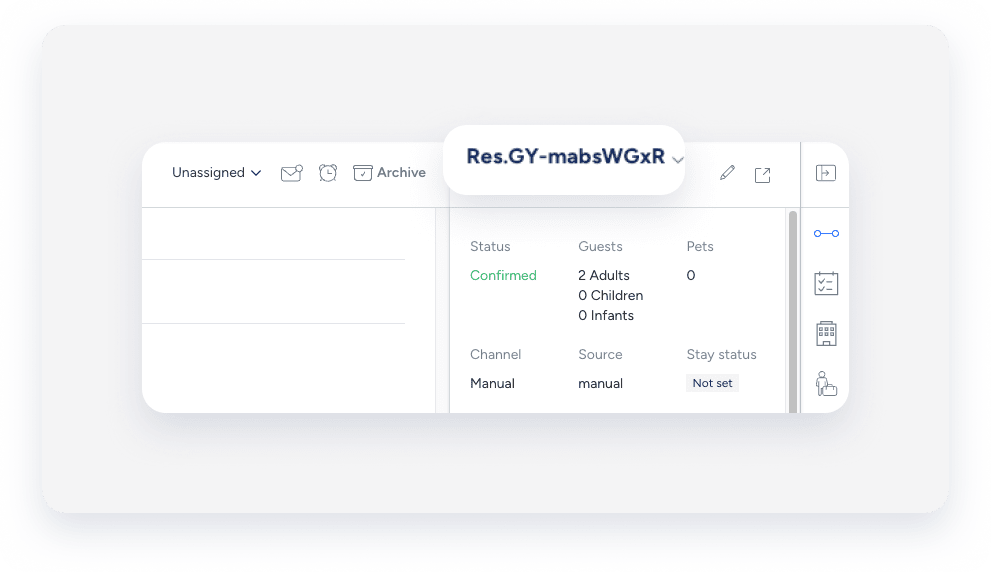
In the Guesty Inbox: The reservation code displays in the Inbox Reservation widget of the relevant conversation thread.
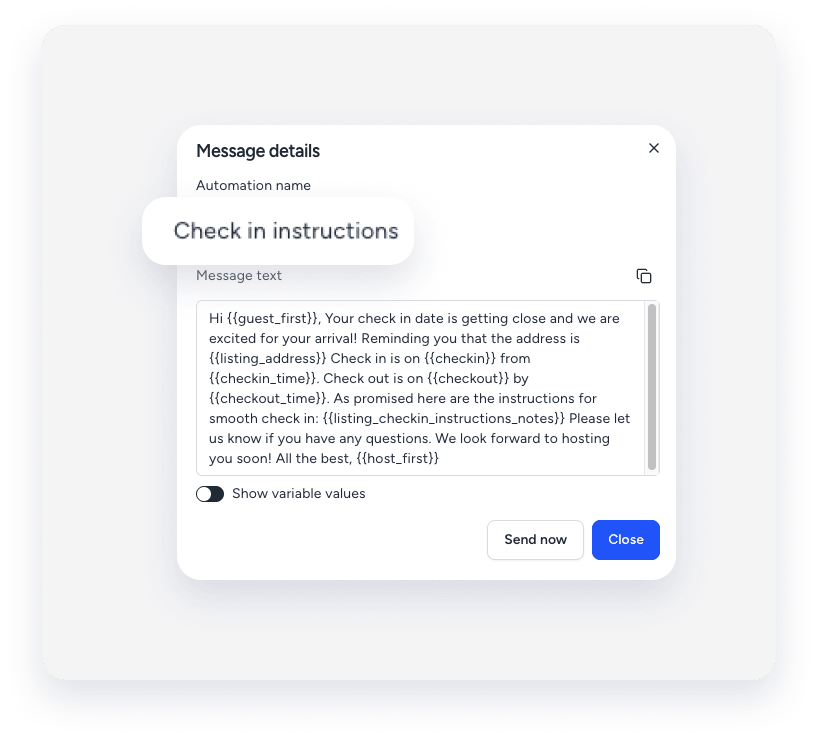
The label you assign to identify a specific message in your message automation workflow. The name is only for user identification and is not visible to guests.
Location
-
In the messaging automation page: In the side navigation menu, click
 Operations and select under Front desk, select Message automation. Click the relevant automation. The automated message name displays in the automations list.
-
In the Guesty Inbox: (for scheduled or sent messages): Select the relevant conversation thread. In the right side panel, click Automated messages. The automated message name for sent or scheduled messages displays in the History tab.

Tip:
Use a consistent naming convention (e.g., channel + purpose + trigger) so automations are easy to find with partial searches.
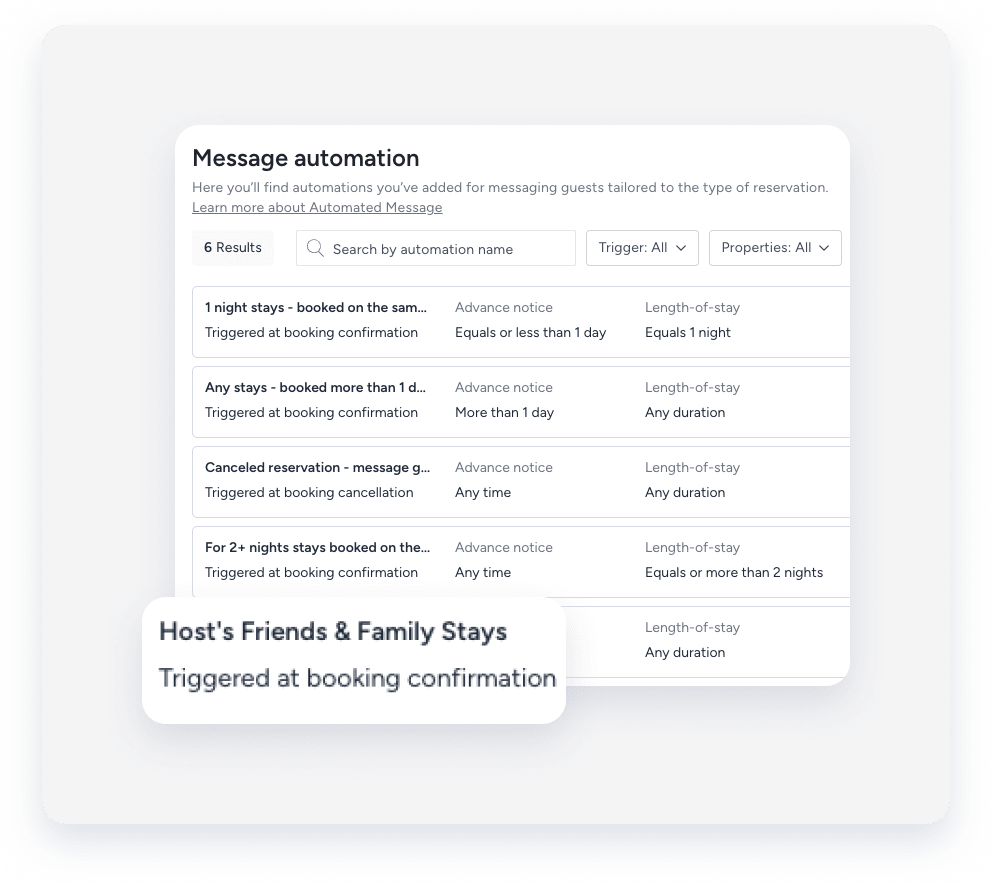
A message automation, sometimes referred to as a workflow, is the visual framework you use to set up automated guest communication based on the reservation lifecycle. The automation name is for internal use only and is not visible to guests.
Location
-
In the messaging automation page: In the side navigation menu, click Operations and select under Front desk, select Message automation. The message automation name displays in the automations list. To search for a specific automation, use the search bar at the top of the page: Type the full or partial name to quickly find it.
-
In the Guesty Inbox: (for scheduled or sent messages): Select the relevant conversation thread. In the right-side panel, click Automated messages. Select the Scheduled or History tab. Under the relevant automation, click See more. The message automation name displays in the pop-up.