Your Guesty account settings control how your business appears to guests and how Guesty works day-to-day, from the sender name on guest emails to your default currency and cleaning rules.
Navigate to your Guesty account settings
Follow the steps below to access your account settings.
Step by step:
- Sign in to your Guesty account.
- In the side navigation menu, click
 Account to open the dropdown menu.
 - Select Settings.
The Company information tab opens by default.
Update your company information
In the Company information tab, update your account name, company logo, and company description.
Account name
Your account name appears as the sender on emails sent from the Guesty inbox to guests who booked through manual reservations or the Guesty Booking Engine.
You can edit it under "Account name".
Note:
For booking channel messages, the sender name is set in the channel, not in Guesty. You can change the name in your account on the respective booking channel, or reach out to the channel’s support team for assistance.
Company logo and description
For best results, use a 300 × 300 px image for your logo. Follow the instructions below to upload your logo to Guesty.
Step by step:
- Under "Company logo", click
 Upload.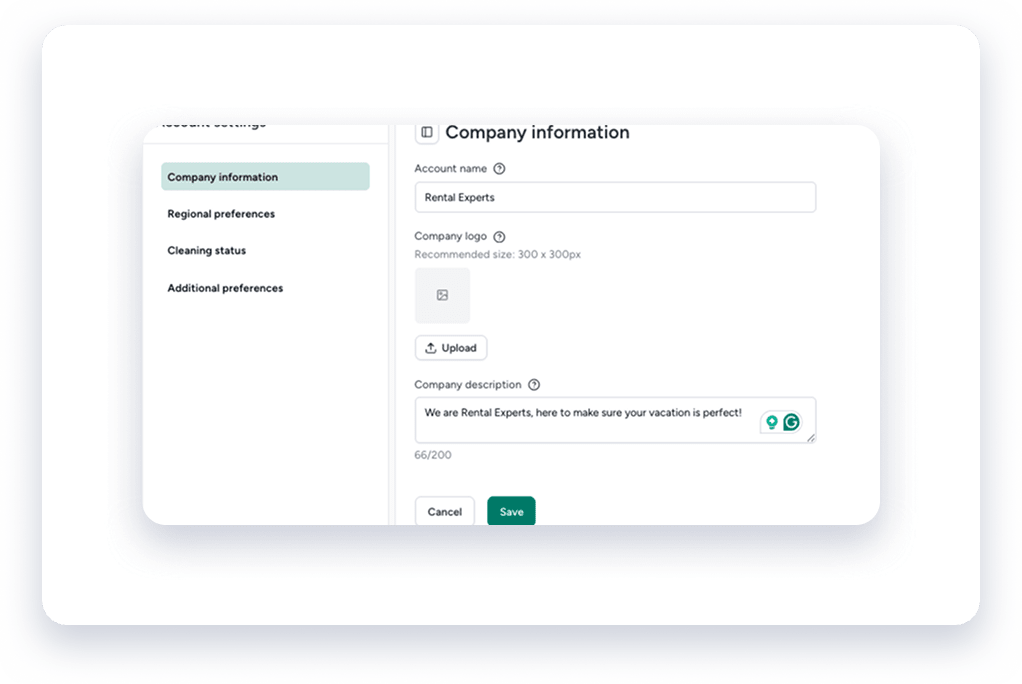
- Select your logo image. To use a different image, click Change. To remove it, click X.
- Under "Company description", enter a short description of your company.
- Click Save
Configure your regional preferences
In the Regional preferences tab, select your account's default currency, then click Save.
The default currency is used in financial reports, expenses, upsells, workflows, revenue overview, and the Owner's Portal. Learn how to change a listing's currency.
Your account's time zone is set automatically based on its location. To change it, contact us.
Set up your cleaning status
Cleaning statuses help you track which properties are ready for the next guest. In the Cleaning status tab, toggle on the options you want, then click Save:
- Mark property as dirty after check-in
- Display cleaning status in Multi-Calendar
- Mark properties as dirty or unknown after selected period. Select your preferred settings from the relevant dropdown menu.
After setting your preferences, click Save.
Configure additional preferences
The Additional preferences tab contains the settings below. Toggle on the ones that fit how your team works.
System notifications
Choose whether to send system notifications to all admins or select specific users. Learn more about adding recipients to Guesty email notifications.
Calendar updates
Require team members to add a note when they change any of these in the Multi-Calendar:
- Availability
- Pricing
- Reason for manual block
Quote settings
Choose what guests must see or complete on quotes:
- Payment method
- Show house rules
- Agreement to Terms & Conditions. Paste a link to your Terms & Conditions in the provided field.
Task suggestions
Enable AI to suggest tasks based on guest messages.
Tip:
To master Account configuration, visit Guesty Academy for interactive courses and step-by-step video tutorials.
