Note:
This is a premium feature available to Accounting by Guesty users based in the United States. A transaction fee per transfer is applied and billed monthly.
Send ACH bank transfers to owners and vendors directly from Guesty with just a few clicks—no NACHA files or bank portals required.
Direct ACH payouts incur a per-transaction fee, even when processed in a group. Guesty invoices fees monthly. Review and accept pricing and term details during setup. ACH transfers typically take 2–5 business days for funds to reach the recipient.
Prepare for ACH transfers
Complete account and profile details
Confirm that your cash accounts include the correct routing and account numbers. Your company information must also include a valid email address.
Ensure all recipient profiles meet the ACH payment requirements.
Gather required documentation
If you're a US business entity, prepare these documents:
- EIN letter showing legal business name
- Certificate of Formation or Incorporation
- Attestation of Beneficial Ownership
- Government-issued photo ID for the authorized representative
- Registered business address
If you're a sole proprietor, prepare:
- Proof of business start date (For example, first sale invoice or marketplace confirmation)
- Social security number (SSN) and valid ID
Understand system limitations
Scheduling: Guesty supports same-day payout initiation only. Advanced scheduling and automated rules aren't supported.
Cancellations: You can't cancel or reverse direct ACH transfers once initiated.
Batch limits: Guesty processes up to 1,000 payouts at a time. Split larger groups into separate batches.
Set up direct ACH transfers
Setting up involves two main phases: verifying your business and connecting your bank accounts.
Accept terms and submit business verification
Step by step:
- Sign in to your Guesty account.
- In the side navigation menu, click
 Accounting to open the dropdown menu.
 - Under Accounting setup, select Direct ACH transfers.
- Review and accept the Terms and policies and Connected account user terms.
- To the right of "Verify Business", click Verify.
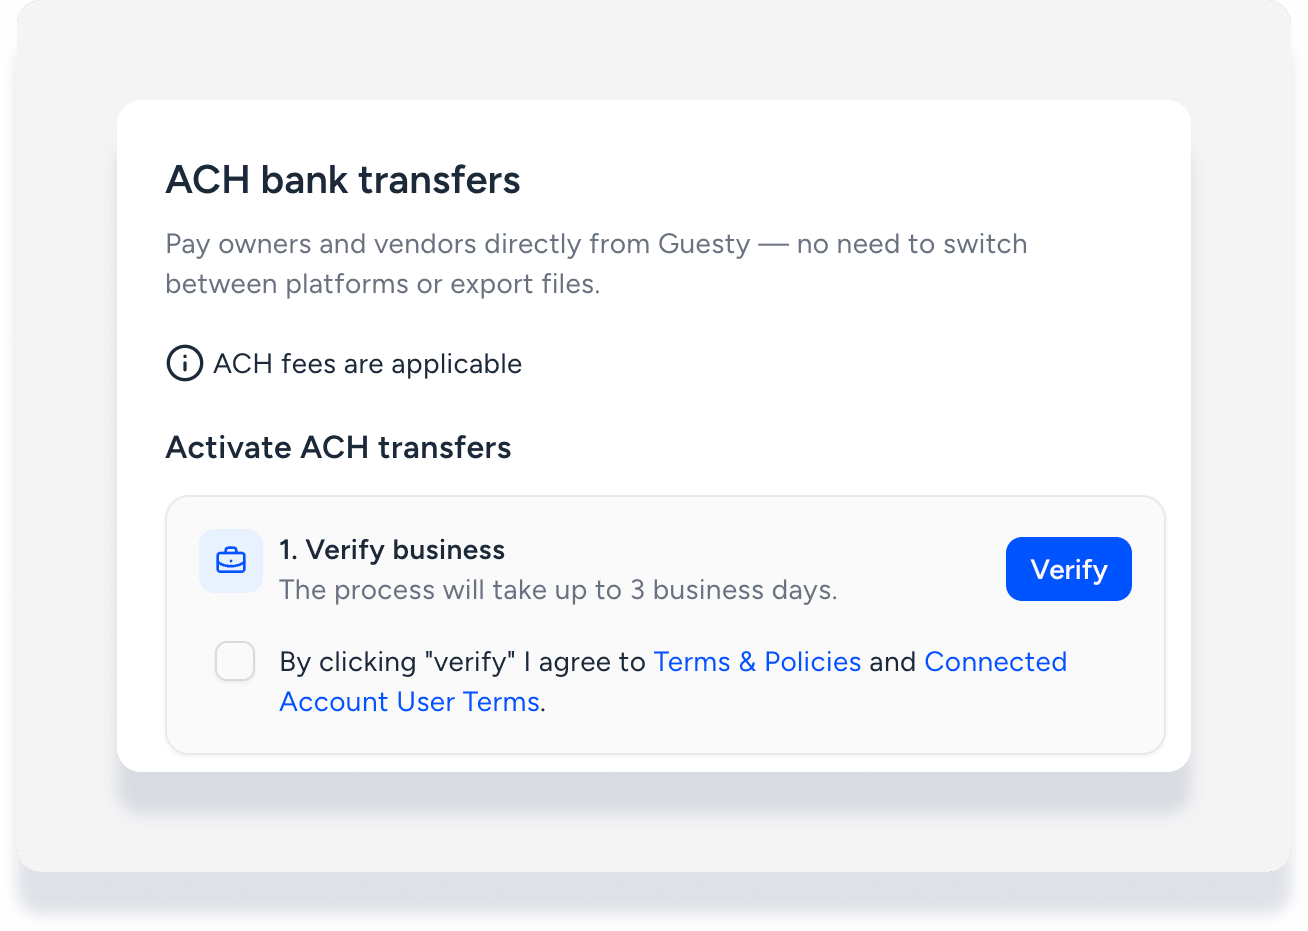
- In the pop-up, follow prompts to submit your business details for verification.
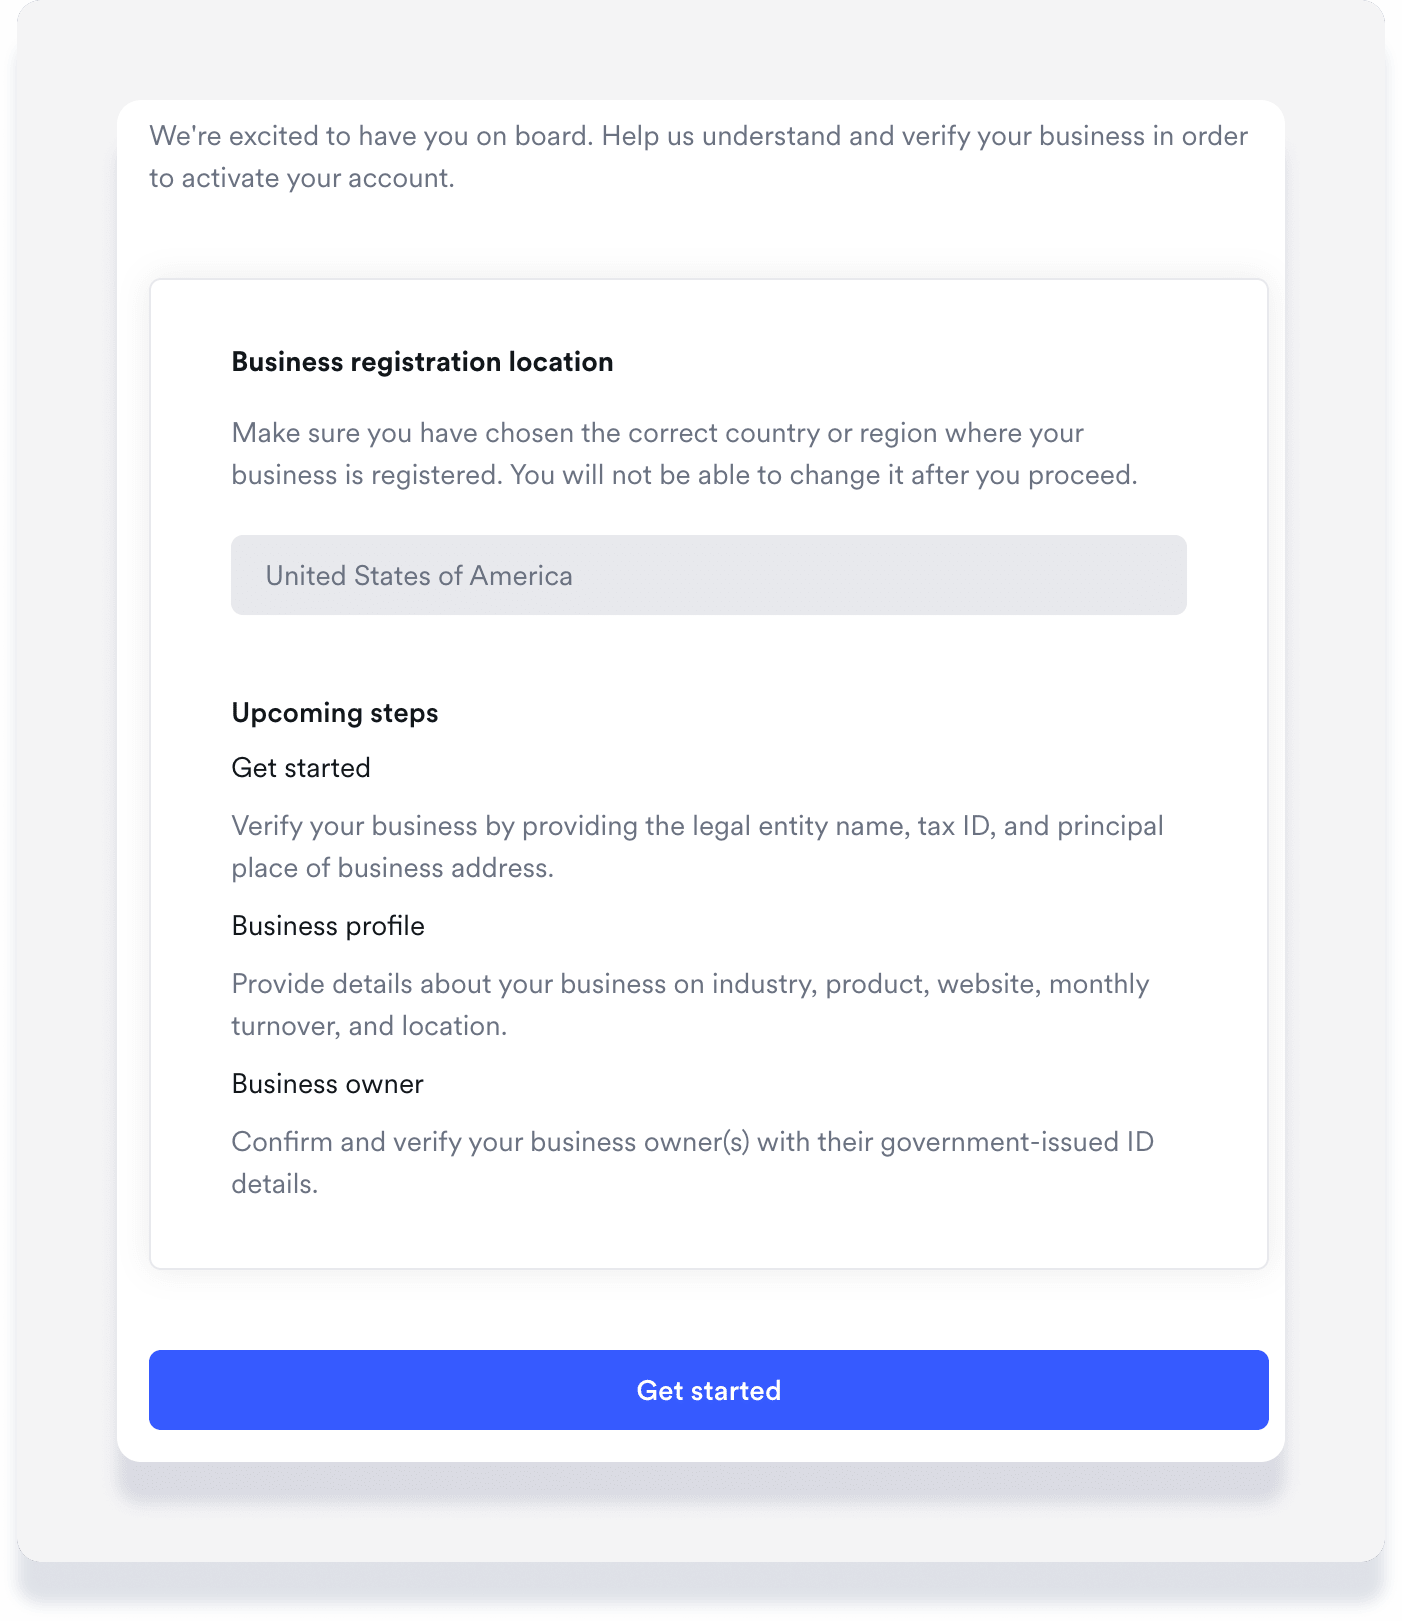
Business verification typically takes up to three business days. If the status changes to "action required," check your email for instructions. Submit missing documentation and resubmit the form as needed.
Connect bank account and verify micro-deposits
Important:
Before clicking Connect Now: If your business type is a registered company, ensure the name of your cash account in the system matches your registered business name exactly. If these names do not match, the connection will fail.
Add multiple bank accounts by following these steps for each one.
Step by step:
- To the right of "Connect bank account", click Connect Now.
- In the side panel, select the relevant bank account.
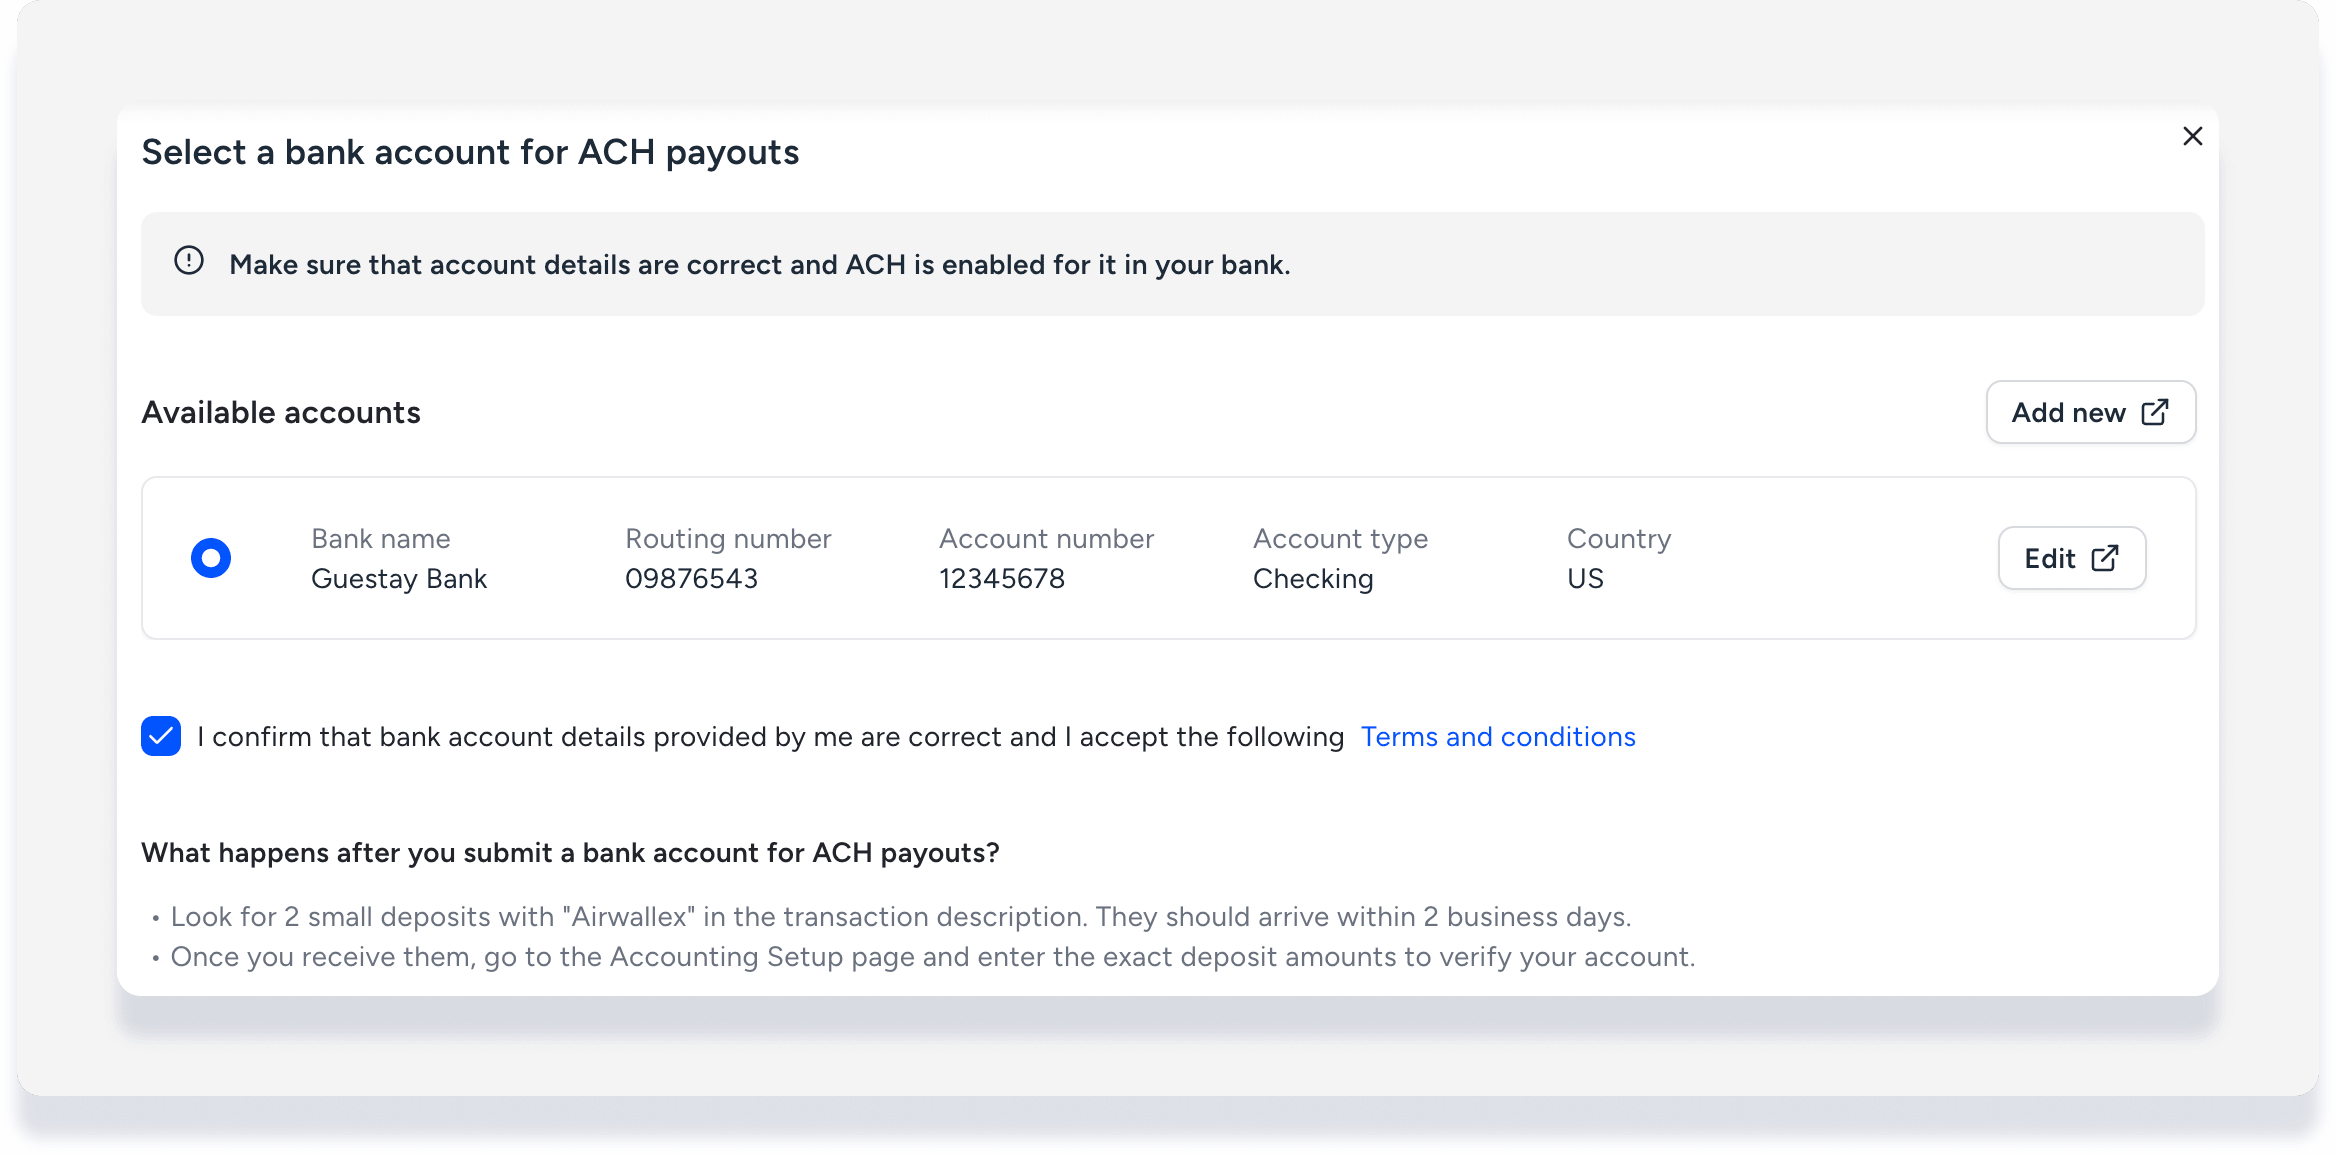
- Confirm the bank account details are correct, then click Submit.
- Allow up to five business days for two micro-deposits (under $1.00) from "Airwallex" to appear in your connected bank account.
- Once both micro-deposits are received, to the right of "Connect bank account", click Finish Verification.
-
Under "Amount 1" and "Amount 2", enter the exact micro-deposit amounts.
Important:
Wait until both deposits appear and enter the exact amounts. Even a small rounding error causes the verification to fail. You have three attempts to enter these correctly before the bank account is permanently invalidated for ACH transfers.
- Click Verify.
Make a direct ACH transfer
Important:
Once you initiate the transfer, the money is sent immediately. You can't cancel or reverse the transaction.
Allow 2-5 business days for funds to reach the recipient after you initiate the transfer.
Step by step:
- Sign in to your Guesty account.
- In the side navigation menu, click Accounting to open the dropdown menu.
- Under General ledger, select Trial balances.
- At the top-left, use dropdown menu to select the relevant filter, such as "Owners balance as of today".
- Select one or more relevant items using the checkboxes, then at the top-right click Pay.
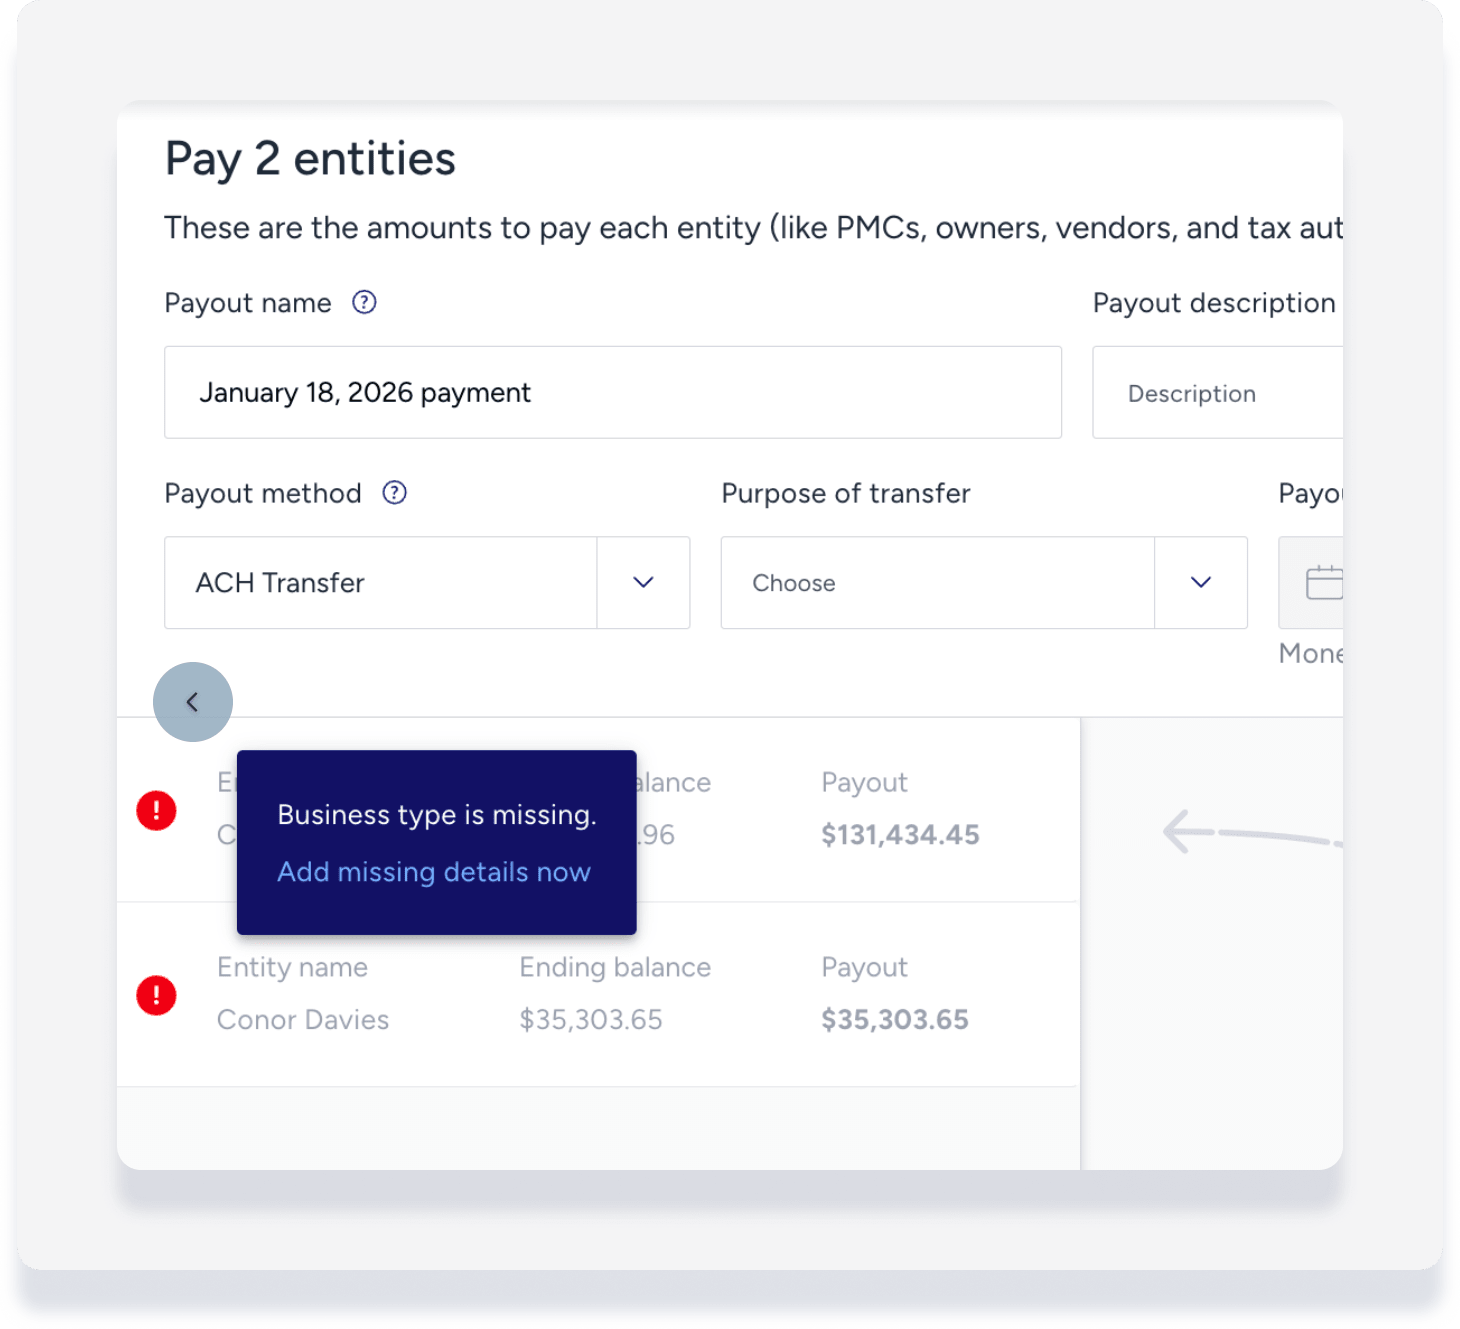
- In the pop-up, complete these fields:
- Under "Payout method" select ACH transfer.
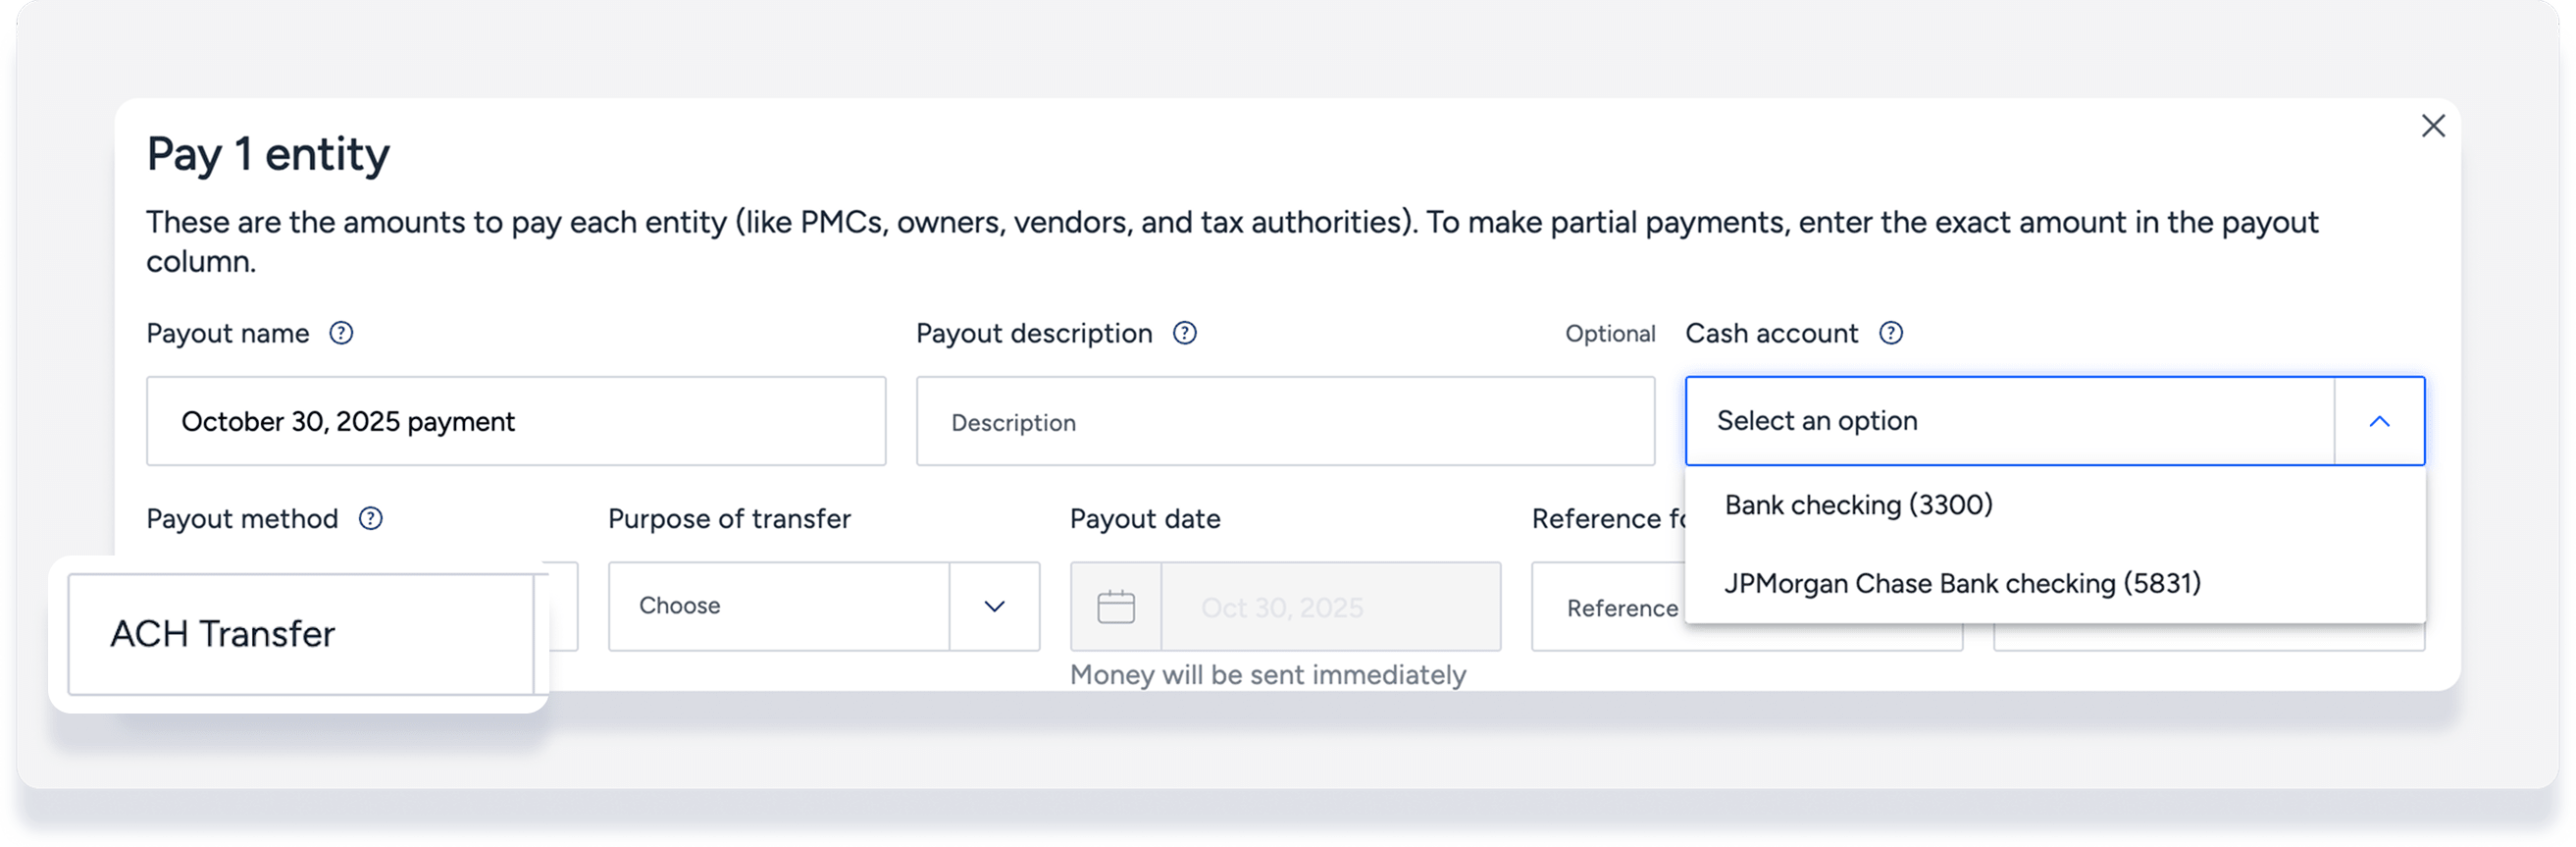
- Under "Cash account", select the verified bank account. Only verified bank accounts appear for the ACH transfer payout method.
-
Fill in the remaining details.
Tip:
Use the "reference ID" field to identify payouts made within the same batch.
- Under "Payout method" select ACH transfer.
- At the bottom-left, click Payout.
- In the pop-up, review the details and click Confirm and pay.
If an error occurs, click the warning icon for details. Update the bank information in the relevant owner profile or vendor profile and try again.
Tip:
If a bank rejects the ACH transfer, the account may need to whitelist the ACH Originator ID. Provide the following details to your bank if you experience repeated failures: Company name "AIRWALLEX", Company ID "1371913769".
View your payout status
Step by step:
- Sign in to your Guesty account.
- In the side navigation menu, click Accounting to open the dropdown menu.
- Under General ledger, select Disbursements.
- Filter for "Payout method" ACH transfer.
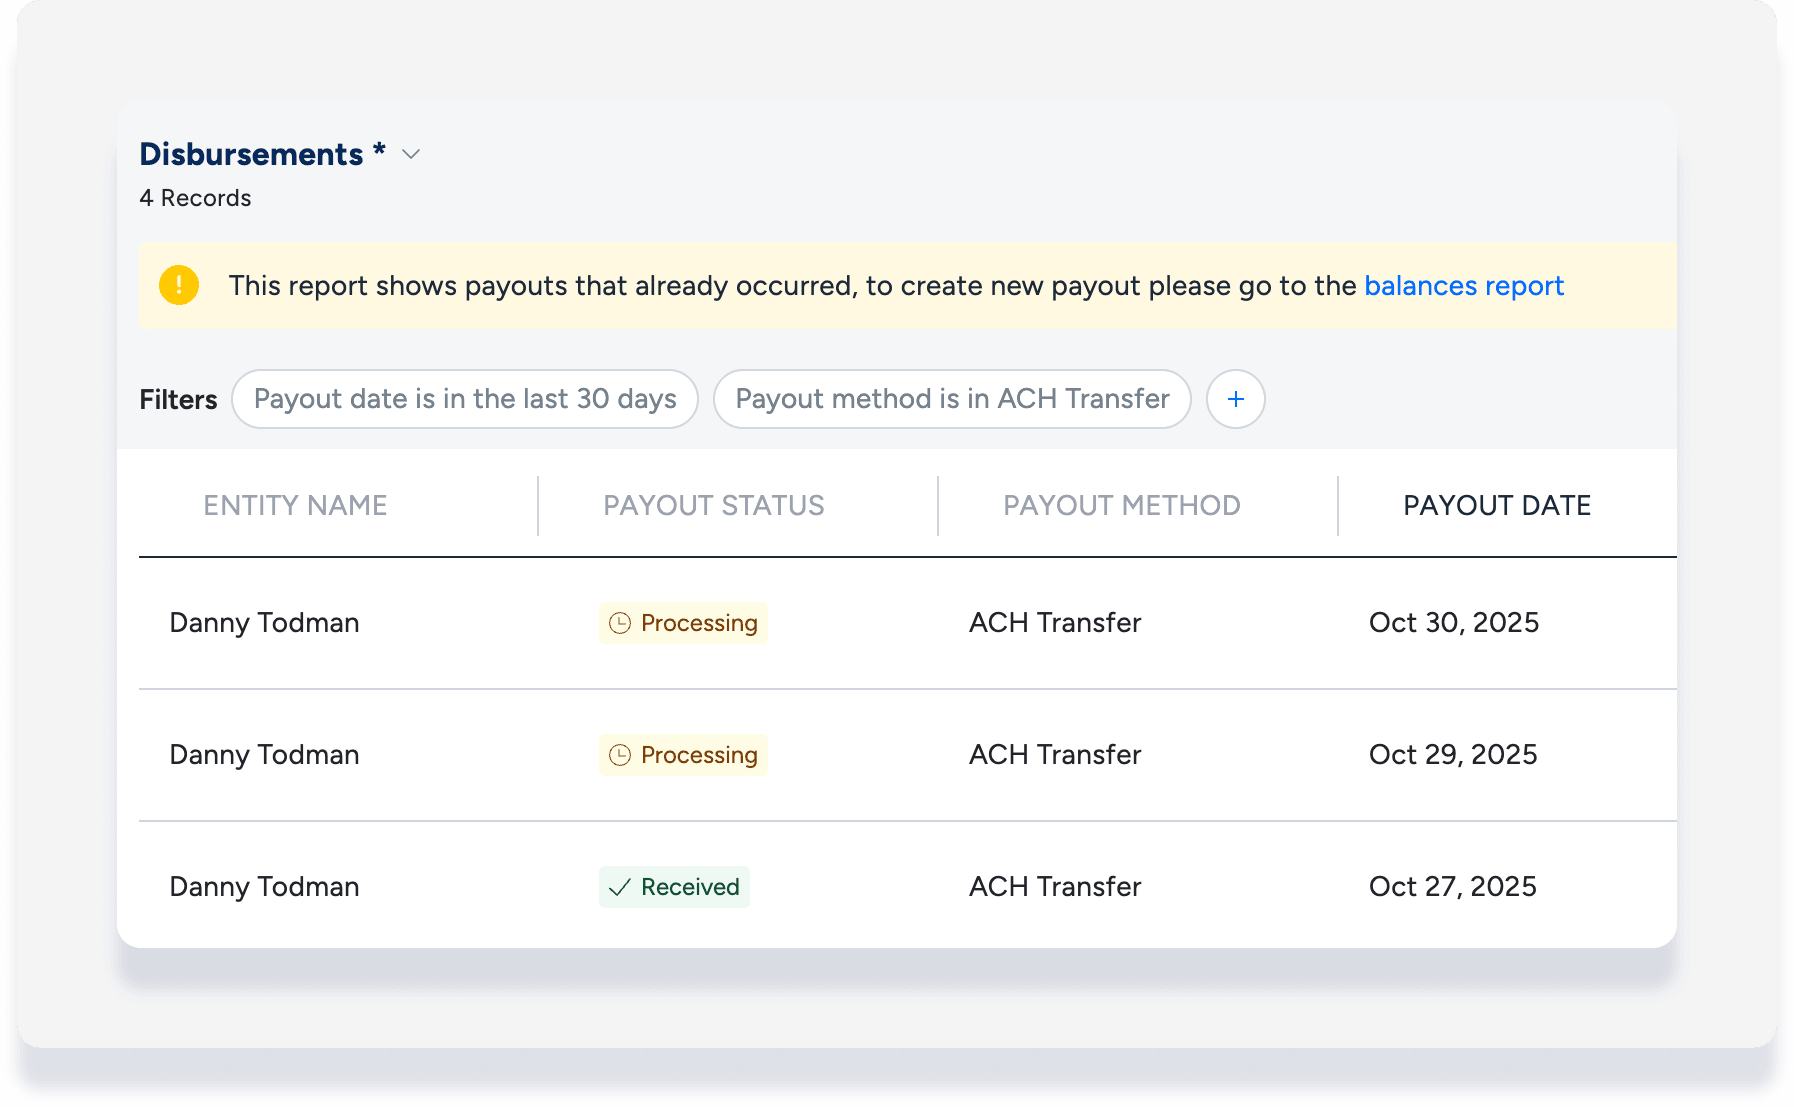
Payout statuses
- Processing: Payout has been initiated or scheduled
- Received: Funds confirmed by recipient's bank
- Insufficient funds
- Failed
If "failed," view the error reason in the tooltip or the email notification. Common errors include:
- Beneficiary name mismatch
- Insufficient balance
- Invalid recipient account details
- Recipient bank blocks the transaction (often due to ACH Originator ID not being whitelisted)
Handle a failed transaction
If a payout fails, it doesn't stop the entire batch. Only the specific failed transaction is affected. The bank eventually returns these funds. Follow these steps to reconcile your records:
Record the failed transaction
Because you can't cancel the original payout in Guesty, you must create a journal entry. This moves the money back into your cash account and the respective owner account so your records match your bank statement.
Attempt the payout again
After recording the journal entry to reset the balance, repeat the Make a direct ACH transfer steps above.