Welcome to GuestyPay! We've compiled some best practices below to enhance and streamline your GuestyPay experience.
If you need help with onboarding your new GuestyPay account, don’t hesitate to reach out!
The onboarding process is designed to be self-service, but we are here to help at any point.
Log into your GuestyPay dashboard as soon as it’s approved!
After you apply to GuestyPay, the application review process typically takes between 1-3 business days. Once your application is approved and your GuestyPay account is automatically opened, you will receive an automatic email with your account login credentials for the GuestyPay dashboard. To guarantee you have full visibility into your payouts, test your access to the GuestyPay dashboard before assigning listings to your new GuestyPay provider.
If you are migrating from another payment provider
Most payment processors tokenize their payment methods, which is the process of replacing any sensitive payment information with a random set of characters called a token. This token allows for future auto payments to be processed without storing the payment information.
As a result, no payment information can be transferred from your old payment processing account to your new payment processing account. Any reservations confirmed when your listings were assigned to your old payment processing account must continue to process any remaining auto payments through that same processing account token.
To guarantee a smooth transition, keep your old processing account listed in your Guesty payment processing page even if there are no listings assigned. This will ensure that any previously-tokenized reservations with an auto payment schedule will continue to process through your old payment processing account. Newly confirmed reservations will process automatically through GuestyPay.
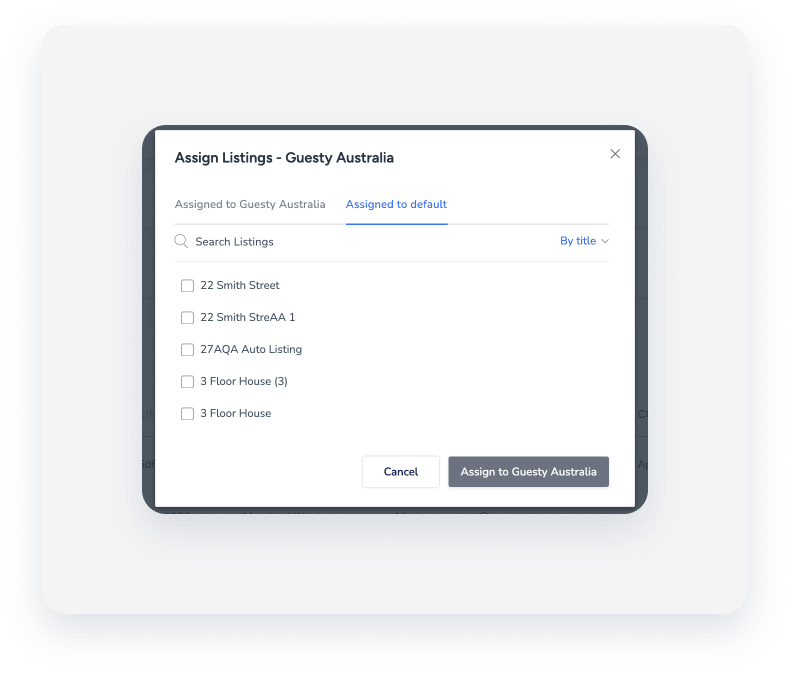
In this case, as you want to move some of your listings from the existing (default) account to your new GuestyPay account, you will need to select the desired listings, assign them to “default” rather than selecting “Insert name of default account here”. Once this is done, go back to the listing edit option in the GuestyPay processing account, select the desired listings from the default tab and click “assign to GuestyPay <account_name>".

Reconcile on a regular basis using the payout reconciliation tab
We recommend reviewing your GuestyPay dashboard at least once a week at minimum. Stay on top of your transactions status, monitor your payouts using the different reports, and check if you have any chargeback requests. In case there are chargebacks from your guests, you have 15 days to respond, so handling them in a timely manner is crucial.
For any chargeback above 1%, contact our risk management team for helpful tips and tricks for risk reduction
Our risk management team is dedicated to assisting our users with any chargebacks or risk issues. We are available to schedule a call with you to assist in risk reduction tools, chargeback questions, dispute insights, and more!
Notify Guesty before making changes to your legal entity or bank account
To make sure your payouts continue flowing, contact us before making changes to your bank account or your company legal entity.