Accounting by Guesty is a premium feature available. Please contact us to discuss activating it.
A transaction is a business event with a monetary impact on your company's financial statements. We created a few transaction types that you are likely to use in your business. They are predefined with whom to debit/credit (owner, vendor, or PMC) and which account they should appear in.
Below is a definition and example for each type of transaction, to help you choose the right one to add. There are also several sets of instructions since a transaction can be added in multiple places in the dashboard for your convenience. Follow the instructions below based on your current needs.
Learn how to:
Important:
A transaction can't be edited after it was added. If you need to change a transaction, reverse it then add it again with the correct details.
Check the time zone in your Guesty account settings. An error will occur when attempting to add a transaction if the time zone isn't set.
Transaction types
Owner charge
Choose this when money is debited from the owner and paid to the PMC/vendor.
Example: The owner was charged $300 to fix the air conditioning, and this sum was paid to the vendor.
Toggle on to Charge owner VAT or GST.
Note:
The "PMC share" field should be at least 1% to be included in the PMC earnings report.
Folio transfer
Choose this when a relocation between two listings from different owners is needed and each owner should receive a payout.
Example: There was a flood at owner A's property, and the guest needs to be moved to owner B's property, and the income from the reservation needs to be transferred as well.
Payment from owner
Choose this when the owner makes a payment to you, the PMC.
Example: The owner was overpaid, and now the owner is refunding the amount.
Expense
Choose this when money is taken from the PMC (or PMC and owner) and paid to the vendor.
Example: The PMC and the owner were charged $300 to fix the air conditioning (50% each), and this sum was paid to the vendor.
Tip:
Alternatively, you can now add an directly in a calendar-based task.
Debit/credit
Choose this when you refund or charge any amount to the owner that cannot be reported through any of the above types of transactions.
Example: If you pay the owner more than needed, you can debit them for the extra amount.
Working capital
Transfer funds between the owner and working capital.
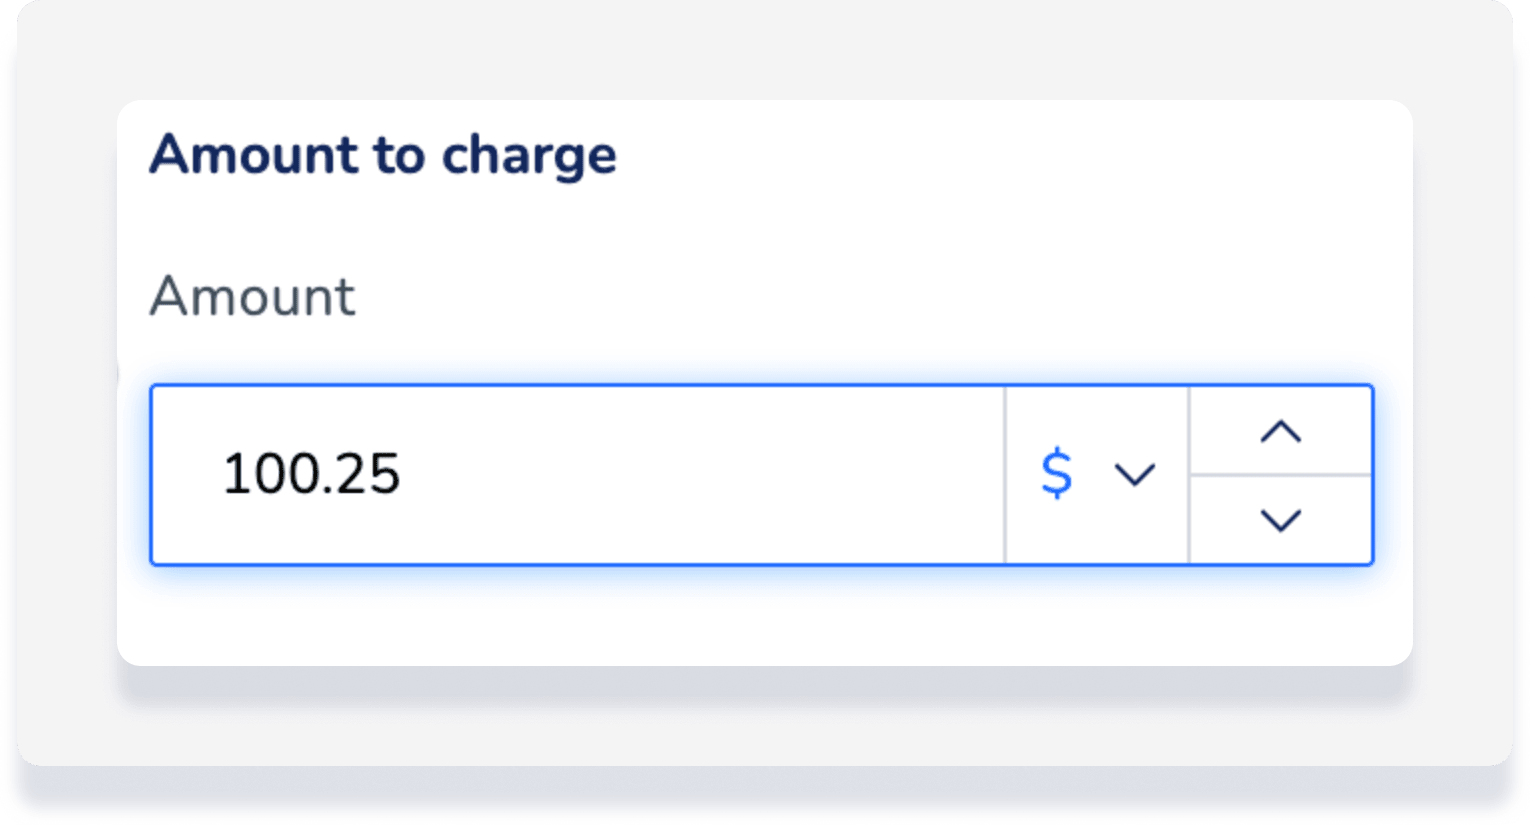
Transaction amount format
To create a transaction for an amount that is less than a whole number, you must use "." for a decimal point as shown below:
Add transaction
Before you begin
If a listing is not assigned to a business model, it will not appear as an option.
After the accounting period ends, only users with Admin and accountant roles can take this action.
Add to a reservation
Step by step:
- Sign in to your Guesty account.
- In the side navigation menu, click
 Reservations.
 - Select the relevant reservation.
- In the left submenu, click Accounting.
- To the right, click Add transaction.
- Of the transactions listed above, select the one that fits your current needs and fill in the required information.
- In the right side panel, fill in the required information and note that when selecting a listing, you will only be able to see listings that are assigned to a business model.
- Click Add.
Note:
Expenses are only included in your Analytics calculation. Turn on the Charge owner toggle to indicate that the expense was paid out of your trust account and include the transaction in your accounting records.
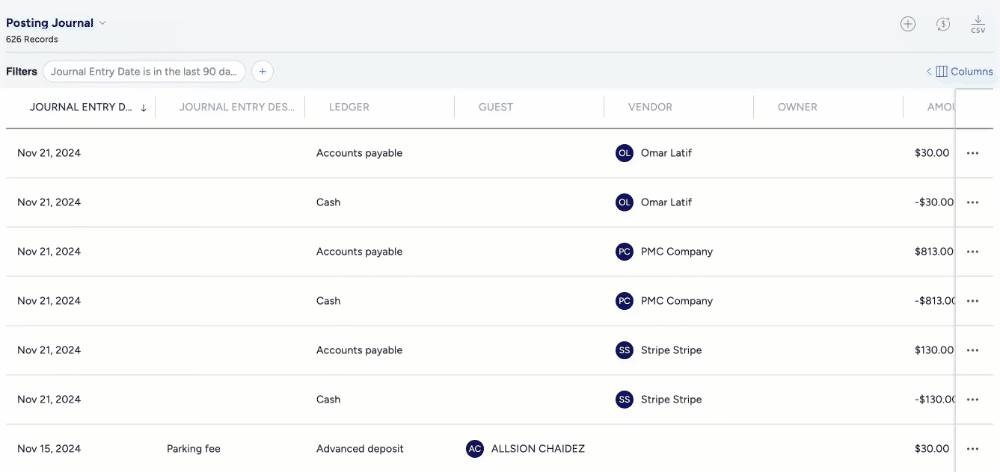
Add through the posting journal
Step by step:
- Sign in to your Guesty account.
- In the side navigation menu, click
 Accounting to open the dropdown menu.
 - Under General ledger, select Posting journal.
- In the top-right corner, click the plus icon (it will say Add transaction when you hover over it).
- Of the transactions listed above, select the one that fits your current needs and fill in the required information.
- In the right side panel, fill in the required information and note that when selecting a listing, you will only be able to see listings that are assigned to a business model.
- Click Add.
Note:
If you would like to bulk upload 20 transactions or more, please contact us.