Once you add an owner, start using Guesty's Accounting feature, and/or set up your Owners Portal website, you'll need to assign at least one listing to the owner.
This can be done from the "Properties" page. Alternatively, you can assign multiple listings to an owner via the Owner's profile or through the Guesty Mobile App.
Important:
- At least one property needs to be assigned to an owner. If an owner only has one property assigned, and you want to unassign it, you will need to assign a different property to the owner before proceeding. Alternatively, you can delete the owner.
- Make sure that your listing is assigned a single owner before assigning it to a business model. A listing that is assigned to a business model must be associated with exactly one owner.
- Fractional ownership: You can assign more than one owner to a listing via the "Properties" page only.
Assign and unassign multiple listings to an owner
You can assign listings to an owner in bulk by using filters via the "Properties" tab in the owner's profile. You can filter by tag, city, country, owner, and property level.
For example, to find listings in Spain, you can use the "Country" filter and type "Spain". This will display all your listings in Spain. You can then select multiple listings or choose individual ones to assign to the owner.
Follow the instructions below to assign multiple listings to an owner.
Step by step:
- Sign in to your Guesty account.
- In the side navigation menu, click
 Operations to open the dropdown menu.
 - Under Portfolio, select Owners.
- Select the relevant owner.
- In the Owner profile, scroll down to the Properties section.
-
To assign your initial properties, click + Assign properties.
To assign additional properties, click Edit.
- In the side panel, click the "Unassigned" tab.
- Click + Filters and select any filters you want to apply.
Once you have selected your filter type, click the dropdown arrow next to each filter to refine your search.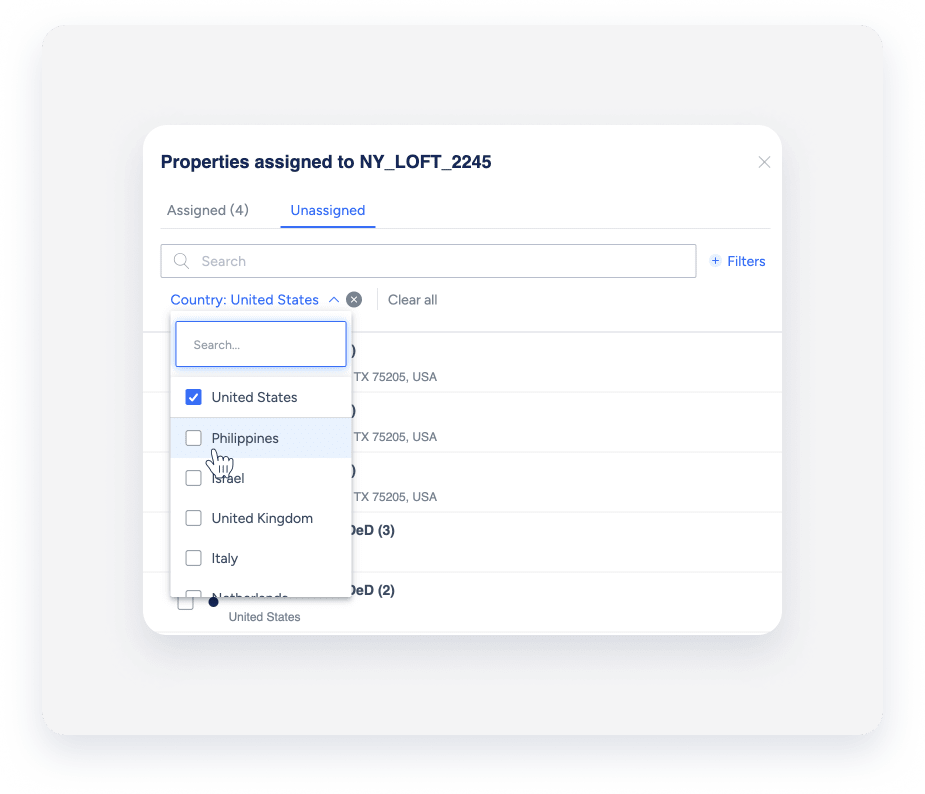
- Check all the listings you want to assign to the owner. If the selected listing is a multi-unit, the parent unit and its sub-units must be selected.
- Click Done.
- Click Save to apply changes.
The listings are now assigned to the owner.
You can also unassign and reassign listings to owners under the "Properties" tab in the owner's profile. Click Edit to open the sidebar displaying a list of "Assigned" and "Unassigned" listings.
- Under "Assigned", click the X next to the listings you want to unassign.
-
Under "Unassigned", check the box next to the listings you want to reassign.
In both cases, be sure to click Done and then Save to apply changes.
Assigning an owner to a listing
You can assign an owner to a listing directly from a property page. Make sure to create an owner before attempting to assign them to a listing.
Follow the instructions below to assign an owner to a listing.
Step by step:
- Sign in to your Guesty account.
- In the side navigation menu, click
 Properties.
 - Click the relevant listing.
If the listing is a multi-unit, access the multi-unit listing's main settings or click a sub-unit. - Under "Details & layout", click Owner & license.
- Click Edit next to the "Property owner" field.
- Click in the text box below the "Owner(s) name".
- Select an owner from the dropdown menu or begin typing their name.
Alternatively, if you want to remove an owner from a listing, simply click the X next to the owner's name. This action will automatically unassign the owner from the listing. - Click Save.
- If the property is a multi-unit, select the relevant option to apply:
-
Yes, apply this change to
property nameand its x subunits -
No, apply this change to
'property name'unit type only
-
Yes, apply this change to
- Click Apply changes.
Learn more about deleting an owner.