After your 14-day free trial, activate PriceOptimizer for your listings. PriceOptimizer automatically updates your nightly rates in the listing's calendar daily.
Before you start, make sure your listing is eligible by reviewing the geo-location and other requirements.
If you manually adjust pricing or minimum nights in the multi-calendar, it will sync with PriceOptimizer.
Important:
If you are already using another smart pricing tool, it should be deactivated before using PriceOptimizer to avoid pricing conflicts in your calendar.
Activate PriceOptimizer on a listing
Review pricing
Step by step:
- Sign in to your Guesty account.
- In the side navigation menu, click
 Marketing and sales to open the dropdown menu.
 - Under Revenue management, select PriceOptimizer.
- Find the listing(s) you want to use PriceOptimizer on. You can search for a specific listing by name or nickname, or use the filters to find the listings that match your specific criteria. Click anywhere in the listing to open its pricing information.
- See the Pricing forecast data by clicking the tickbox for the following views at the bottom of the graph:
- Recommended pricing: Blue line representing PriceOptimizer pricing recommendations.
- Market pricing: Orange line showing the pricing of similar listings in the market
-
Current pricing: Light blue line showing your current listing rates.
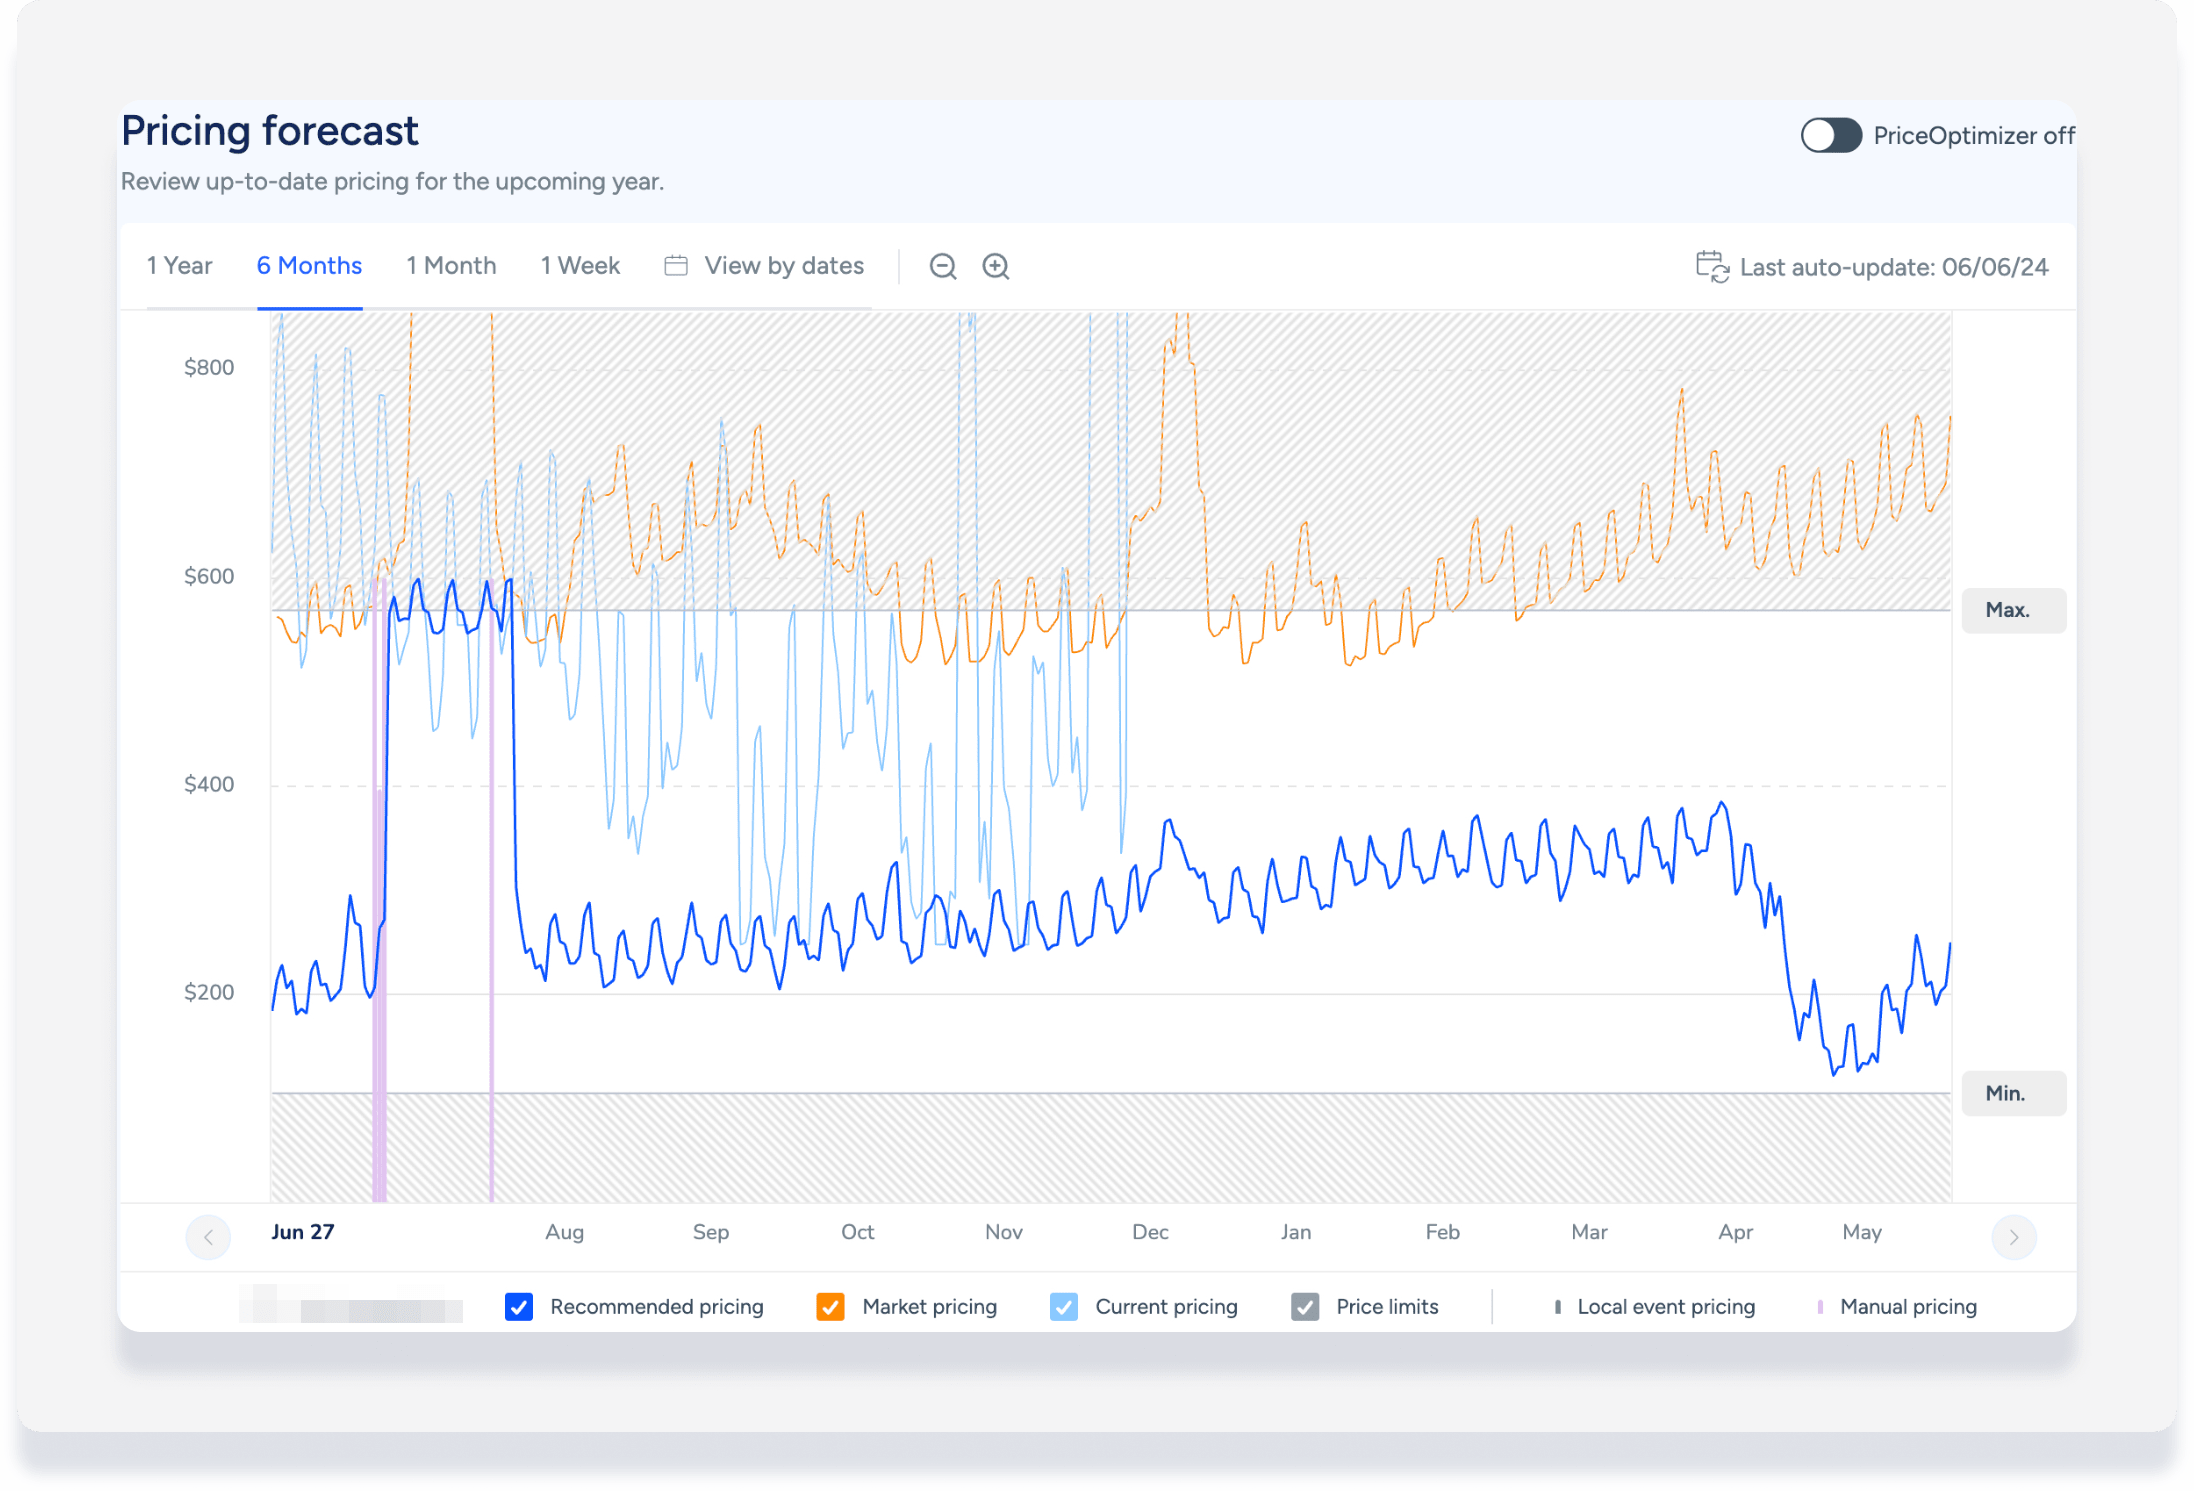
- Review the Pricing forecast suggestions:
- Ensure the rates look accurate based on your market.
- Make sure your peak and off-seasons are depicted accurately.
- Set the minimum and maximum price limits.
- In the left menu, click Pricing strategy to open the sub-menu.
- Click on each of the following tabs. At the bottom of the "Pricing forecast" graph in each section, click the tickbox for "Current pricing" and review to compare:
- Base price recommendation
- Price limits by season
- Day-of-week strategy settings
- Seasonal strategy settings
-
Holiday strategy settings
- After making changes, click Save at the top-right.
The pricing forecast graph will start displaying your data. Learn about how to interpret the pricing forecast graph and all pricing customization options.
You can keep a listing inactive to experiment with the settings and see how they affect pricing recommendations, but the pricing is not in effect until you take the next steps to enable PriceOptimizer on the listing.
Activate PriceOptimizer
- At any point after reviewing and editing your settings, toggle PriceOptimizer off to activate.
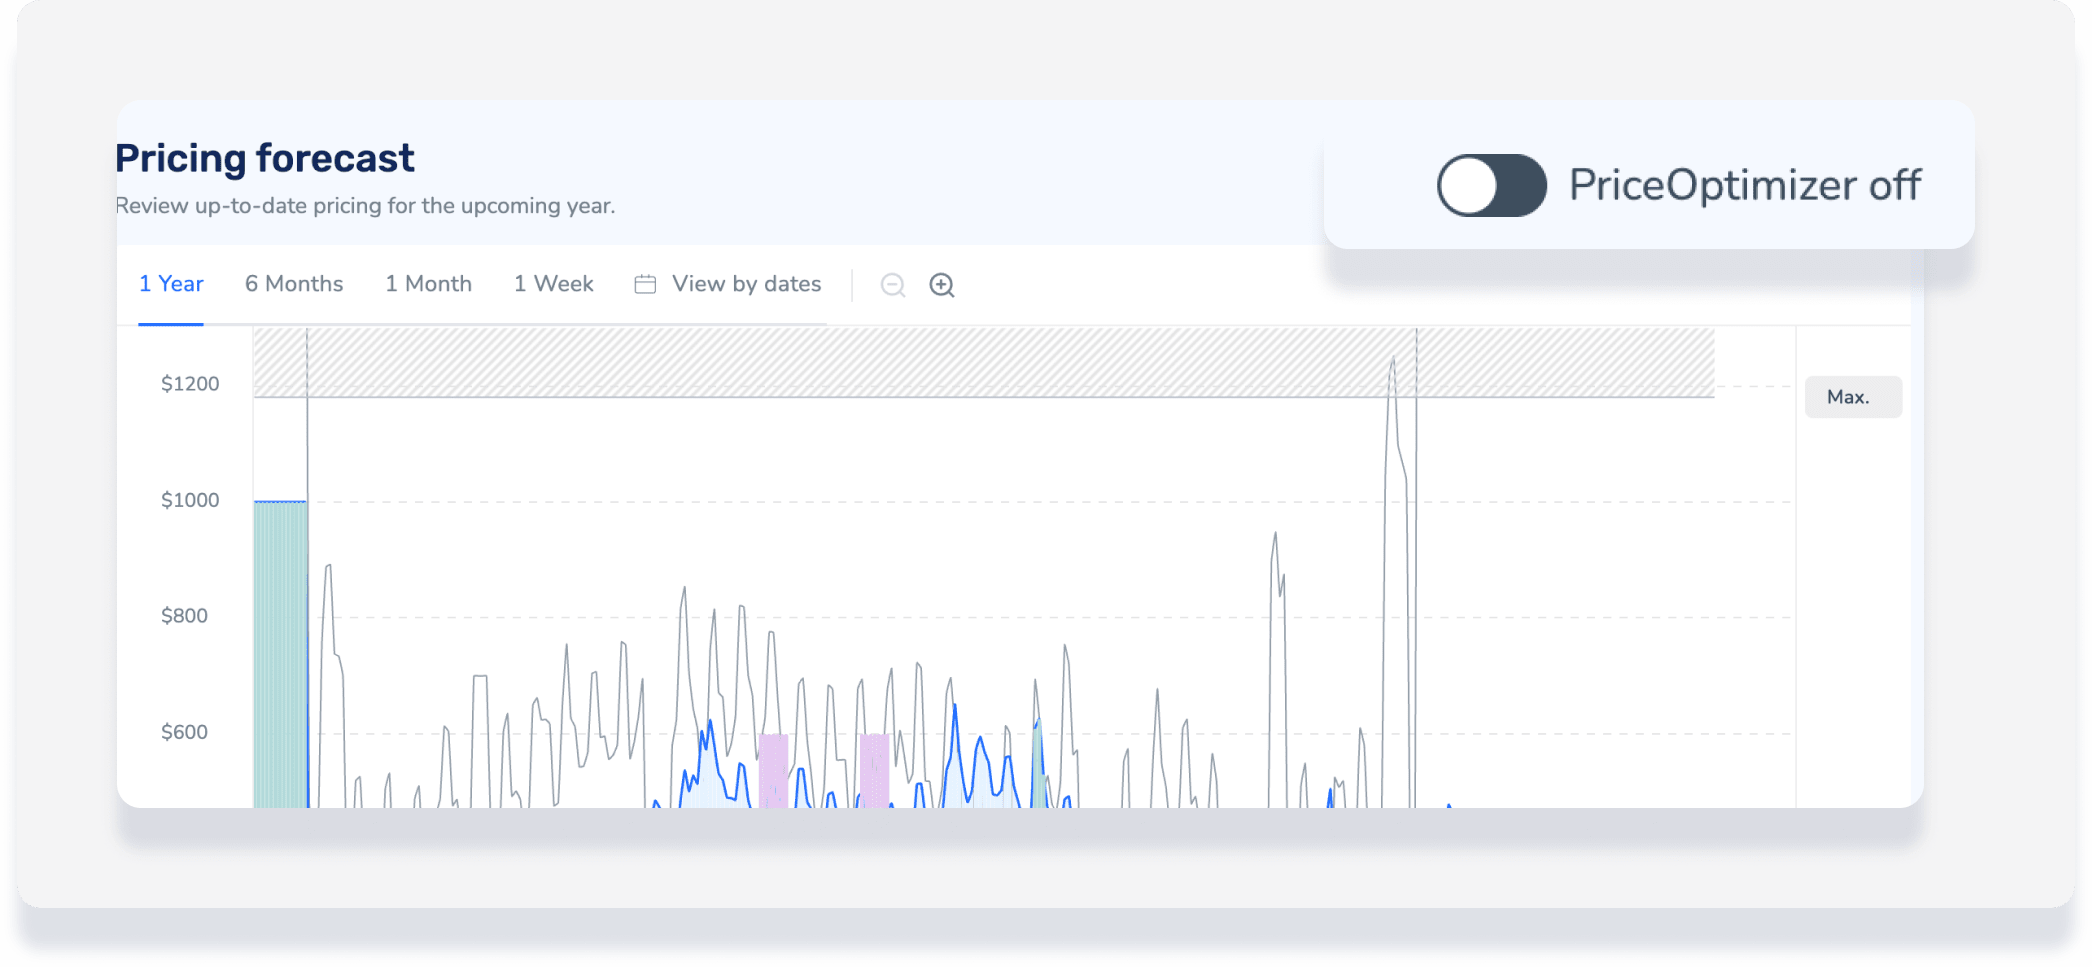
- In the pop-up, click the blue Activate button to confirm. PriceOptimizer will override rate strategy rules.