If a guest is checking in early or checking out late, be sure to check the "Block the night before" or "Block the night ahead" checkboxes to avoid overlapping reservations. This will eliminate the risk of a new guest checking in before a previous guest has checked out, or before you've had the chance to complete the post-check-out tasks. The relevant checkbox will be grayed out if the night before or the night ahead is already occupied
You can create blocks for early check-in or late check-out times in several different ways:
- Multi calendar (manually)
- Listing's Calendar (manually)
- Reservation page (manually)
- Listing page (automatically for all future reservations)
Tip:
Learn how to change a listing's default check-in and check-out time.
Multi Calendar
You can manually block the night before check-in or the night after check-out for an existing reservation, directly via the Multi-Calendar.
Step by step:
- Sign in to your Guesty account.
- In the top navigation bar, click the Multi Calendar icon.
- Click the relevant reservation.
- In the right sidebar, click the pencil icon to edit the reservation.
- Click the Dates drop-down menu, and scroll down to “Check in - Check out”.
- Mark the Block the night before and/or Block the night ahead checkbox.
- Click Save.
Step by step:
- Sign in to your Guesty account.
- In the top navigation bar, click the Multi Calendar icon
- Click the relevant reservation.
- In the right sidebar, click the pencil icon to edit the reservation.
- Click the Dates drop-down menu, and scroll down to “Check in - Check out”.
- Mark the Block the night before and/or Block the night ahead checkbox.
- Click Save.
Listing's Calendar
Step by step:
- Sign in to your Guesty account.
- In the top navigation bar, click the mode selector, then select Operations mode.
- Click Properties.
- Click the relevant listing.
- If the listing is a multi-unit, access the listing's main settings or click a sub-unit.
- In the listing's menu, click Calendar.
- Click the relevant reservation.
- Follow steps 4-7 above ("Multi-Calendar")
Step by step:
- Sign in to your Guesty account.
- In the top navigation bar, click the Multi-Calendar icon
.
- Click the relevant listing to open its Property page.
- Click Calendar, then select Calendar.
- Click the relevant reservation.
- Follow steps 4-7 above ("Multi-Calendar")
Reservation page
You can manually block the night before check-in or the night after check-out for an existing reservation, directly via the reservation’s page.
- Sign in to your Guesty account.
- In the top navigation bar, click the mode selector, then select Operations mode.
- Click Reservations.
- Search for the relevant reservation and click it.
- Under the “Summary” field, click the pencil icon
to edit the reservation’s check-in and check-out time blocks.
- Under the “ETA” field, mark Block the night before and/or Block the night ahead checkboxes.
- Click Save.
- A gray block will appear on the reservation's calendar to display the early check-in and/or late check-out blocks.
Step by step:
- Sign in to your Guesty account.
- Click the Multi-Calendar icon
- Click the relevant reservation on the calendar.
- In the right sidebar, click the full-screen icon
, located to the right of the reservation number.
- Under the “Summary” field, click the pencil icon
to edit the reservation’s check-in and check-out time blocks.
- Under the “ETA” field, mark Block the night before and/or Block the night ahead checkboxes
- Click Save.
- A gray block will appear on the reservation's calendar to display the early check-in and/or late check-out blocks.
Property page
You can set up automatic time blocks for all future reservations via the property’s page.
Note:
Blocks are triggered by new reservations that are created, and will affect all future reservations. Time blocks won’t apply to existing reservations or reservations that haven’t checked in yet.
- Sign in to your Guesty account.
- In the top navigation bar, click the mode selector, then select Operations mode.
- Click Properties.
- Select the relevant listing.
For a multi-unit, access the listing's main settings. The change will be applied to the sub-units.
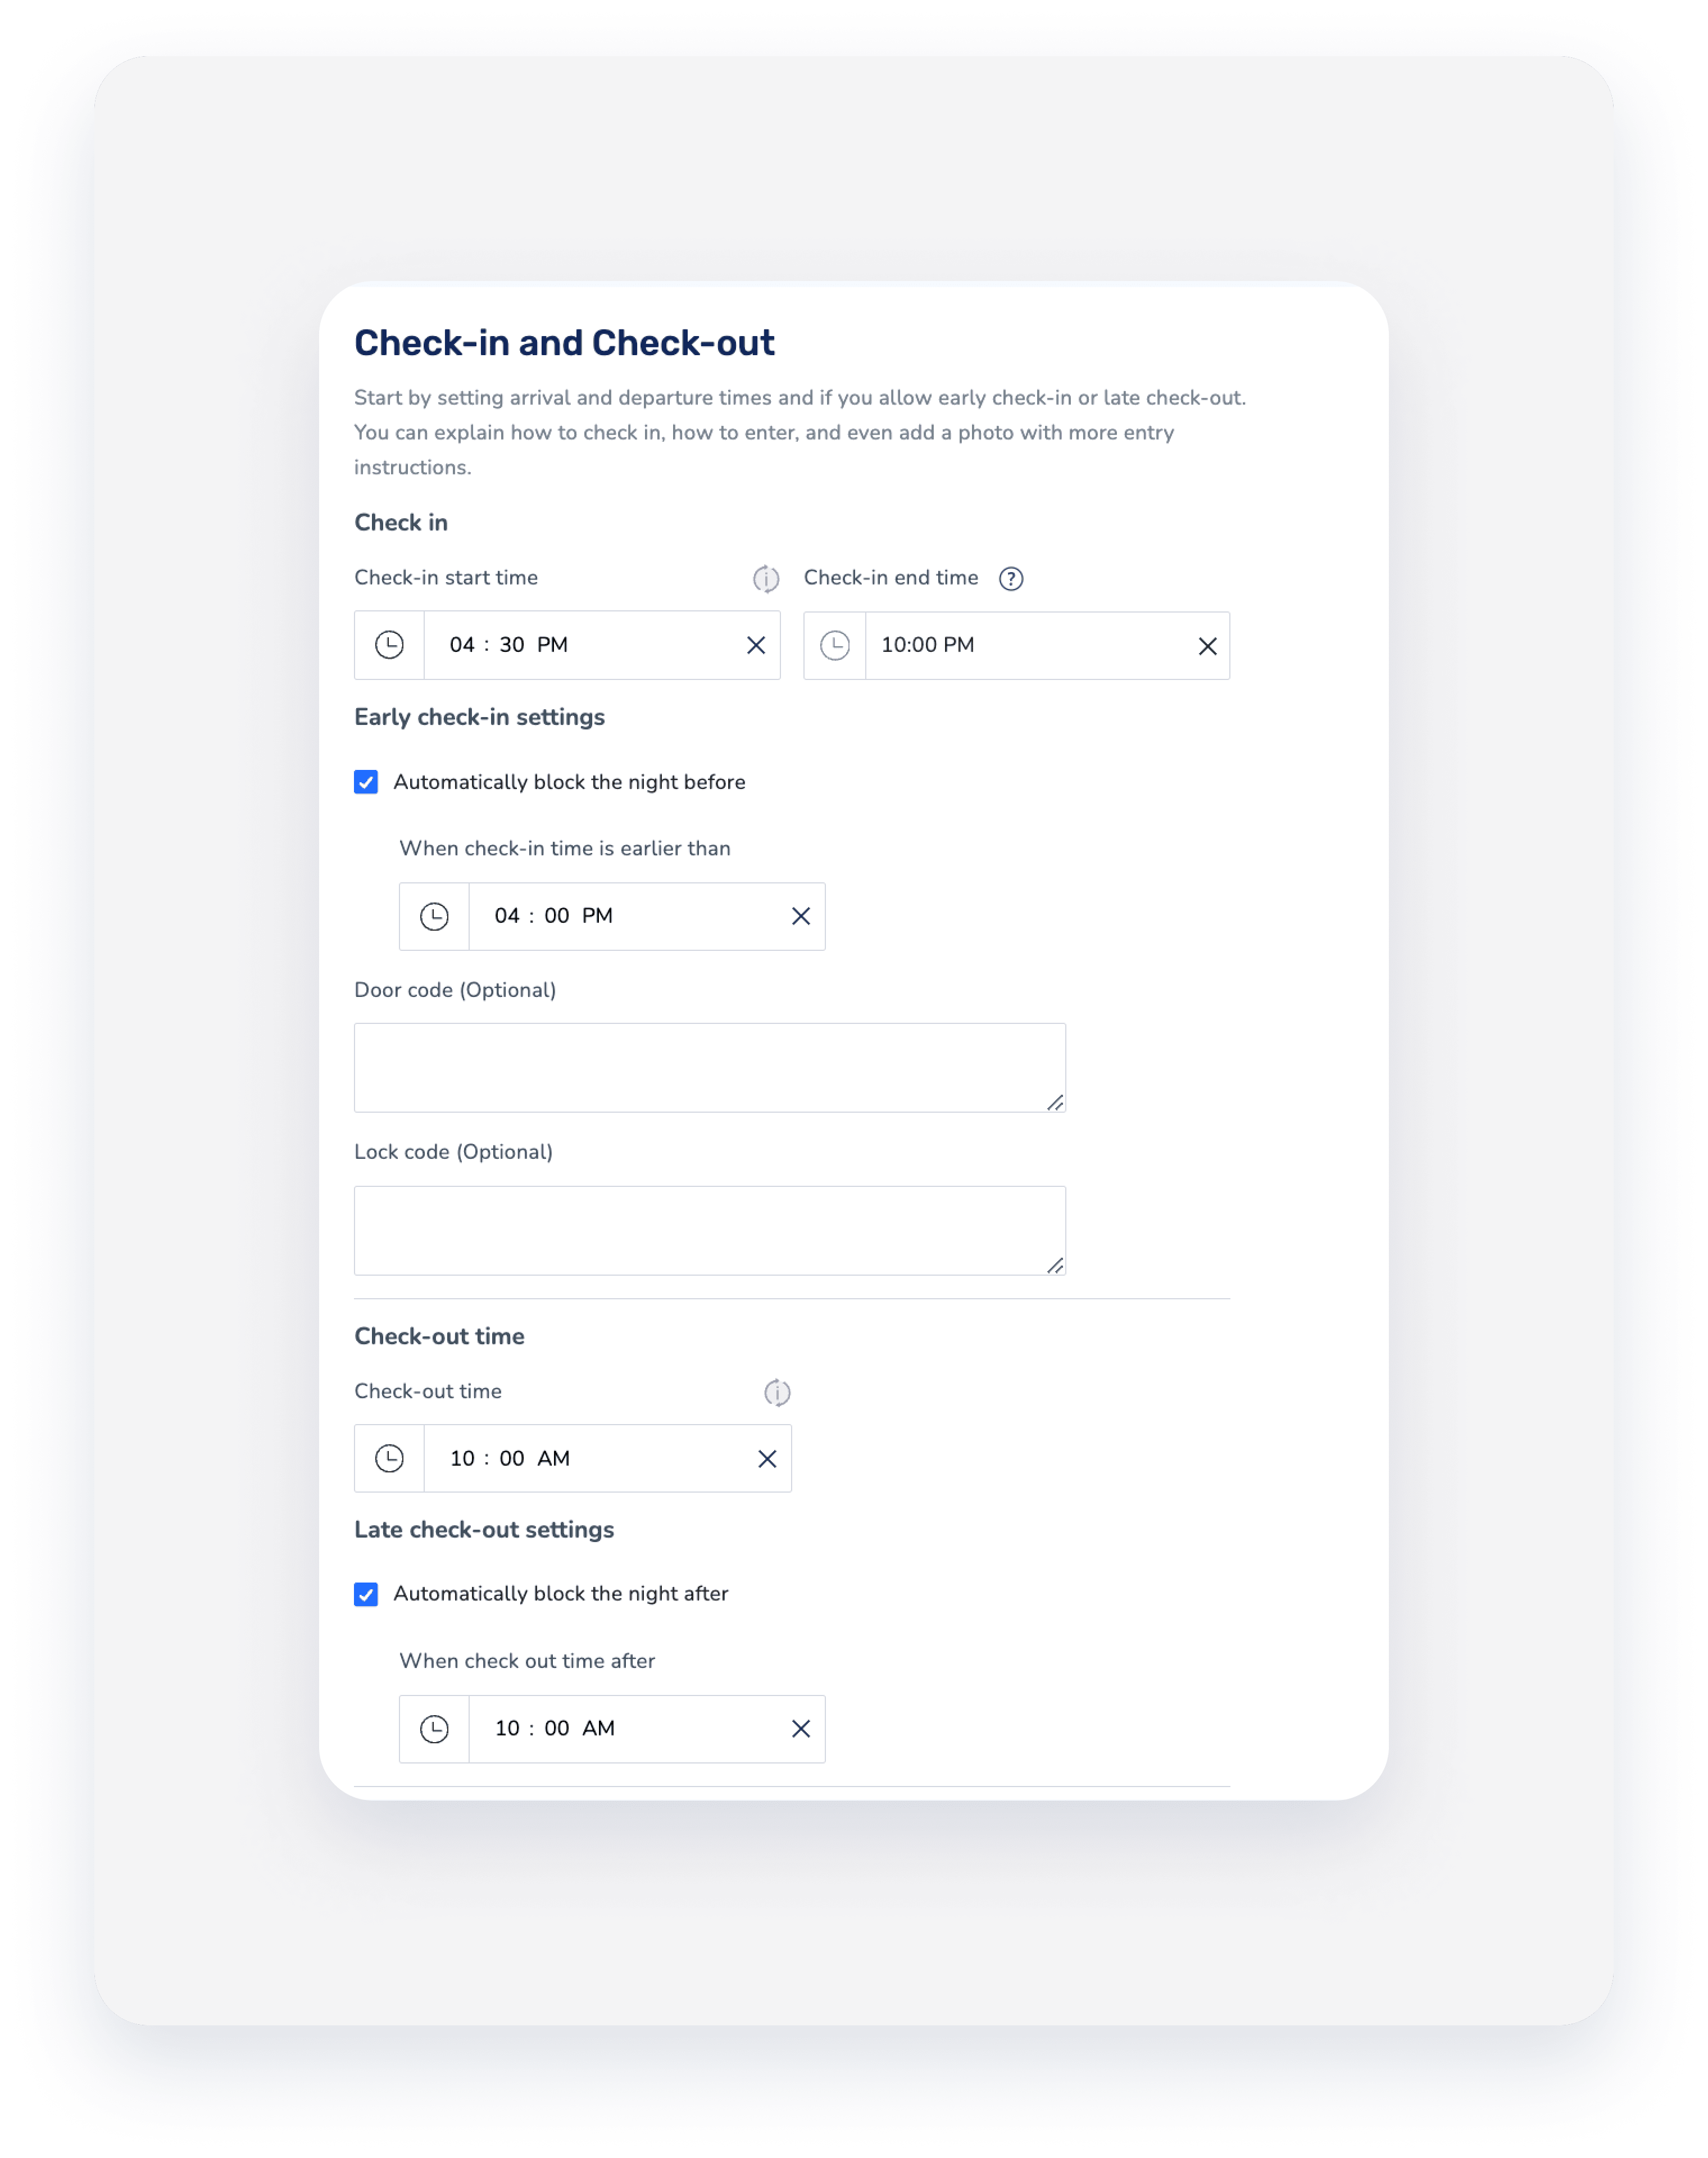
 - In the listing's menu, click Pricing & Policies, and select Reservation policies from the drop-down.
- In the "Check-in and check-out policy" section, click Edit.
- Enter the relevant information, and mark Yes, I allow early check-in and/or Yes, I allow late check-out checkboxes.
- Click Save.
Step by step:
- Sign in to your Guesty account.
- In the top navigation bar, click the Multi Calendar icon
.
- Locate the relevant property at the left bar, and click it.
- In the listing's menu, click Pricing & Policies, and select Reservation policies from the drop-down.
- In the "Check-in and check-out policy" section, click Edit.
- Enter the relevant information, and mark Yes, I allow early check-in and/or Yes, I allow late check-out checkboxes.
- Click Save.