Automating the bank reconciliation process helps save time and reduce manual errors by automatically matching transactions from a bank statement with entries in the Guesty ledger. Upload a bank statement file (CSV or PDF), allow the system to find high-confidence matches, review suggested matches, and handle any exceptions.
This article explains how to start a new reconciliation, understand the automated matching process, and clear transactions.
Before you begin
Learn about ongoing account maintenance, the importance of separate bank accounts, and more in Managing bank reconciliations.
When using bank reconciliation in Guesty for the first time, start by setting up your pre-reconciliation to clear past transactions.
Start automatic reconciliation
Follow the steps below to upload a bank statement and configure your automation settings.
Step by step:
- Sign in to your Guesty account.
- In the side navigation menu, click
 Accounting to open the dropdown menu.
 - Under Cash management, select Bank reconciliation.
- At the top right, click New reconciliation.
-
In the "Start bank reconciliation" side panel, fill in the required details:
"Reconciliation end date": Select an end date for the reconciliation period. This must be on or after the start date.
"Bank ending balance": Enter the ending balance from the bank statement. This can be a negative value.
Upload the bank statement PDF or CSV file. We recommend using a CSV file for better results.
-
Once the file uploads, choose the automation settings:
For CSV files: Toggle on Automatically clear high-confidence matches. When enabled, the system automatically marks transactions as "cleared" if it finds a high-confidence match. This is toggled off by default.
-
For PDF files:
Apply auto-reconciliation: This is toggled on by default. If toggled off, the system won't scan the PDF for transactions and only saves the file as a reference.
Automatically clear high-confidence matches: This option is available if Apply auto-reconciliation is on. When enabled, the system automatically marks transactions as "cleared" if it finds a high-confidence match. This is toggled off by default.
Click Next.
Review and manage matches
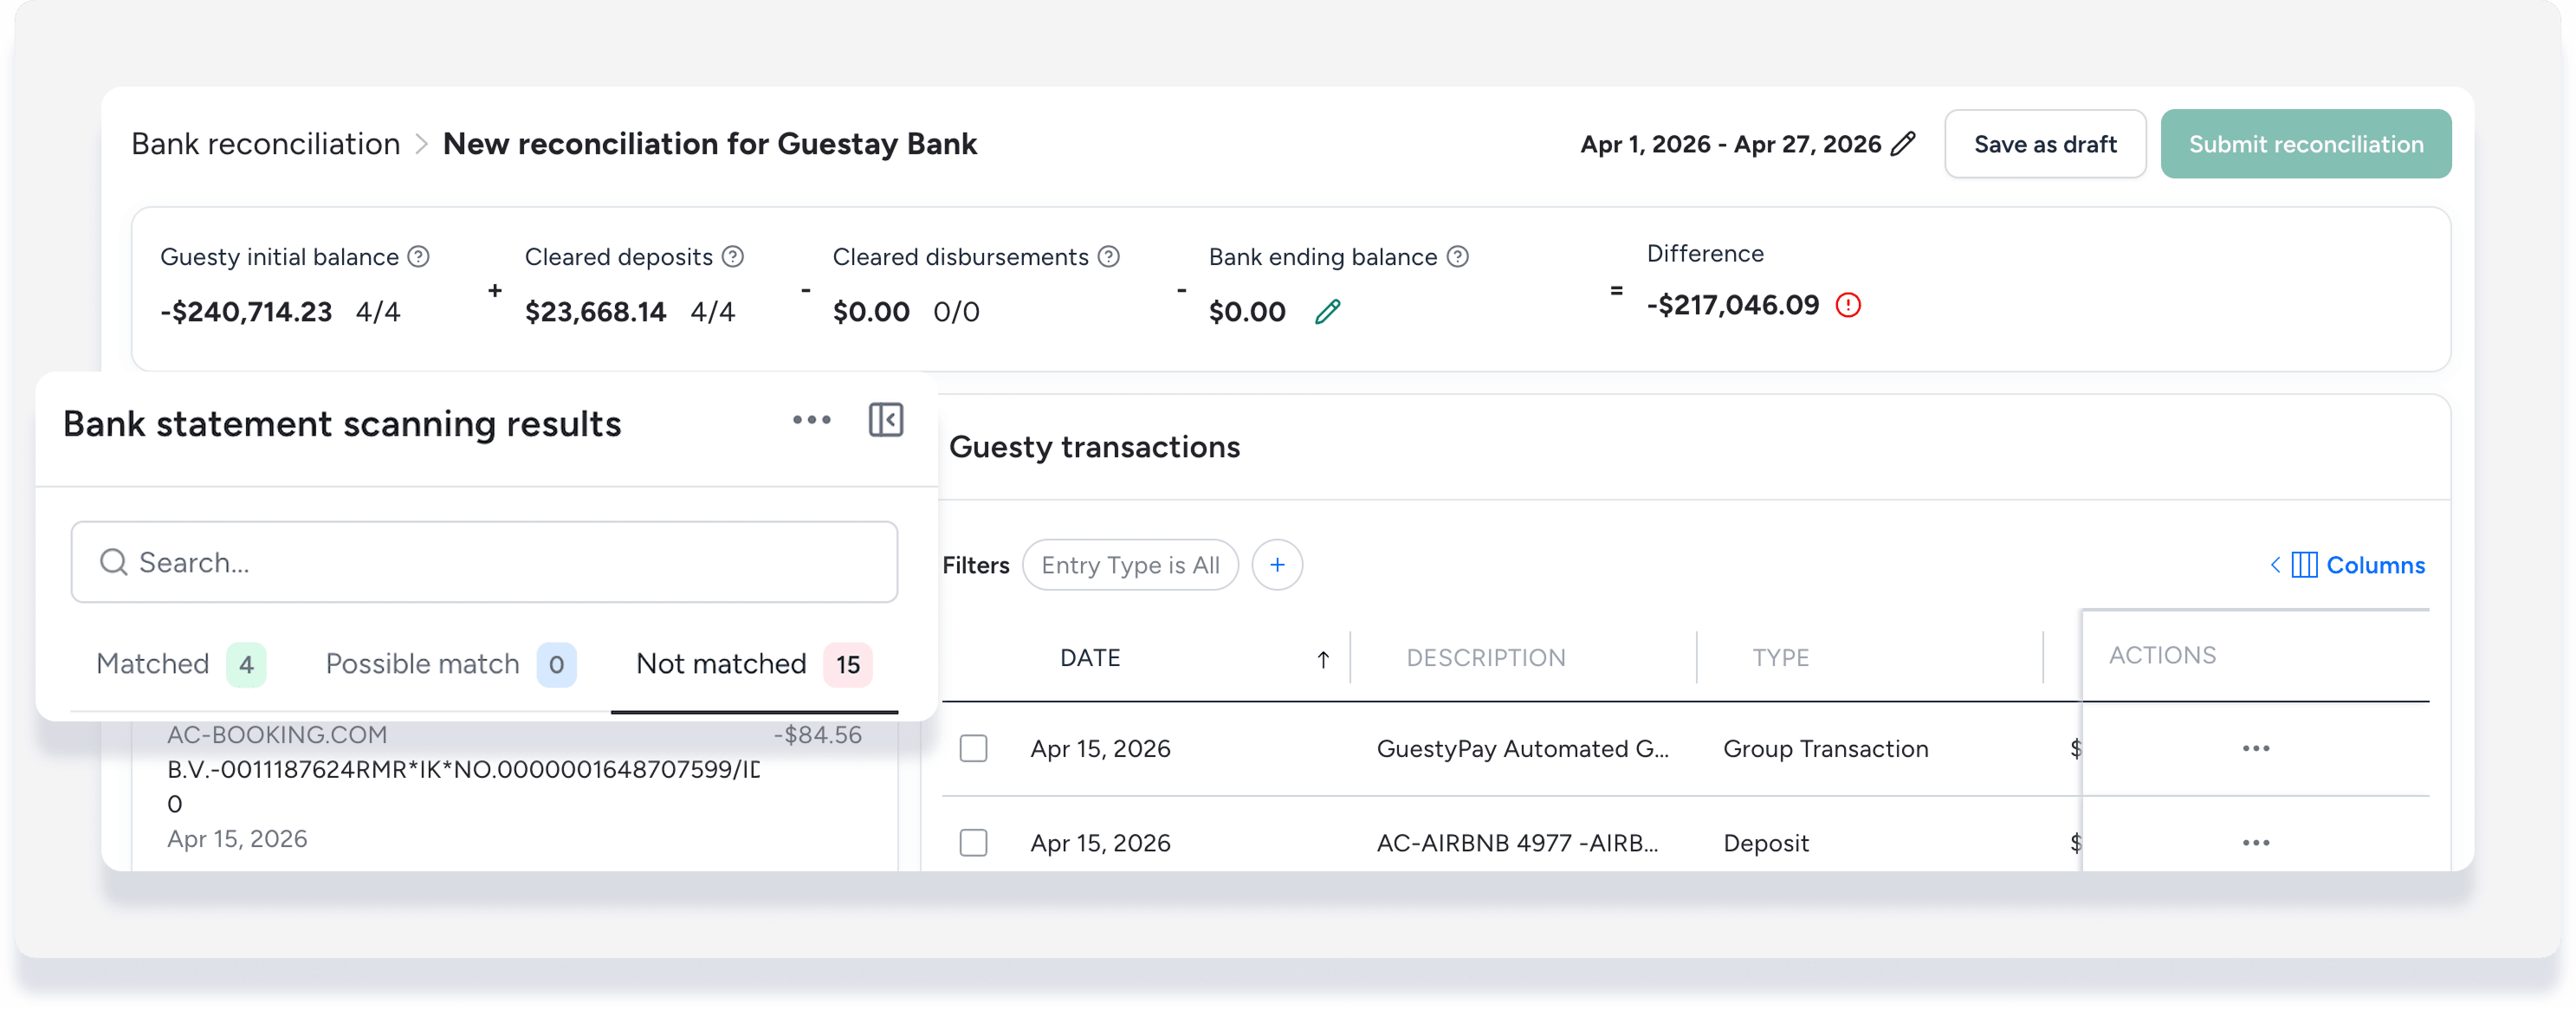
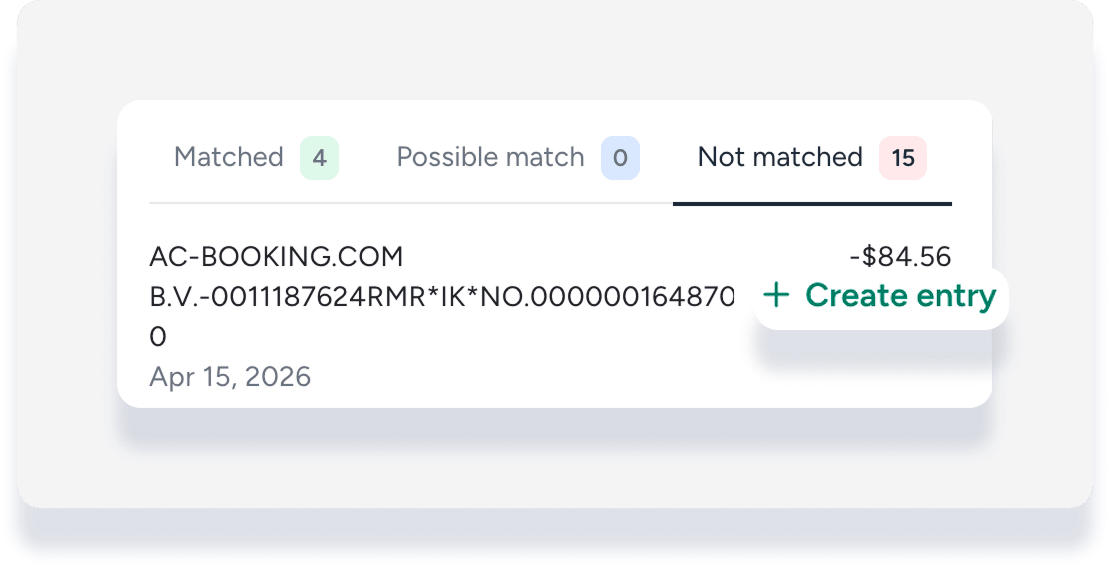
Once the file is processed, the "Bank statement scanning results" section displays the extracted bank transactions sorted into three tabs. The view defaults to the "Not matched" tab.
Understanding match levels
Matched: Transactions that the system matched with high confidence
Possible match: Transactions that the system identified as a potential match, but details aren't exact between the date, amount, or description
Not matched: Transactions that the system could not find a match for
Each tab displays a numerical badge with the total count of transactions in that category. Transactions are listed by date, description, and amount.
The sections below explain the options available to manage transactions, navigate the reconciliation page, and follow a suggested process to get started.
Manage transaction matches
Follow the steps below to manually match, update, or remove transaction matches.
Step by step:
Find a transaction with a "Not matched" status in the "Match level" column.
Under the "Bank amount" column, click Select match.
Under "Bank statement scanning results", view the list of unmatched bank transactions, which is sorted to prioritize entries with the same amount.
Select the relevant bank transaction and click Match.
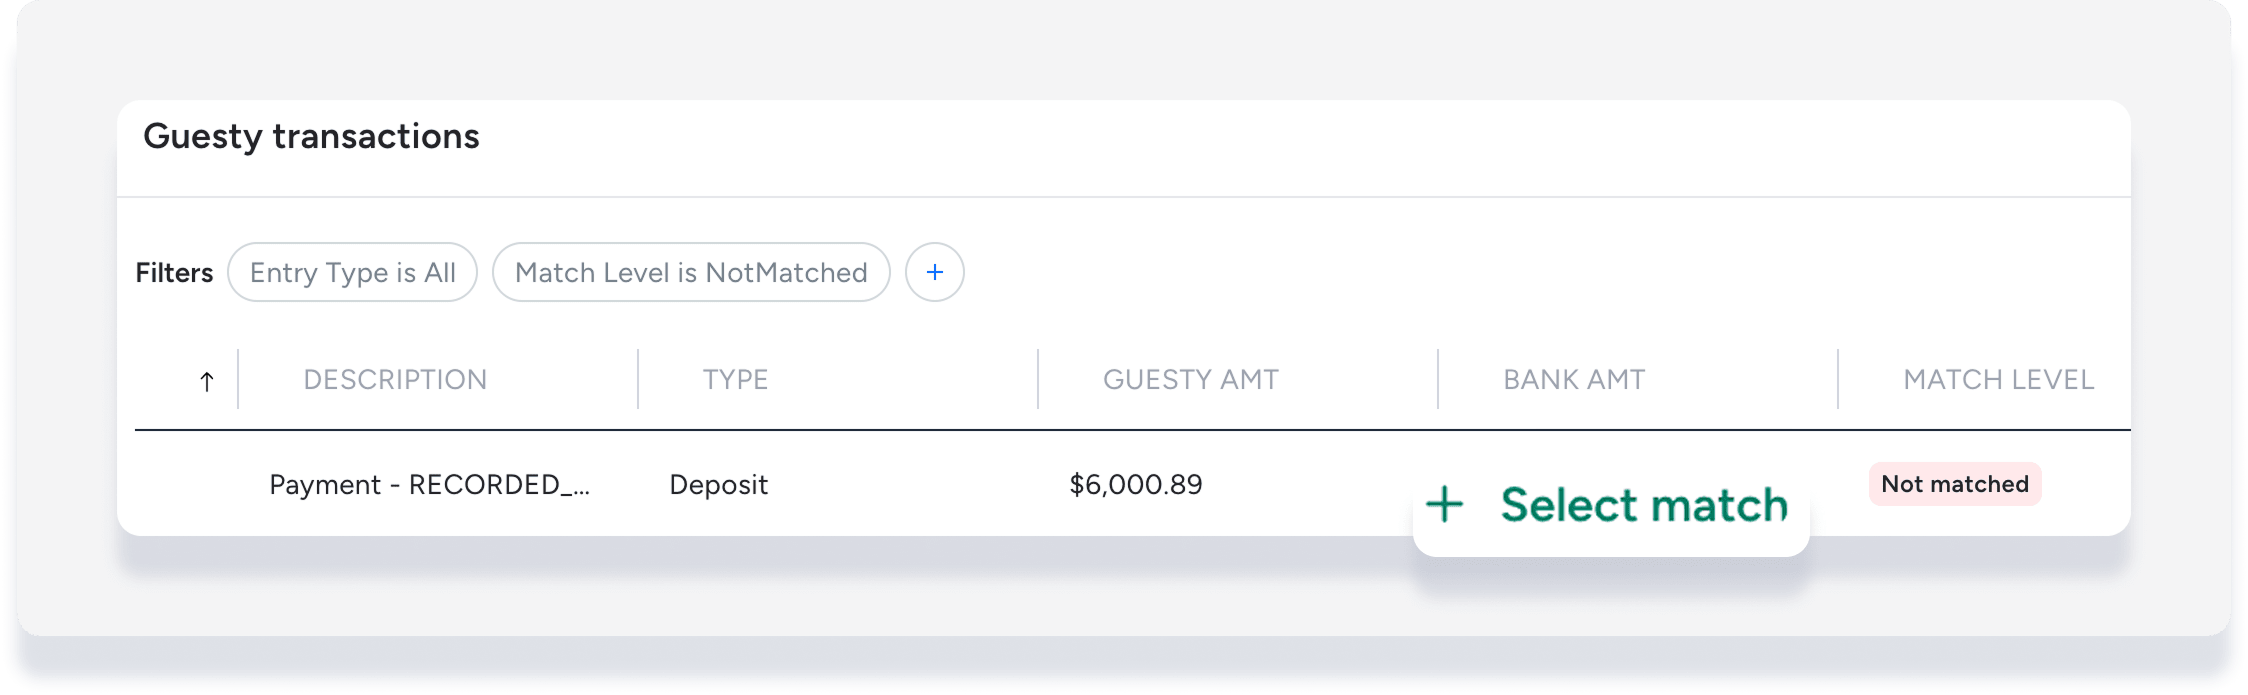
The Guesty transaction status updates to "Matched by [user]", and the "Bank amount" column populates.
Step by step:
- To the far right of the relevant "Not matched" transaction, click
 .
. - Select Move to next period.
- In the pop-up, click Move to next reconciliation.
If the deposit is still processing, the system marks it as "In transit" and moves it to the next period's bank reconciliation.
This optional step helps individually validate automated matches. This is useful for "Possible match" entries. Validation isn't necessary, and clearing transactions can continue whether or not matches are validated.
Step by step:
- In the "Match level" column, hover next to "Matched" or "Possible match".
- Click Validate.
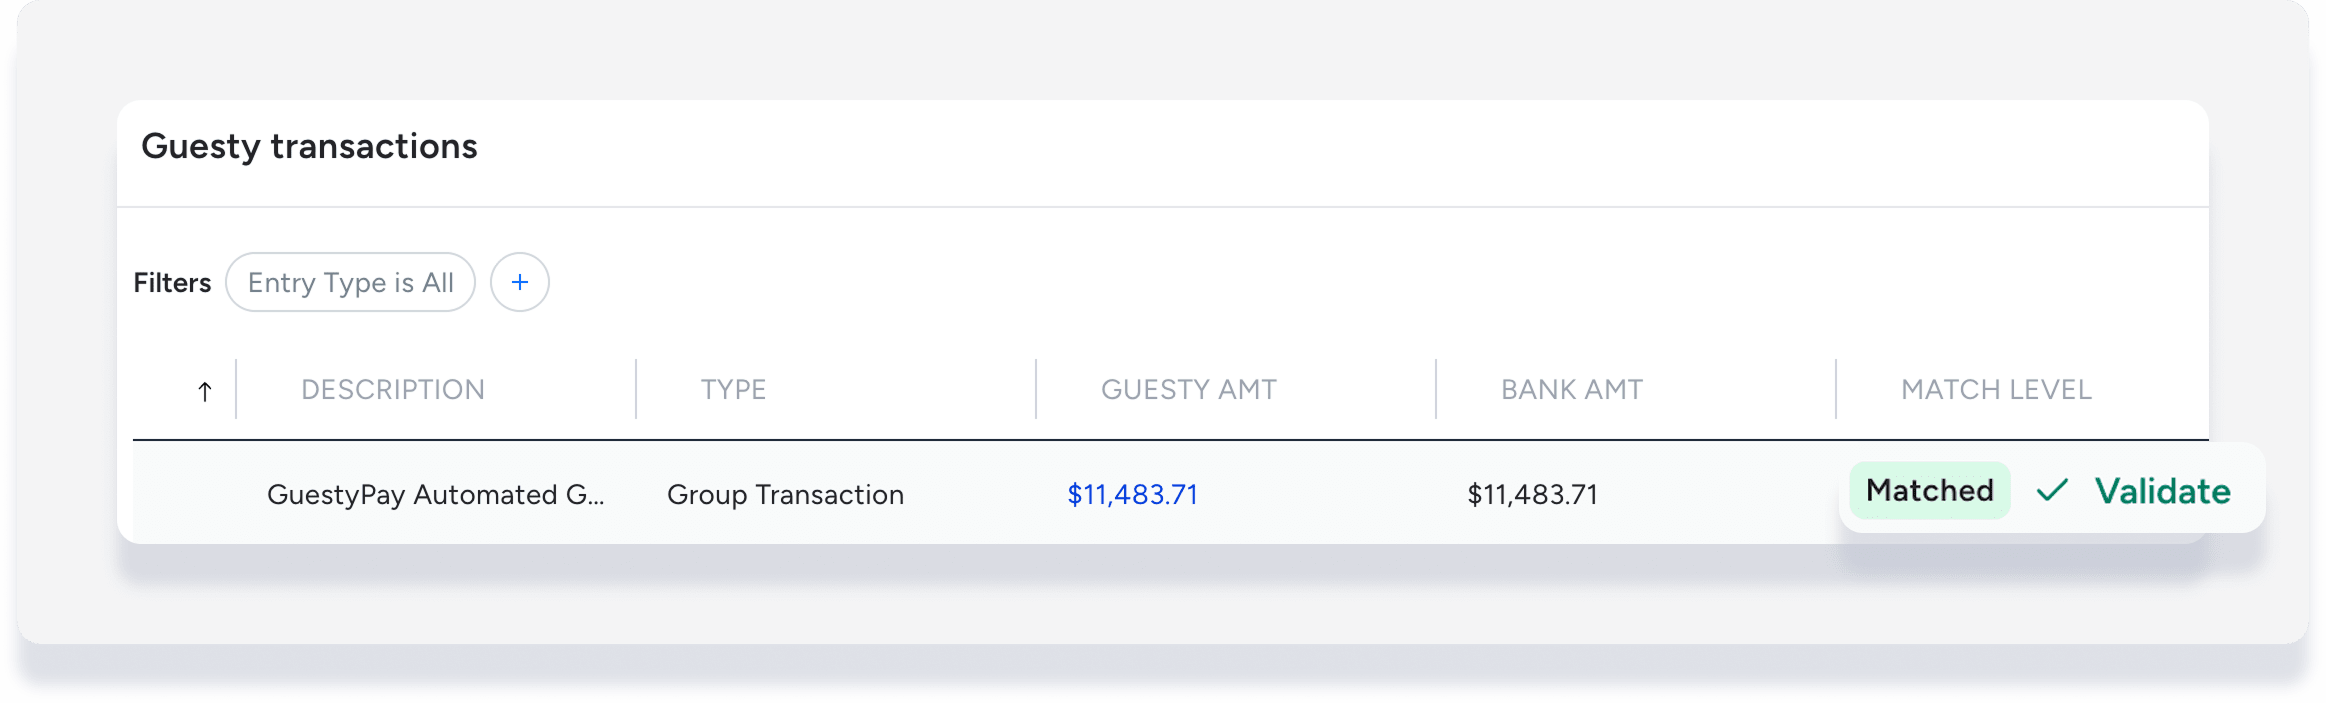
The Guesty transaction status updates to "Matched by [user]".
Step by step:
- To the far right of the relevant transaction, click .
- Select Change bank match.
Under "Bank statement scanning results", view the list of unmatched bank transactions, which is sorted to prioritize entries with the same amount.
Select the relevant bank transaction and click Match.
The system removes the old match, links the new one, and updates the status to "Matched by [user]".
Step by step:
- To the far right of the relevant transaction, click .
- Select Remove bank match.
The system removes the link between the Guesty transaction and the bank entry. The status reverts to "Not matched", the "Bank amount" clears, and the bank transaction moves back to the "Not matched" tab.
Suggested matching process
Follow the steps below to identify and handle any problem transactions before clearing transactions to reconcile.
Tip:
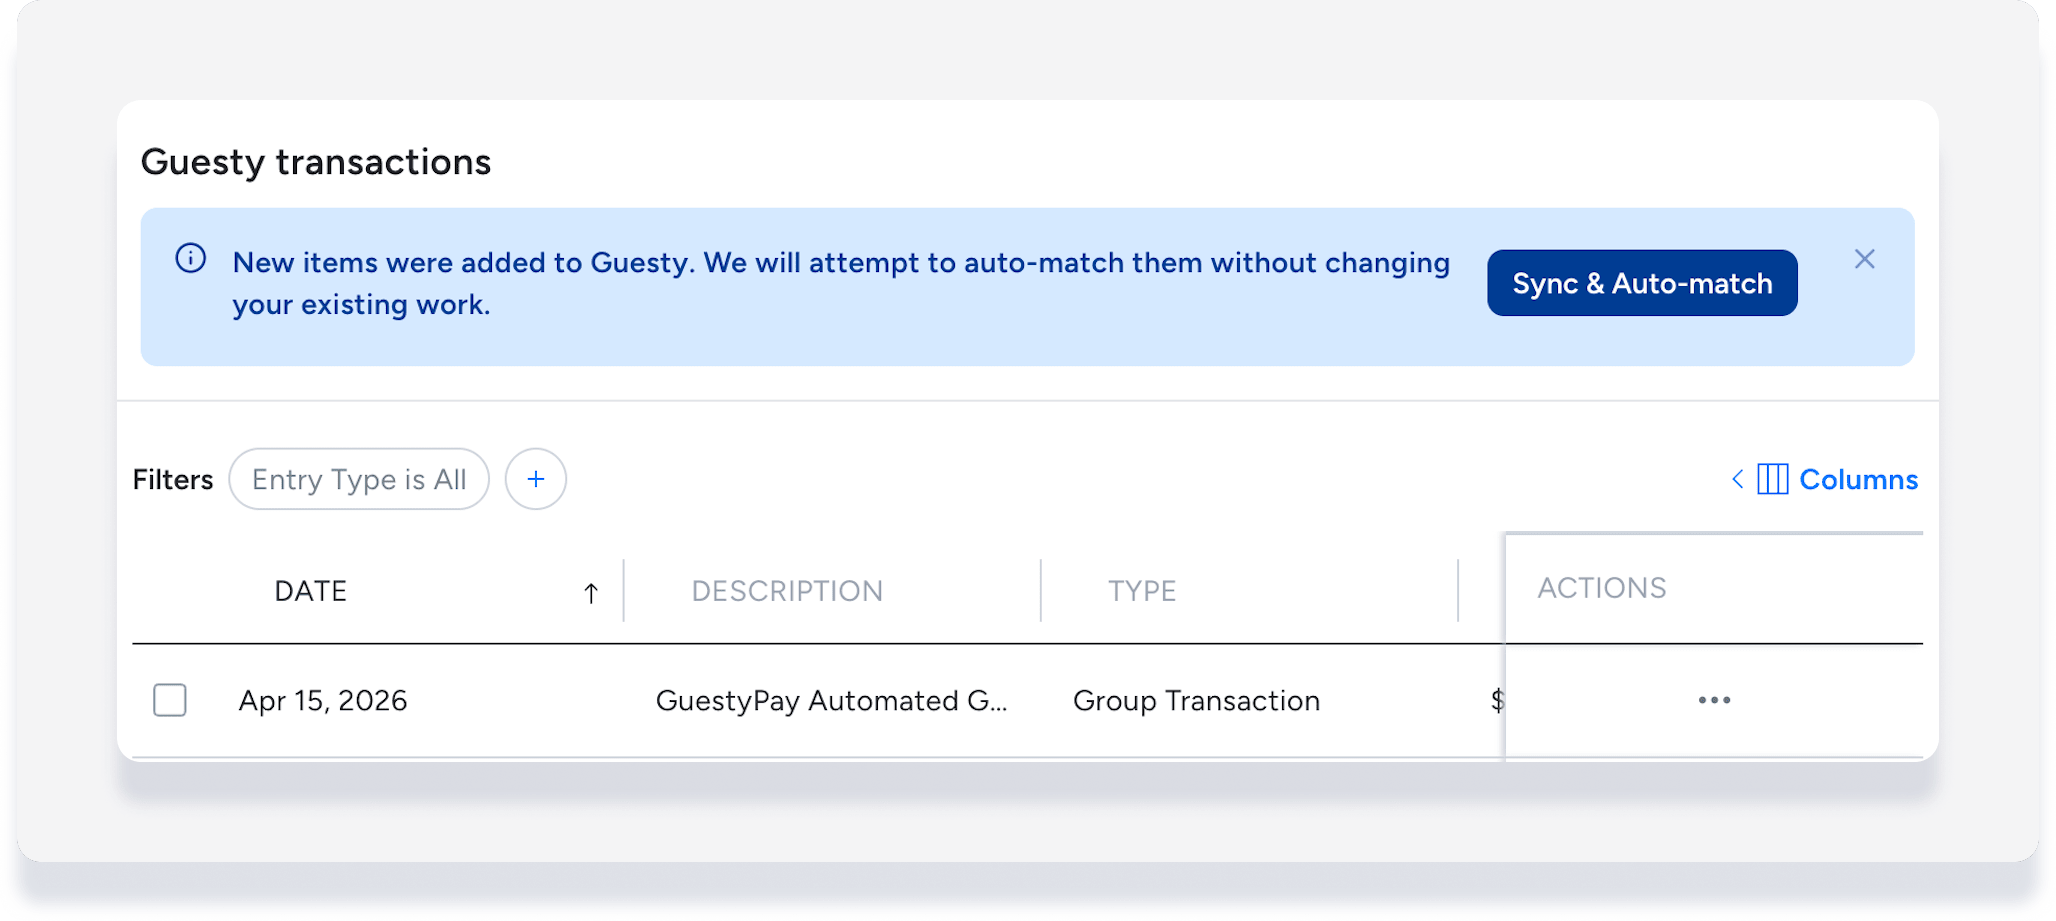
After making any changes outside the reconciliation, click Sync and Auto-match to refresh the reconciliation data.
Step by step:
Review amount discrepancies: Under "Guesty transactions", add the filter "Amount mismatch" and select Amount differs from bank.
Hover over the data in the "Bank amount" column to view the bank transaction details.
Take action on any mismatched amount results, such as creating manual journal entries or grouping transactions.
Remove the "Amount mismatch" filter.
-
Review bank transactions without a match: Under "Bank statement scanning results", click Not matched and take one of the following actions:
-
Hover over a transaction and click Create entry. In the pop-up, complete the fields to save a new journal entry. Once saved, the system auto-matches the transactions.
Manually match the bank transaction to a Guesty transaction. (See steps in above section.)
-
- Check that grouped transactions are correct or edit them if necessary.
- Validate matched and partially matched transactions if needed. (See steps in above section.)
- Click Sync and Auto-match to refresh the data and find new auto-matches if changes occurred outside the reconciliation.
Clear transactions to reconcile
Follow the steps below to select your cleared transactions and submit the final reconciliation.
Tip:
To clear "Matched" and "Possible match" transactions separately, filter the view by "Match level".
Step by step:
Check the boxes next to the matched transactions to clear them. The balances in the banner update dynamically as transactions are selected or removed.
Click Submit reconciliation when the difference between the cleared transactions and the bank ending balance is zero.
Alternatively, click Save as draft to complete the process later.
Learn how to complete a draft, bulk resubmit, and view reconciliation statements in Managing bank reconciliations.