Guesty PriceOptimizer delivers automated, AI-driven suggestions for local events that impact the pricing of your listings.
Data-driven local event suggestions are automatically added every Monday for all PriceOptimzer listings, replacing the need to manually create each event. For maximum flexibility, create events manually and manually edit suggested local events. Local events you already added manually are still there.
Pricing is determined according to the following hierarchy: Most recent between (PriceOptimizer or calendar manual override OR Manual local event) > Data-driven local event.
-
First: Manual overrides and manual local events
- Manual overrides made in the PriceOptimizer pricing forecast, the multi-calendar, or the listing's calendar
- Manual local events
- Between these two: The most recently applied override takes precedence
- Both can go outside your defined price limits
-
Second: Data-driven local events
- Only apply on days where there are no manual overrides or manual local events
- Stay within your defined price limits
Access Guesty PriceOptimizer
Step by step:
- Sign in to your Guesty account.
- In the side navigation menu, click
 Integrations to open the dropdown menu.
 - Select Guesty add-ons.
- Click Guesty PriceOptimizer.
- Select the relevant listing. To locate the relevant listing, search by name or nickname or use the filters to find all listings that match your specific criteria.
View local events in a listing
Local events are shown in a listing's pricing forecast graph in green.
Hover over the graph to view the local event details.
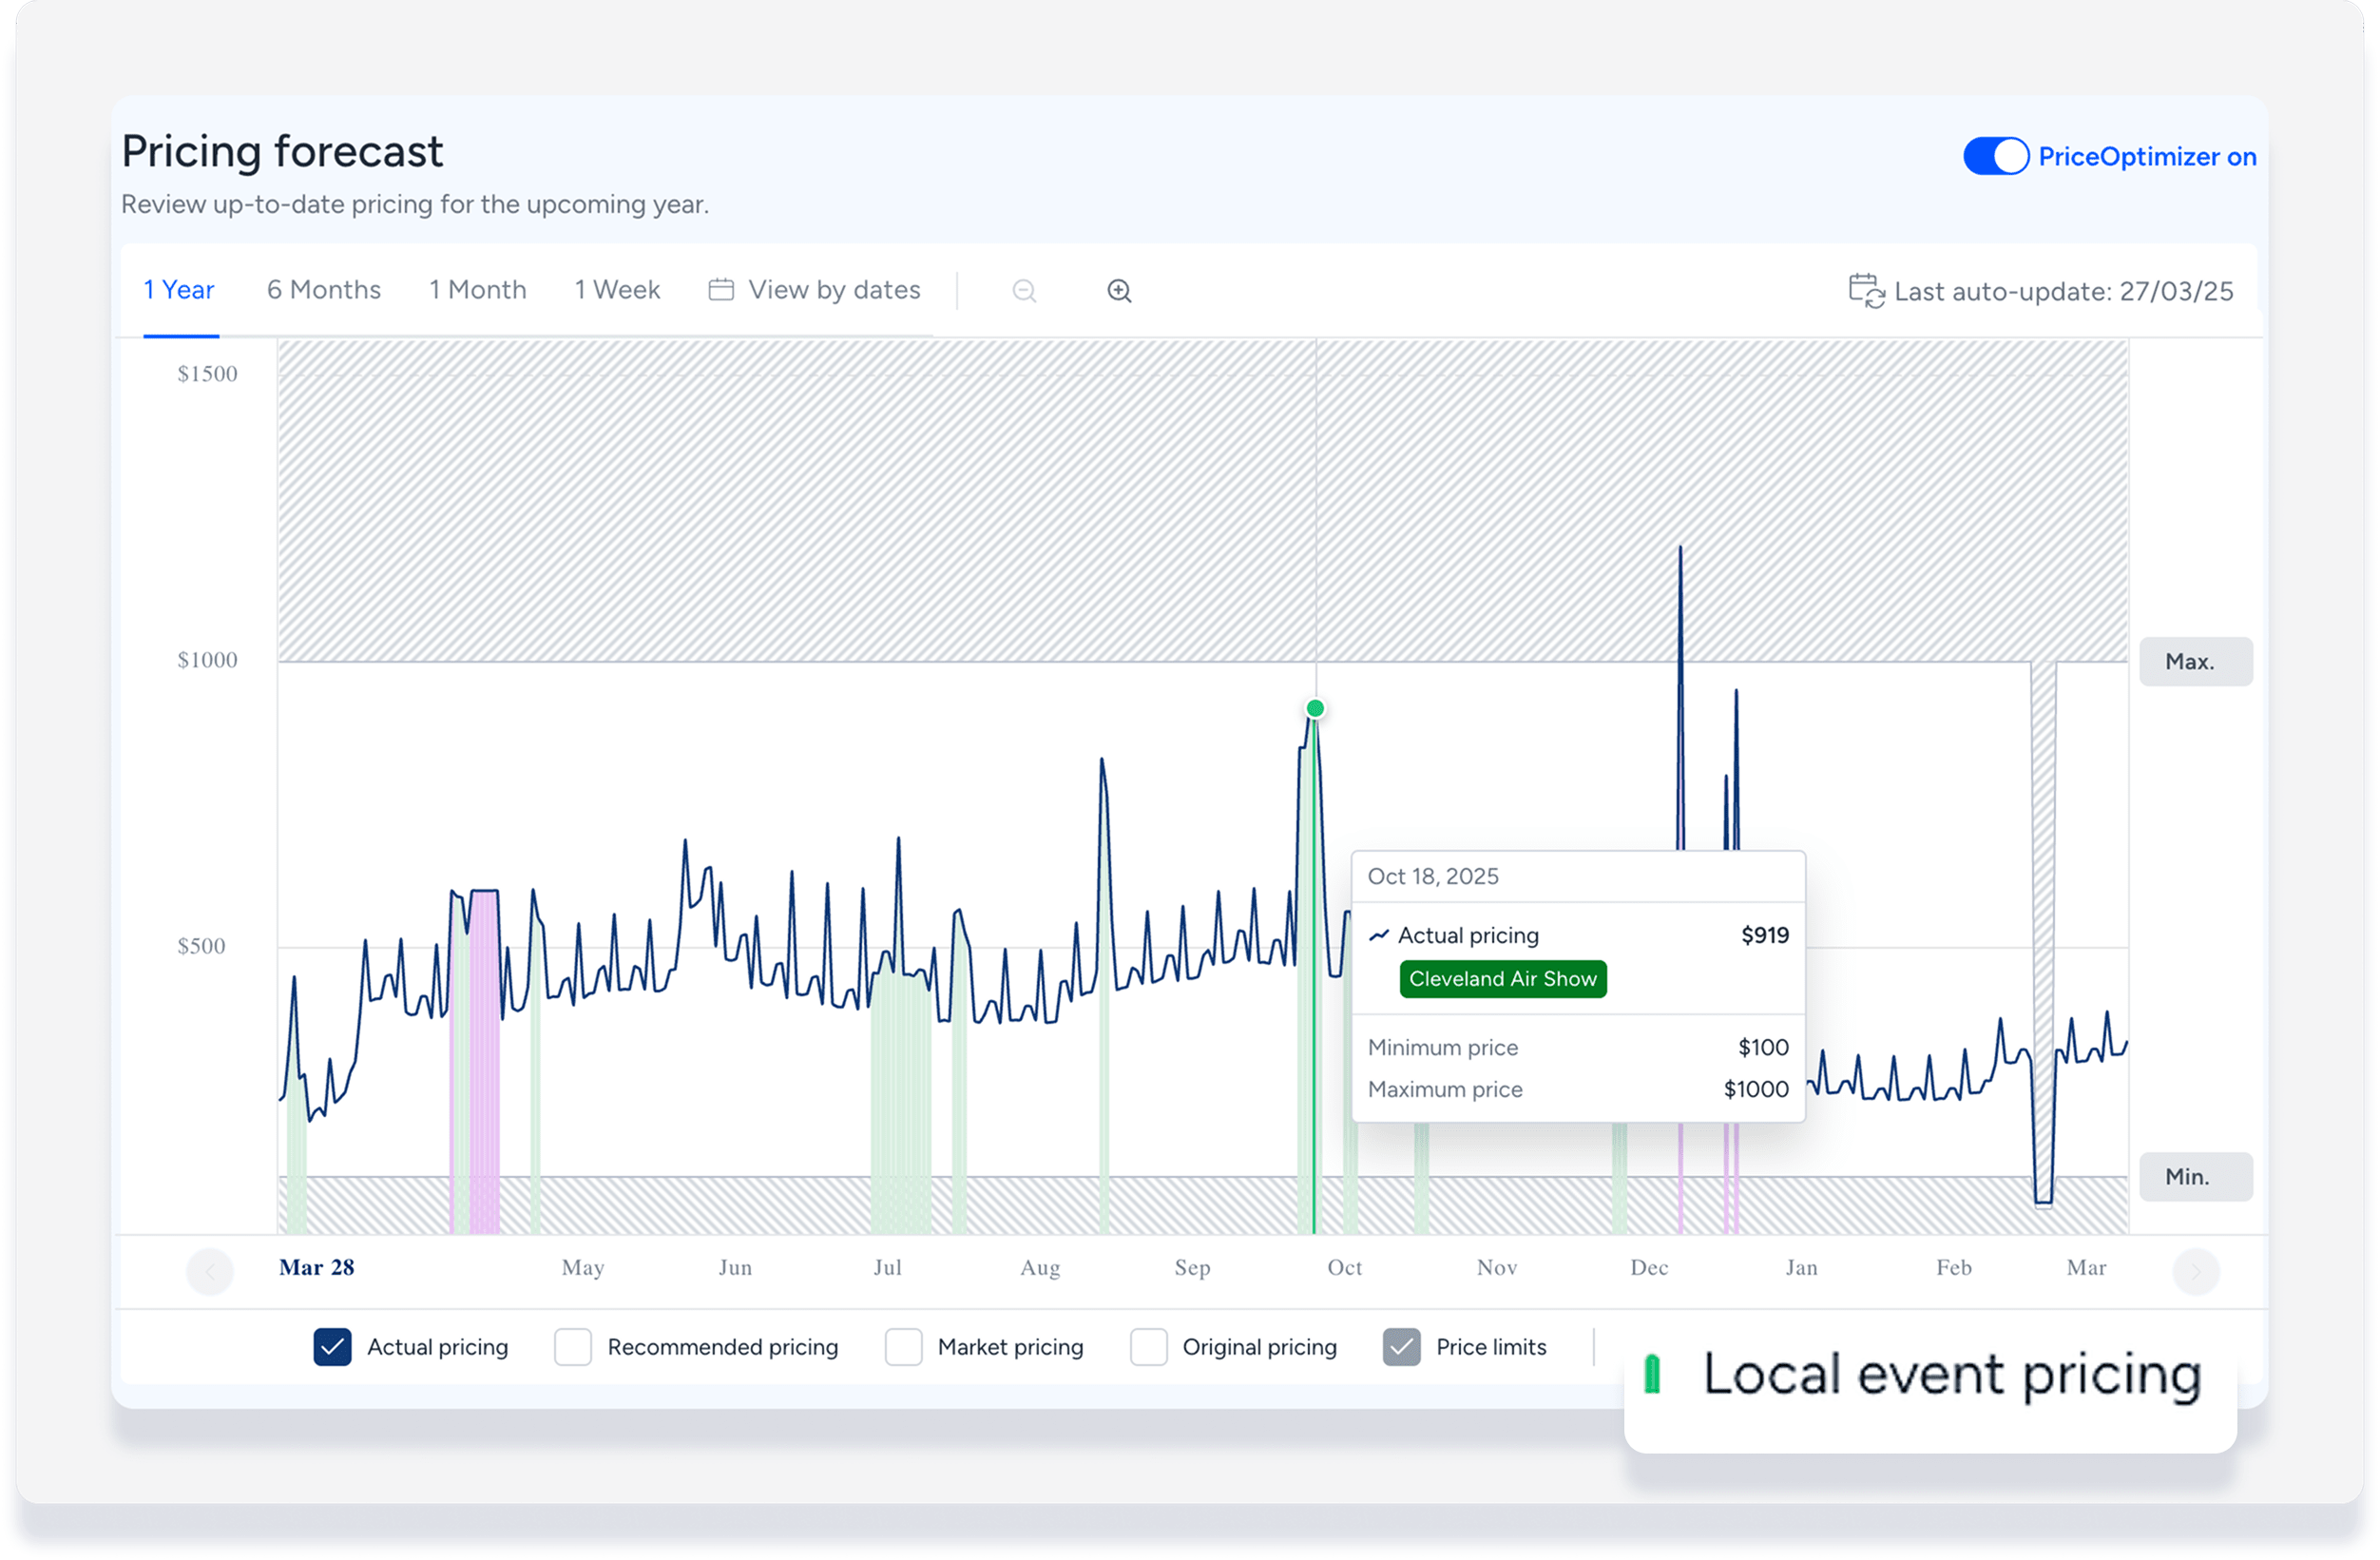
To navigate to the listing's local events page, in the left-side menu click Local event.
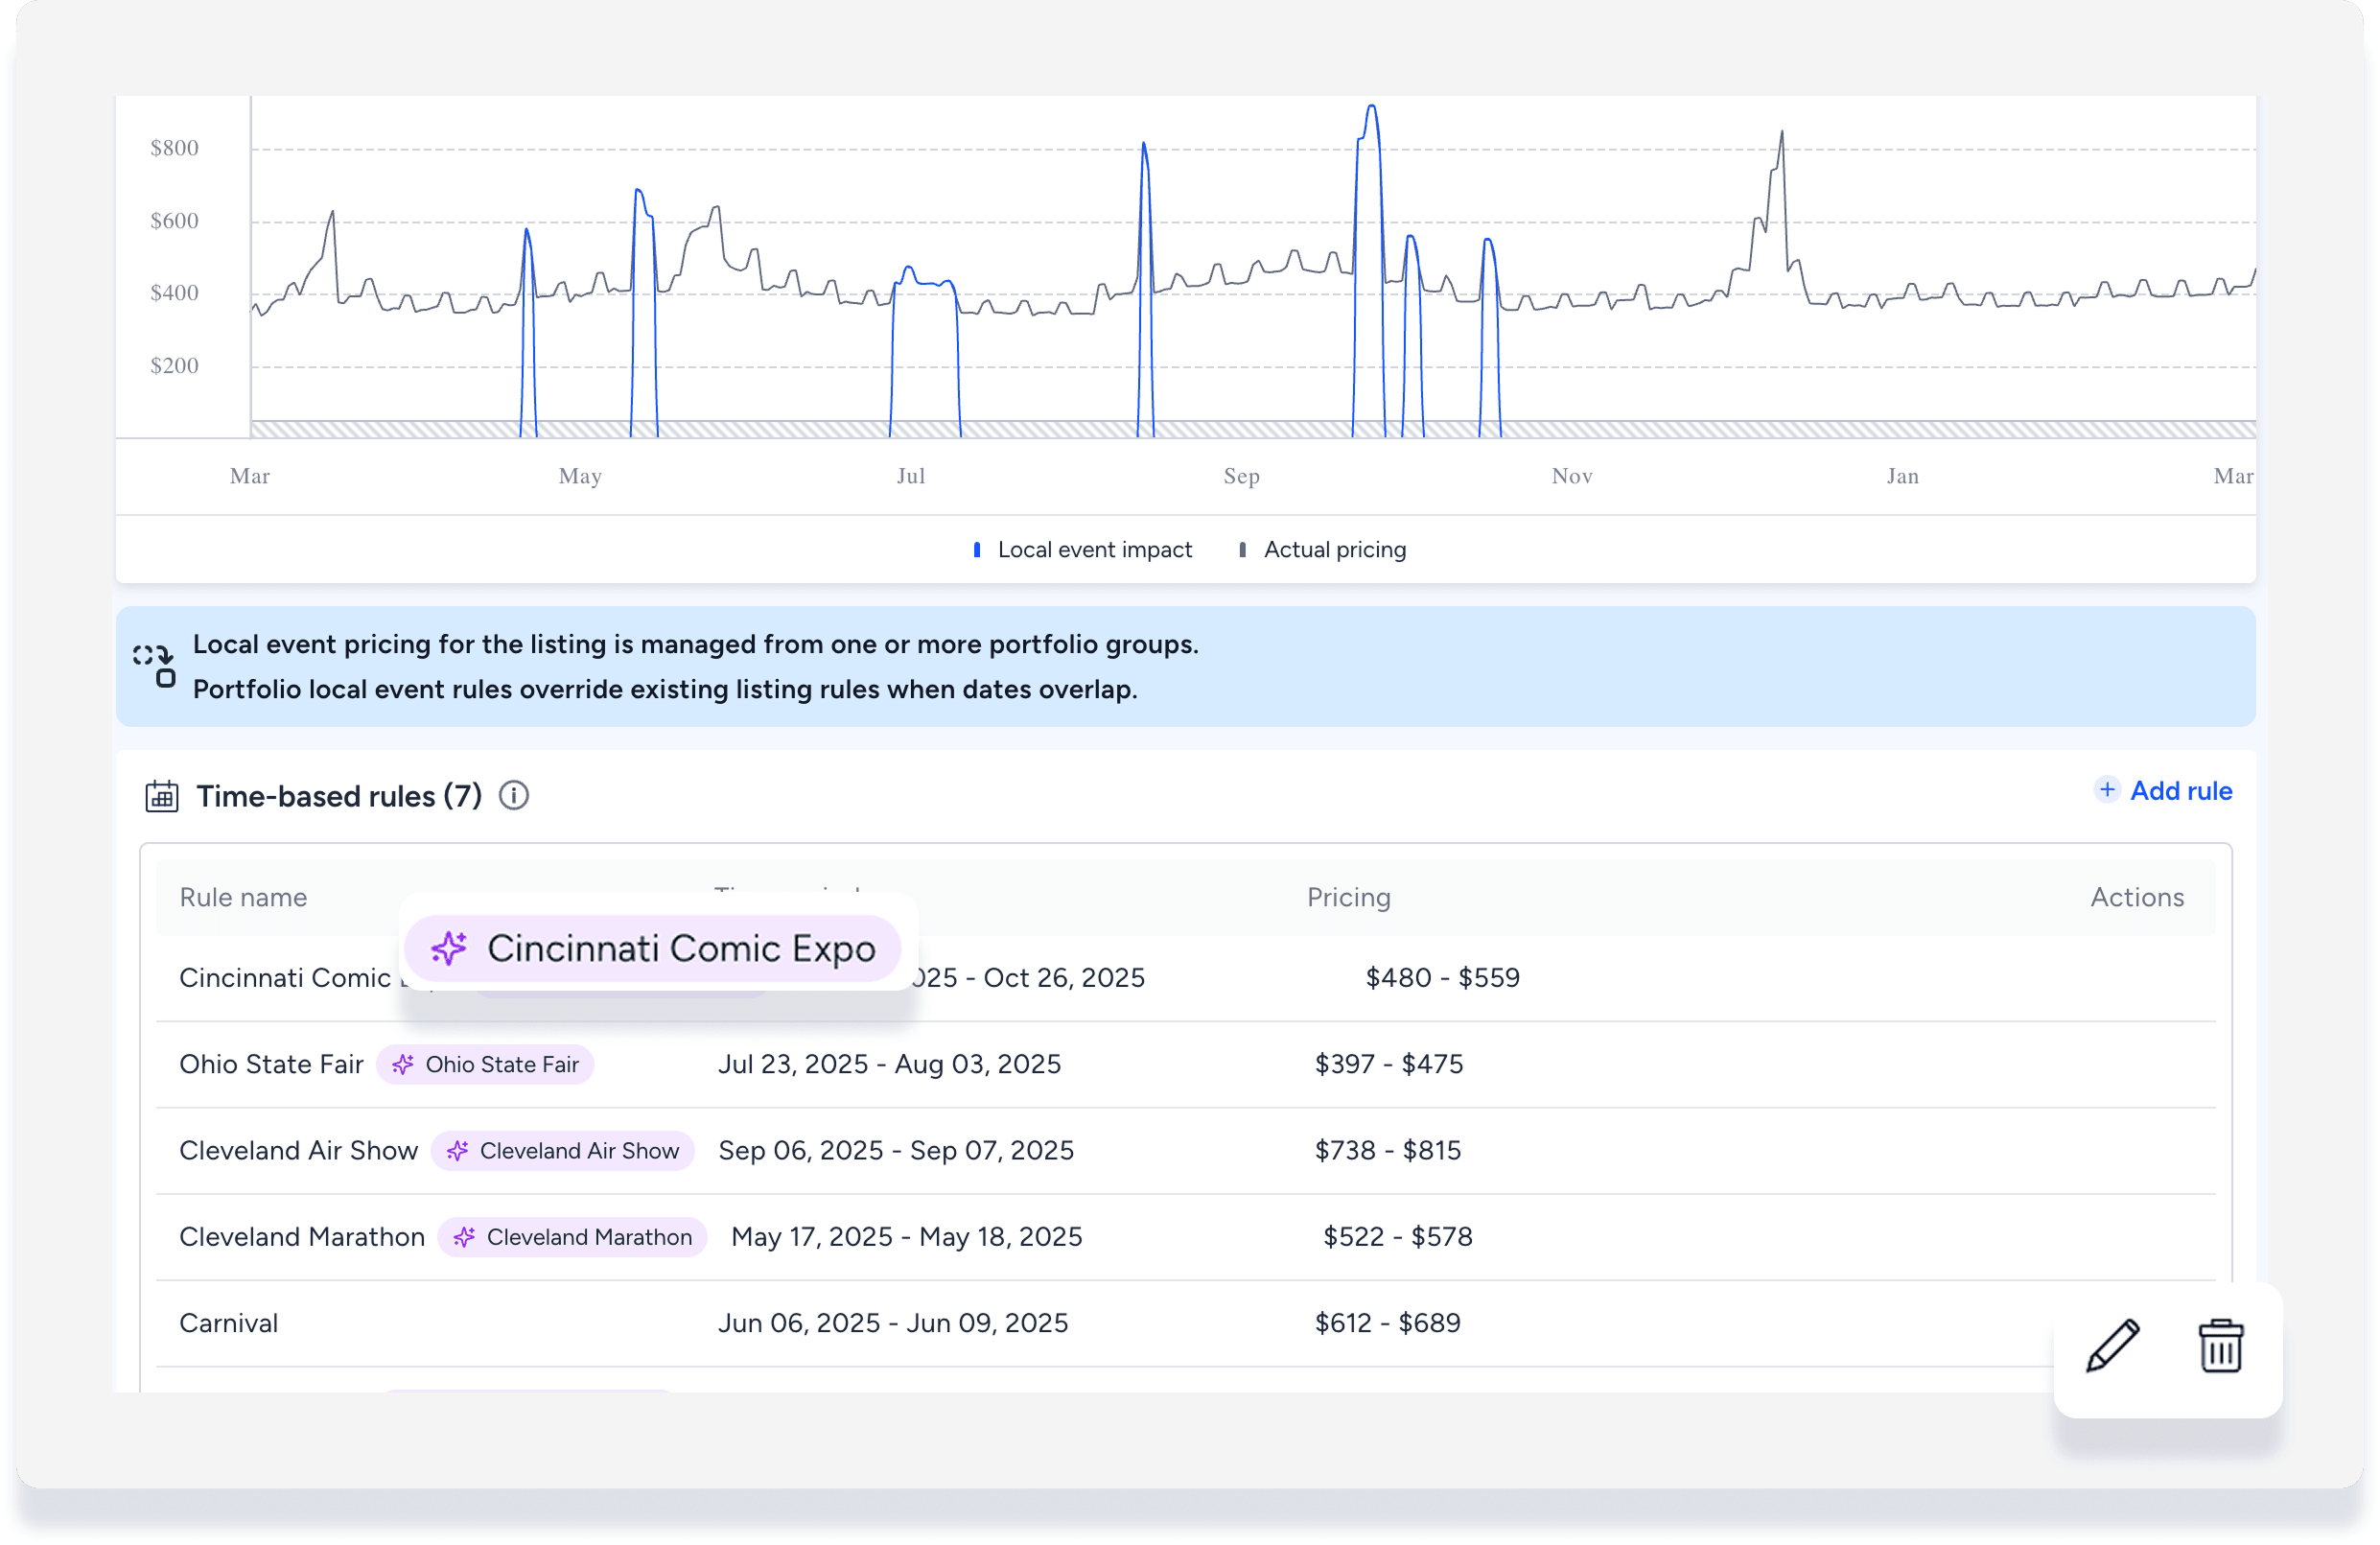
Suggested local events are distinguished from manual local events as shown in the following image:
- Suggested local events have this symbol

- Only manual events can be edited or deleted on the listing level as per steps below
Edit a manual local event
Tip:
To edit or delete a suggested local event, see manage suggested local events below.
Step by step:
- To the right of the relevant event, click
 .
. - Edit the details as needed:
- Event name
- Time period start and end date
- Set a new fixed amount, or enter a percentage.
- If you enter a percentage, it is calculated on top of “actual pricing” in your pricing summary.
- Review the pricing adjustment as displayed in the pricing forecast graph at the top.
- Click Update rule.
- At the top right, click Apply x change(s) then select Apply again in the confirmation pop-up.
To delete a manual local event, click ![]() . In the pop-up click Delete rule.
. In the pop-up click Delete rule.
Create a manual local event
Tip:
Suggested local events are updated every Monday. Before adding a local event manually, wait to see if it is added automatically.
Step by step:
- To the right, click + Add rule.
- Enter the details:
- Event name
- Time period start and end date
- Set a new fixed amount, or enter a percentage.
- If you enter a percentage, it is calculated on top of “actual pricing” in your pricing summary.
- Review the pricing adjustment as displayed in the pricing forecast graph at the top.
- Click Update rule.
- At the top right, click Apply x change(s) then select Apply again in the confirmation pop-up.
Manage suggested local events
Suggested local events are managed under group pricing strategies, not under specific listings.
Edit a suggested local event
Step by step:
- Navigate to the main Guesty PriceOptimizer page. If you're in a listing, click < PriceOptimizer at the top left to go back.
- In the side navigation menu, click Group pricing strategies.
- Click Override groups. Suggested local events are indicated by this symbol
- To the right of the local event, click

- Select one of the following options:
- Edit the group (event) name
- Edit the pricing strategy
- Assign or unassign listings
- Duplicate the event
- Archive the event
Activate or deactivate a local event
Local events are activated by default. To deactivate follow the steps below.
Step by step:
- Navigate to the main Guesty PriceOptimizer page.
- If you are in a listing, at the top left click < PriceOptimizer.
- In the side navigation menu, click Group pricing strategies.
- Click Override groups.
- Suggested local events are indicated by this symbol
- Suggested local events are indicated by this symbol
- To the right of the local event, under "Status", toggle off.
To re-activate a local event, under "Status", toggle on.