Important:
This integration is only available for existing Mailchimp users.
Mailchimp users are now able to export contacts data from Guesty to Mailchimp to create targeted and personalized campaigns. You have the option to export one view at a time, or set up a repeating export that will update Mailchimp every week with your Guesty contacts data.
For example:
- Create a one-time export to promote a food and wine event to your "wine" audience
- Set up a repeating export for VIPs, or for arrivals in 30 days
Before you begin
- You must already have a Mailchimp account before getting started. Sign up for Mailchimp.
- Authentication of your Mailchimp account is only required the first time you set up integration, or after something has changed in your Mailchimp account.
- For security, Guesty will not save your Mailchimp login and password information.
- The data exported includes:
- Guest name (first and last)
- email address
- phone number
- country
- view name.
- An email address is required by Mailchimp for each contact.
- If any contacts do not include an email the export will still complete without them. An email notification will be sent with the number of contacts exported and the number that could not be exported.
- We suggest adding the filter "has email" in your view to export.
- If your contacts include proxy email from channels and you want to create a view only with personal emails.
- We suggest adding the filter “email type” and excluding all proxy emails.
- If any contacts do not include an email the export will still complete without them. An email notification will be sent with the number of contacts exported and the number that could not be exported.
- If your view includes duplicate emails, they will be exported individually from Guesty and then merged by Mailchimp.
- You can export as many views and contacts as allowed by your Mailchimp account terms.
- If you create an export that is beyond your Mailchimp limit, an error will occur.
- Once exported, you can edit or delete the contact details in Mailchimp as needed. For a one-time export, Mailchimp is your source of truth.
Integrate Mailchimp with Guesty contacts

Step by step:
- Sign in to your Guesty account.
- In the top navigation bar, click the mode selector and select Guest Experience.
- Click Contacts.
- Select the view you would like to export:
- In the top left corner, click the dropdown and select a saved view, or
- Add filters and save a new view.
- Include the filter "guest has email" as this is required to export to Mailchimp.
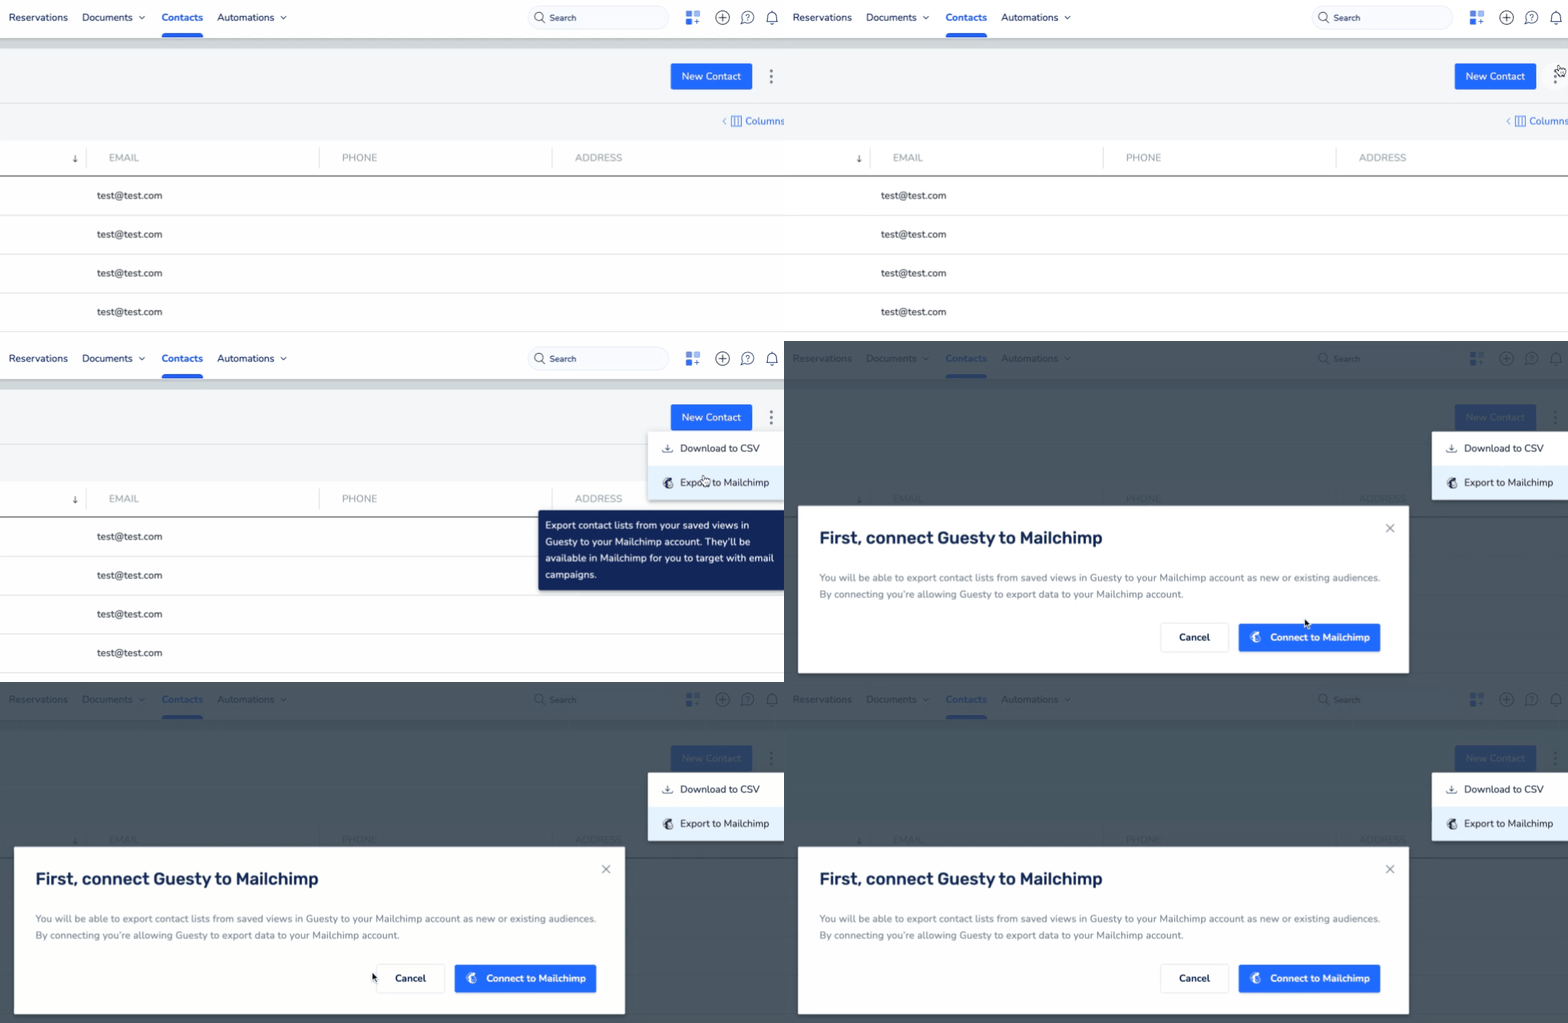
- At the top right corner, click

- From the dropdown, select Export to Mailchimp.
- In the pop-up, click Connect to Mailchimp, then add your user name and password in the Mailchimp tab.
- Click Export to Mailchimp to export the view you selected.
- Click to choose "Export once" or "Repeat exporting", then click Continue.
- If you choose to repeat the export, enter the day of week and time of day.
- Click one of the following options to select your Mailchimp audience:
- Create new audience: Fill in the audience name and other fields.
-
Connect to existing audience: Select from your list of Mailchimp audiences.
- All of the field names must match default columns in Mailchip or an error will occur.
- Click Export to Mailchimp.
You’ll receive an email confirming once the process is successfully completed. If for some reason an error occurs, an email notification will be sent with details.
Repeat the above steps to export additional views as needed.