With Guesty Locks Manager, you can manage every smart lock you use remotely – all from one dashboard – with an automatic, unique code generator and full visibility into lock data.
After connecting your lock provider(s), follow the steps below to link your Guesty properties to the locks. You can link a lock as a private unit door or a common door.
Codes that were set before linking to Guesty will remain on the lock (guest and team member codes). New guest codes for upcoming reservations will be generated by the system automatically upon linking a lock to a property.
Locks can still be accessed directly using the provider app.
Note:
Due to Kwikset brand restrictions, locks don't sync access codes to provider apps. You may need to manage codes directly through the Kwikset app alongside Guesty Locks Manager.
Important:
If you are currently using another smart lock management system, disconnect your locks from that system first to avoid conflicts and unstable behavior.
Door types
When linking locks to properties in Guesty Locks Manager, it's important to understand the different types of doors that can be managed:
- Private Door: This is an entrance door specific to an individual property or apartment unit. It provides access only to that particular rental unit.
- Common Door: This refers to shared entrance points that multiple guests may need to access, such as:
- Building entrance doors (main lobby doors)
- Gates to the property complex
- Doors to common amenities (pools, gyms, laundry rooms, etc.)
Managing both private and common doors provides access solution for your guests. When you link a lock as a common door, you can grant access to guests staying in multiple properties who need to use these shared facilities.
Link properties to locks
Link a lock to a single property or multiple properties, for example if you have a door that is shared between multiple units.
Step by step:
- Sign in to your Guesty account.
- In the top navigation bar, click the mode selector and select Operations mode.
- Click Field operations and select Locks manager.
- In the “Locks” page top bar, click Not linked.
- In the row of the relevant lock, under "Property", click Link property.
- In the pop-up, select Private unit door or Common door, then click Next.
- Select the relevant property or properties, then click Link.
You will see a pop-up confirming that the lock was linked, and the lock will be automatically moved from the “Not linked” to “Linked” tab. Common door locks are distinguished from private unit door locks by this icon: ![]()
Repeat the process above for each lock until they are all in the “Linked” tab.
To add an additional property to a lock, click Linked in the top bar of the "Locks" page. In the "Property" column of the relevant lock, click ![]() . In the right panel, select the desired properties and click Link.
. In the right panel, select the desired properties and click Link.
Tip:
If you've already linked a lock to a private unit and would like to use it as a common door lock, or vice versa, unlink the lock link it again.
Once your locks are linked to properties, the codes will be generated automatically for all confirmed reservations with future check in dates, and when new reservations are confirmed. Learn more about sending lock codes to guests.
Unlink properties from a lock
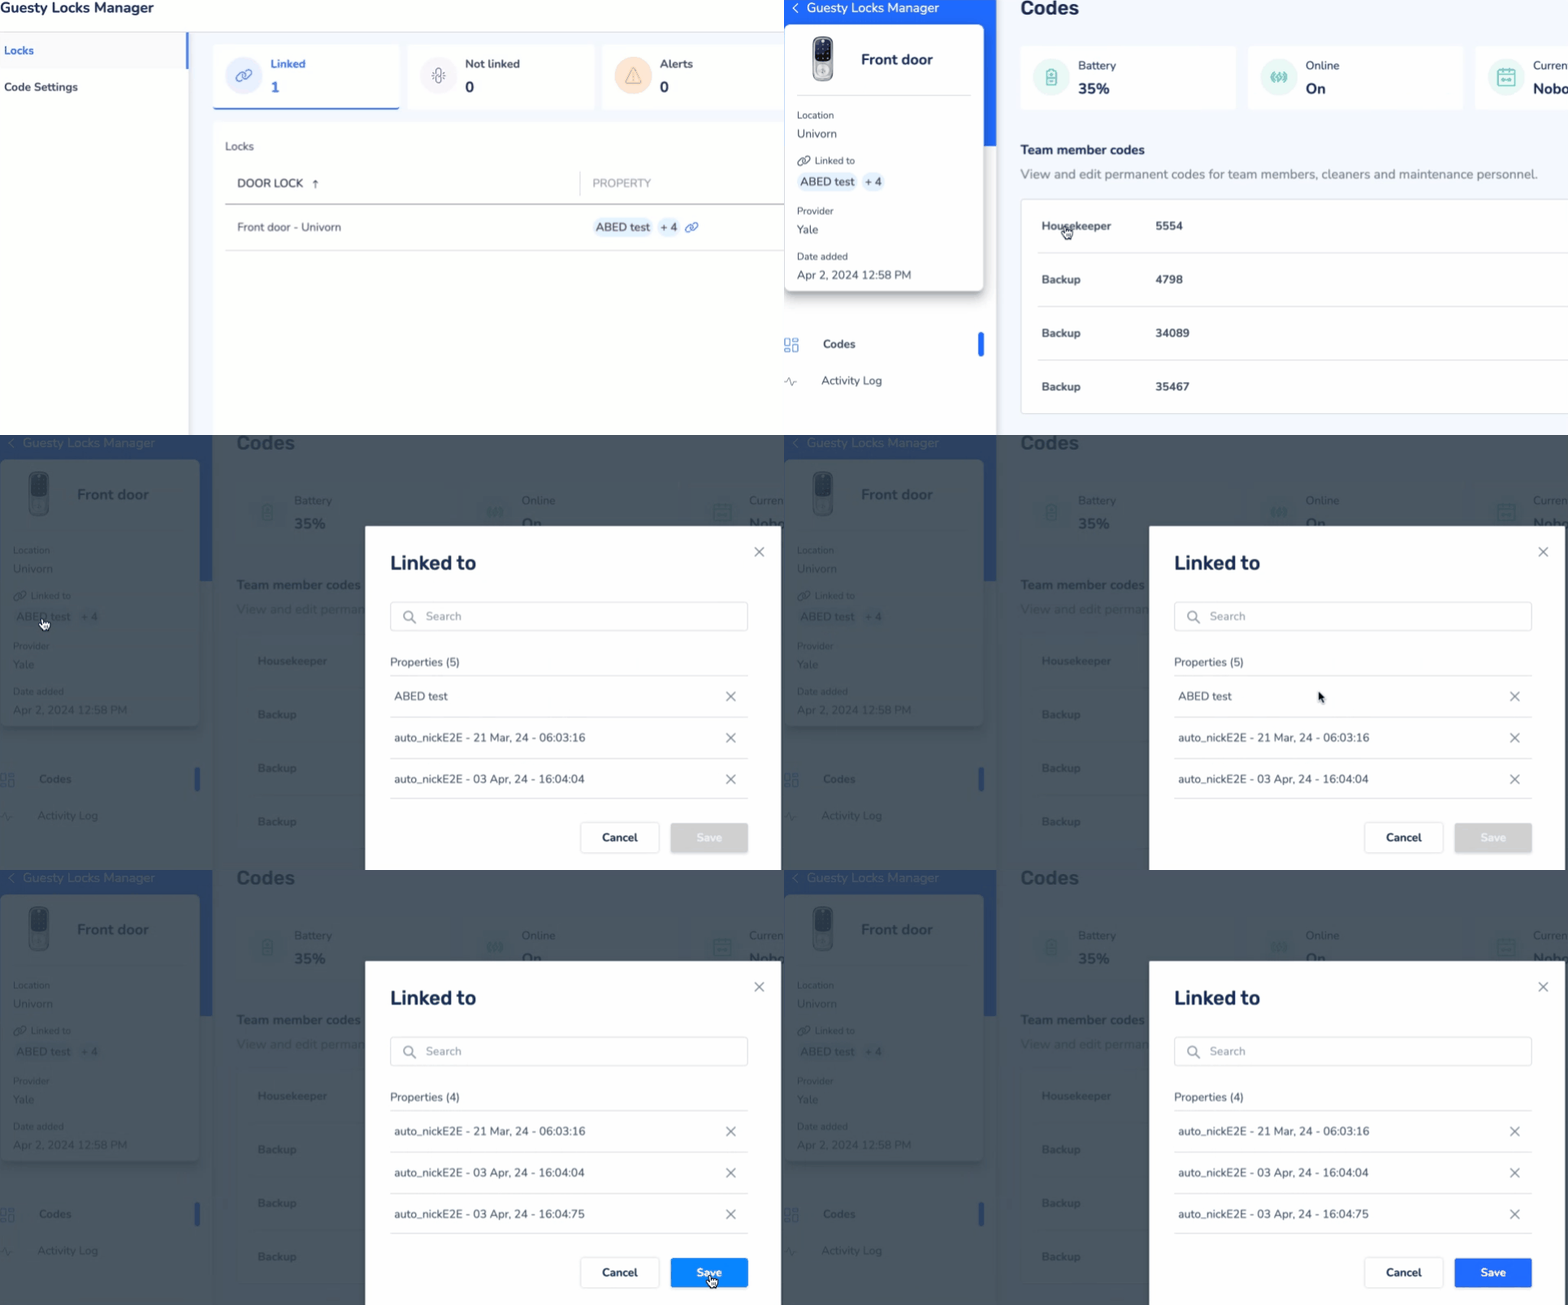
Once a property is unlinked, all scheduled guest codes will no longer work with that lock. To unlink, click the relevant lock. In the left-side panel, click the name of the property. In the pop-up, click x next to the property you want to remove. Click Save.

You can re-link the lock to the same property or to a different one at any time.