When you select a column layout, a horizontal row is automatically created to hold the vertical column content. Rows act as the structural foundation for your site's layout.
Use the row editor to organize site content by changing backgrounds, adding borders, or adjusting spacing.
Before you begin
Before editing rows, create a backup of your site. This allows you to restore a previous version if you make a mistake.
Configure a row
Follow the steps below to configure a row.
Step by step:
- To open the row editor, hover over a row and click Row.

- You can edit a row as follows:
- Click the arrows to move the current row up or down.
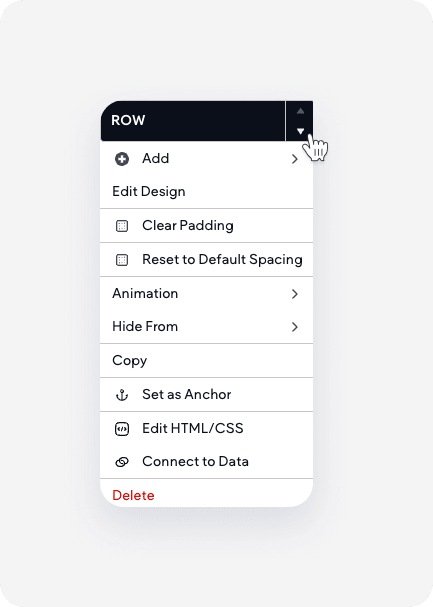
- Click Edit design to open the row design editor. Learn more about the row design editor.
- Click + Add and select one of the following:
- AI-generated section: Open the AI section assistant and enter a prompt.
- Blank flex section: Add a flex section.
- Row above: Add a new row above the current row.
- Row below: Add a new row below the current row.
- Designed section: Add a pre-designed section to the row.
- Column: Add a column to the row.
- Inner row: Add a row within the current row.
- Adjust the row spacing using the following options:
- Clear padding: Removes all inner spacing.
- Reset to default spacing: Reverts spacing to the settings defined in your site theme.
- Click animation to add animations, such as a fade or zoom, when the row loads. Select one of the following options:
- Entrance
- Scroll
- Customize
- Click Hide from to hide the row on specific platforms like desktop, tablet, or mobile.
- To save the row as a section, click Save as Section and select to save only the current row, multiple rows, or the full page.
- Click Save as anchor to set the row as anchor.
- Click Copy to copy the row.
- Click Connect to data to connect the row to dynamic content.
- Click Delete to delete the row.
- Click the arrows to move the current row up or down.
Customize the row design
Use the "Row design editor" to style the background and spacing.
- To open the row editor, hover over a row and click Row.
- Click Edit design to open the row design editor.
- You customize a row as follows:
- Settings tab: Toggle on Full bleed row to allow content to span the entire width of the screen. When toggled off, content width is restricted to 960px.
-
Style tab:
-
Background:
- Color: Select a Background color. A gradient color overrides an image, and vice versa.
-
Image: Click + to open the image picker.
- To create a background image slider, select multiple images from the image picker.
- Select how the image displays, such as Cover, Full image, Tile, or No repeat.
- Video: Click Select video to upload a file or paste a URL from YouTube, Vimeo, or Dailymotion. Learn more about video backgrounds.
- Border: Select a border type, and move the slider to set the border width.
- Shadow: Toggle on Shadow and select a color, type, and position for the shadow.
-
Background:
Create a background image slider
You can display multiple images in a sequence within a row or column background.
Step by step:
- Open the image picker and select multiple images.
- Click Done.
- Select Slide transition from the dropdown menu.
- Move the slide speed slider to set the duration of each image in seconds.
You can apply background overlays, positioning, and display styles to the slider.