This article explains how to assign an additional fee to multiple properties at once using bulk assignment rules. You can define a fee at the account level and apply it to all properties, a specific selection, or a group of properties based on rules, including those added in the future.
The fee configuration process includes:
- Fee setup: Configure the fee's details, such as amount and type.
- Sync to channels: Define how the fee syncs with your booking channels.
- Assign properties: Apply the fee to your properties in bulk.
Understanding bulk assignment rules
When you assign a fee to properties in bulk, keep the following in mind:
- Property-level overrides: You can set a unique fee for a specific property. This is called a "Custom Fee" and it will always take precedence over any fee assigned at the account level. If you remove the custom fee, the property will revert to using the account-level assigned fee, if one was assigned. If no fee was assigned at the account level, no fee will be added to the nightly rate.
-
Multiple fees of the same type: The system will calculate the fee based on the latest fee rule applied. The system will not prevent you from assigning a fee to a property that already has a fee of the same type. If a property matches multiple assignment rules for the same fee type, the most recently applied rule takes precedence.
Example:- Fee A ($100): Assigned to the tag Beachfront (Created: October 1)
- Fee B ($200): Assigned to the tag Luxury (Created: November 1)
If a listing has both the Beachfront and Luxury tags, the cleaning fee applied will be $200.
- Existing reservations: Changes to fee assignments only apply to new reservations created after the change is made. Existing reservations are not affected.
Create and assign a new fee in bulk
- Sign in to your Guesty account.
- In the side navigation menu, click
 Financials to open the dropdown menu.
- Select Additional fees.
- In the "Fee setup" step, configure the fee's details. For more information, see our article on creating and syncing additional fees.
- At the bottom, click Next.
- In the "Sync to channels" step, configure how the fee syncs with your booking channels.
- At the bottom, click Next.
- In the "Assign properties" step, click Assign.
- In the right side panel, choose one of the following options:
- Check “All” to apply the fee across all properties.
- Check “Specific properties”, then check the box next to each property.
- Check “Assign by rule”, to assign the fee to properties that match specific criteria (e.g., Tag = "NYC", City = "London", Property type = "Villa"). This applies to current matching properties and any future properties that match the rule.
- (Optional) Exclude properties: Click Exclude properties to open the dropdown and manually select properties to exclude from the "All" or "By rules" assignment.
- In the bottom-right corner, click Done.
- Click Save fee.
After you save, the fee will be temporarily frozen while the assignment is processed, and a status of "Assignment in progress" will be displayed. You cannot edit the fee during this time. For assignments based on a specific selection of properties, the freeze is released when the process is complete. For rule-based assignments, the freeze is released after 3 minutes.
View the assignment status
The "Additional fees" page includes a "Properties" column that shows the assignment status for each fee. This column displays the number of properties assigned to the fee and one of the following statuses:
- Assignment in progress: The fee is currently being assigned to properties.
- Sync issues: The assignment is complete, but there are data conflicts preventing the fee from syncing for one or more properties.
Note:
For fees assigned using the "All" or "By Rule" options, the configuration also applies to any future properties that match the criteria.
Edit a fee's listing assignment
- Sign in to your Guesty account.
- In the side navigation menu, click Financials to open the dropdown menu.
- Select Additional fees.
- On the relevant fee line:
- Click and select Edit.
- Alternatively, click the property count in the "Properties" column.
- In the right side panel, select the properties to apply the fee to.
- In the bottom-right corner, click Done.
Managing property-level overrides (Custom Fees)
You can override an account-level fee assignment by creating or editing a fee directly on a property's page. This creates a "Custom Fee" that is specific to that property.
On the property's "Additional Fees" page, you can see the origin of each fee:
Custom Fee: A flag will appear next to the fee, indicating it is a property-level override.
If you create a Custom Fee for a property that already has an assigned fee of the same type from the account level, the Custom Fee will take precedence. If you later delete the Custom Fee, the property will automatically revert to the account-level fee assignment.
Understanding and resolving sync issues
When you create or assign fees, Guesty runs validations to check for conflicts. If a fee has conflicts, a "Sync issues" badge will appear in the "Properties" column on the "Additional fees" page.
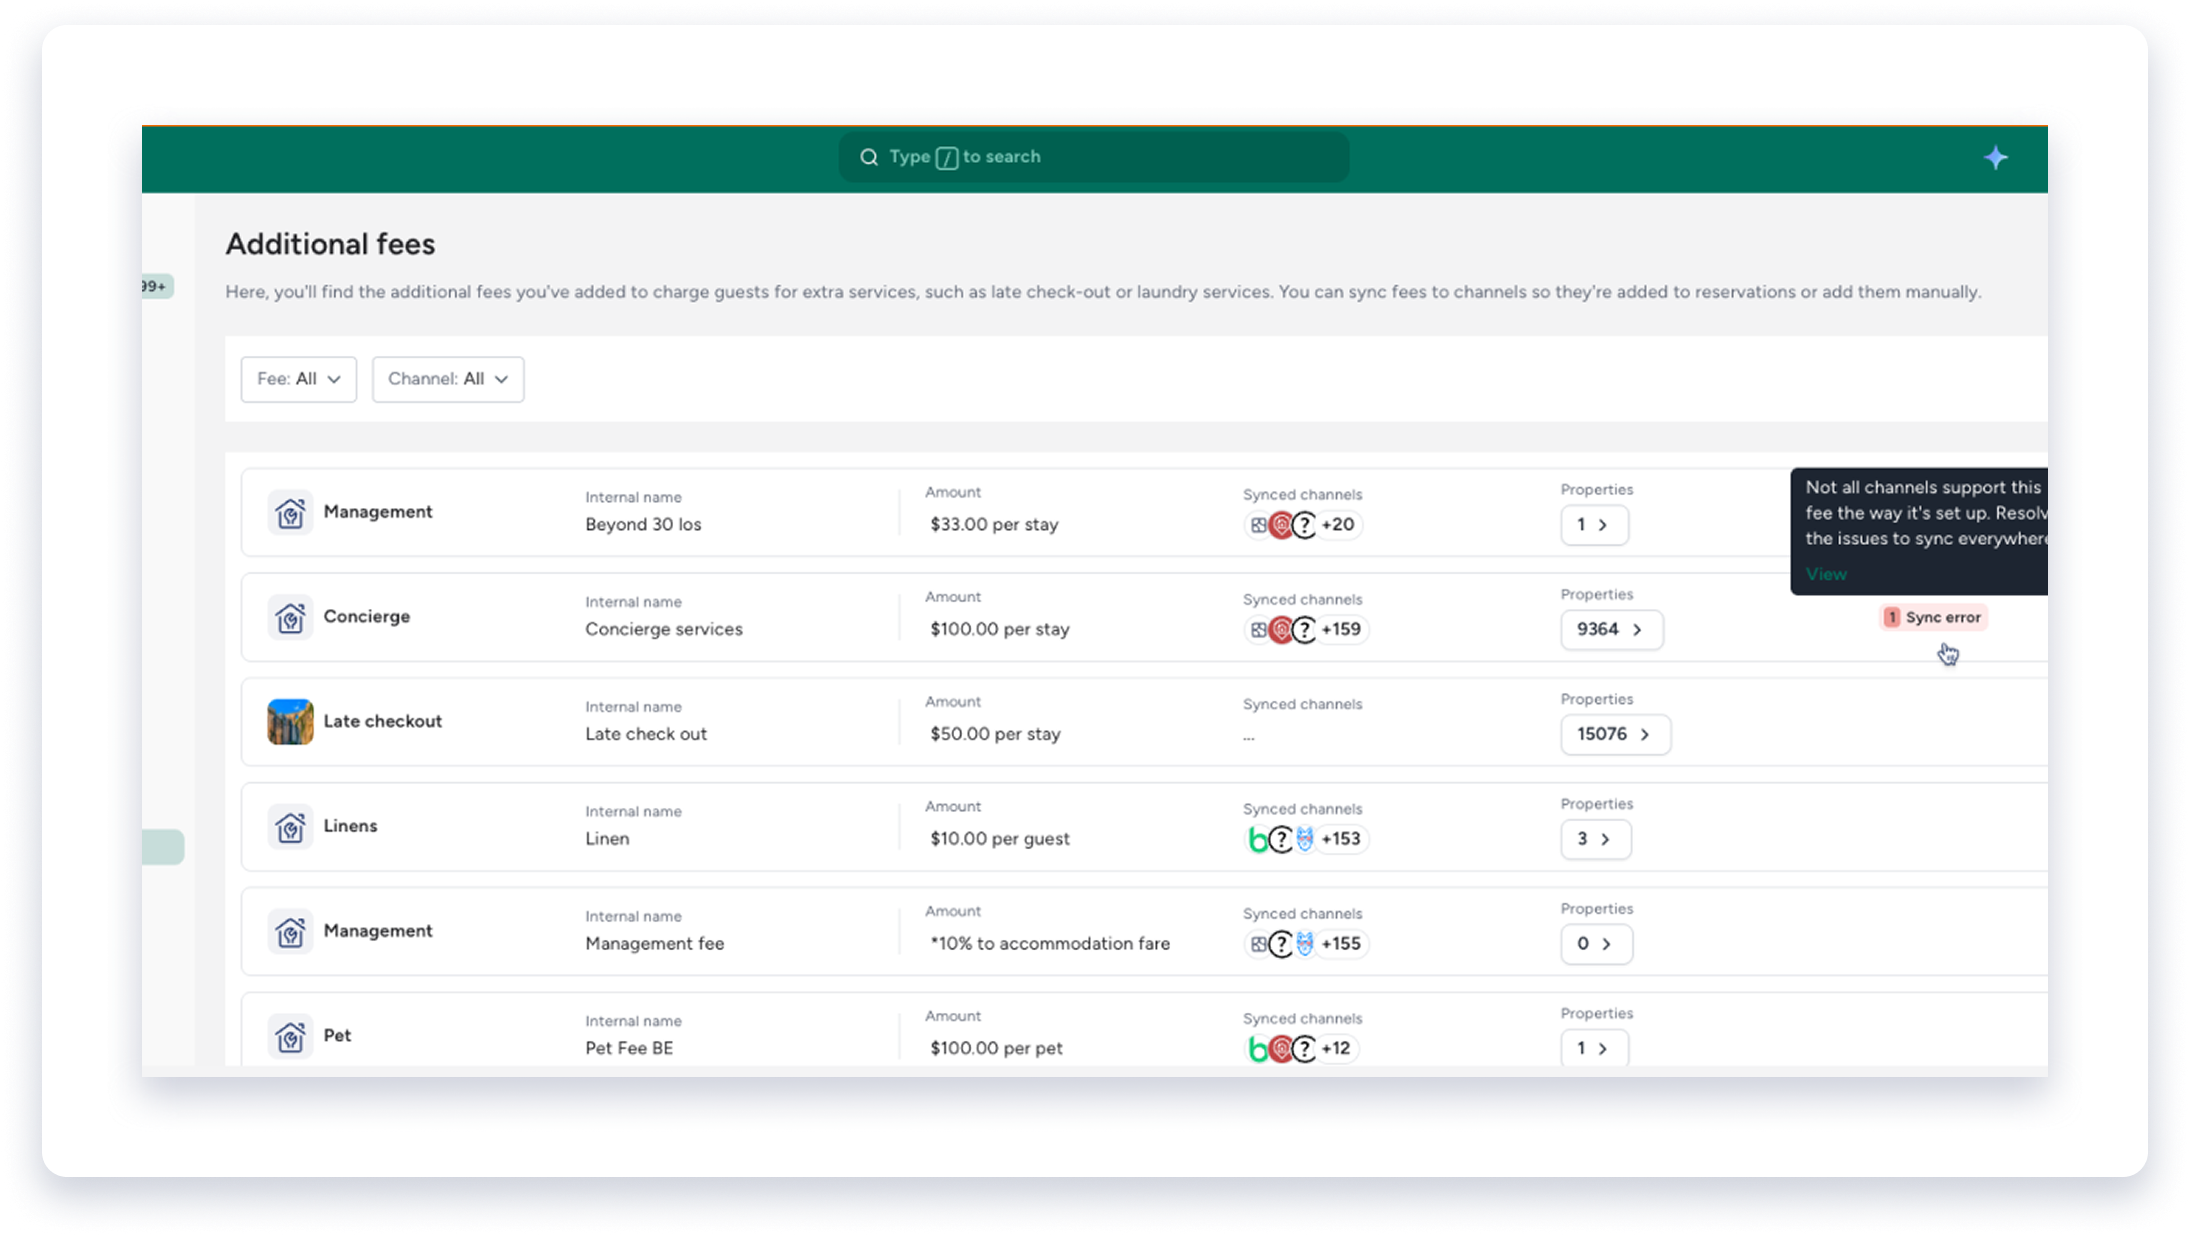
To view and resolve errors
- Click the Sync issues badge for the relevant fee.
- A right side panel will open, displaying a list of properties with conflicts.
- The errors are separated into "Errors" and "Warnings" tabs.
- Click a property row to be redirected to that property's page to resolve the issue.
Download a full error report
For a complete, uncapped list of all errors and warnings across all fees in your account, Click Export full report to download the report in a CSV format. 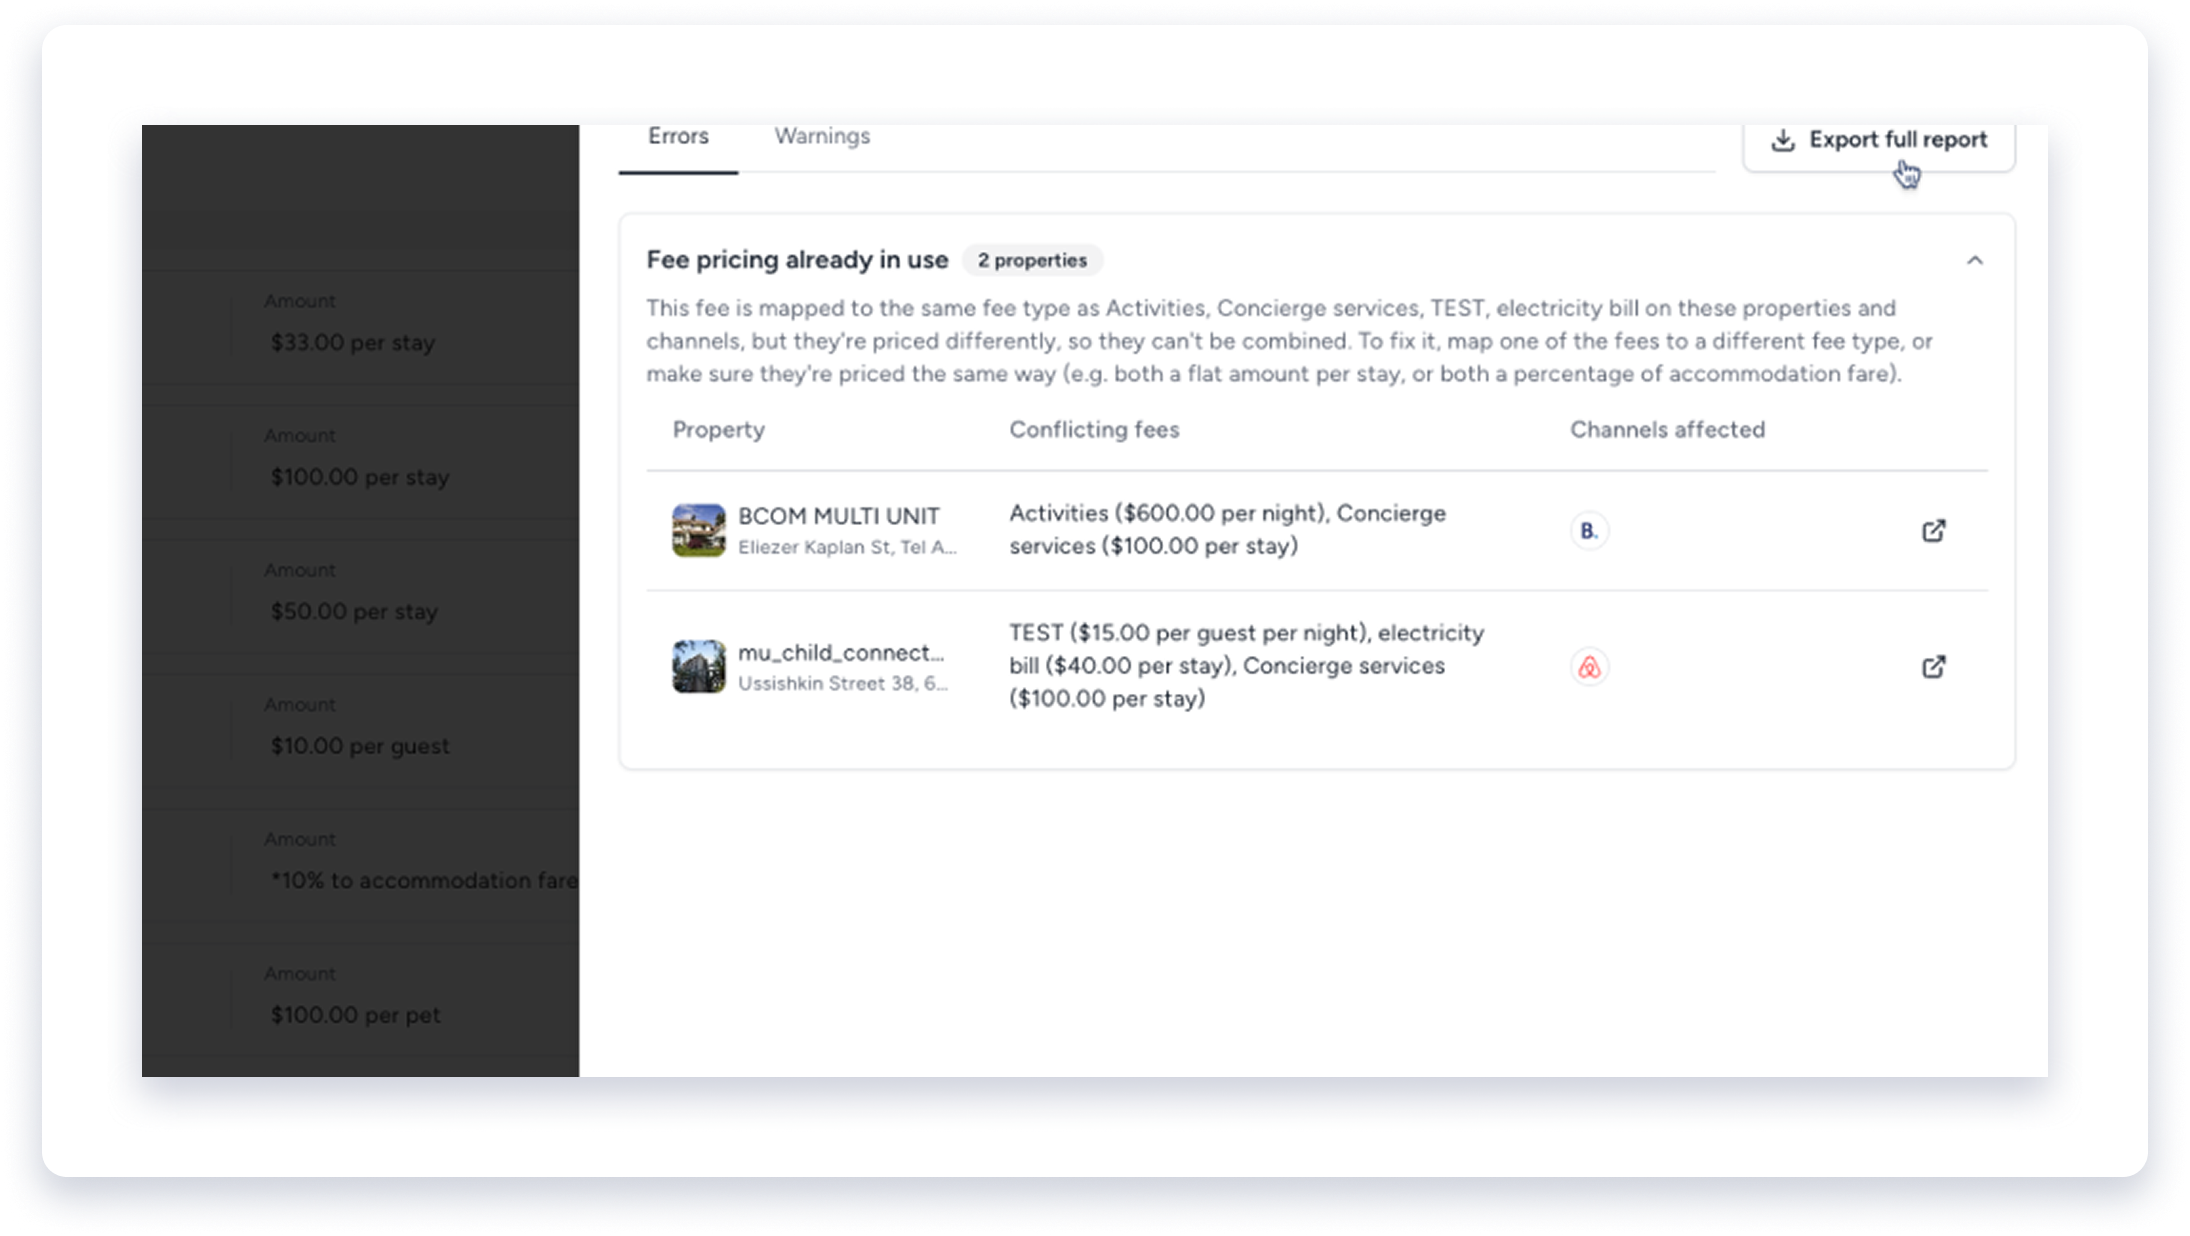
The CSV file includes detailed information for each issue, including the fee name, property name, error code, and a direct link to the page where you can fix the issue.
How existing fees are handled
Existing fee configurations in your account are handled in one of two ways:
- Existing account-level fees: Fees set up at the account level are migrated to the new system with an assignment of "All properties". Their behavior remains the same, but you can edit the assignment.
- Existing property-level fees: Property-level fees will automatically migrate to custom fees
Switch a property-level fee to an account-level assignment
Fees configured on individual properties are treated as "custom fees". They continue to override any account-level fees you assign. To switch a property from a custom fee to an account-level assignment, you must first create and assign the account-level fee, then manually delete the custom fee from the property's page.