Use the reservations report to organize and analyze your booking data. The report page allows you to switch between saved views, apply multiple filters, and customize the columns you see to focus on the information that matters most.
This report helps you monitor reservation trends, guest details, and financial data in one central location.
Navigating and managing report views
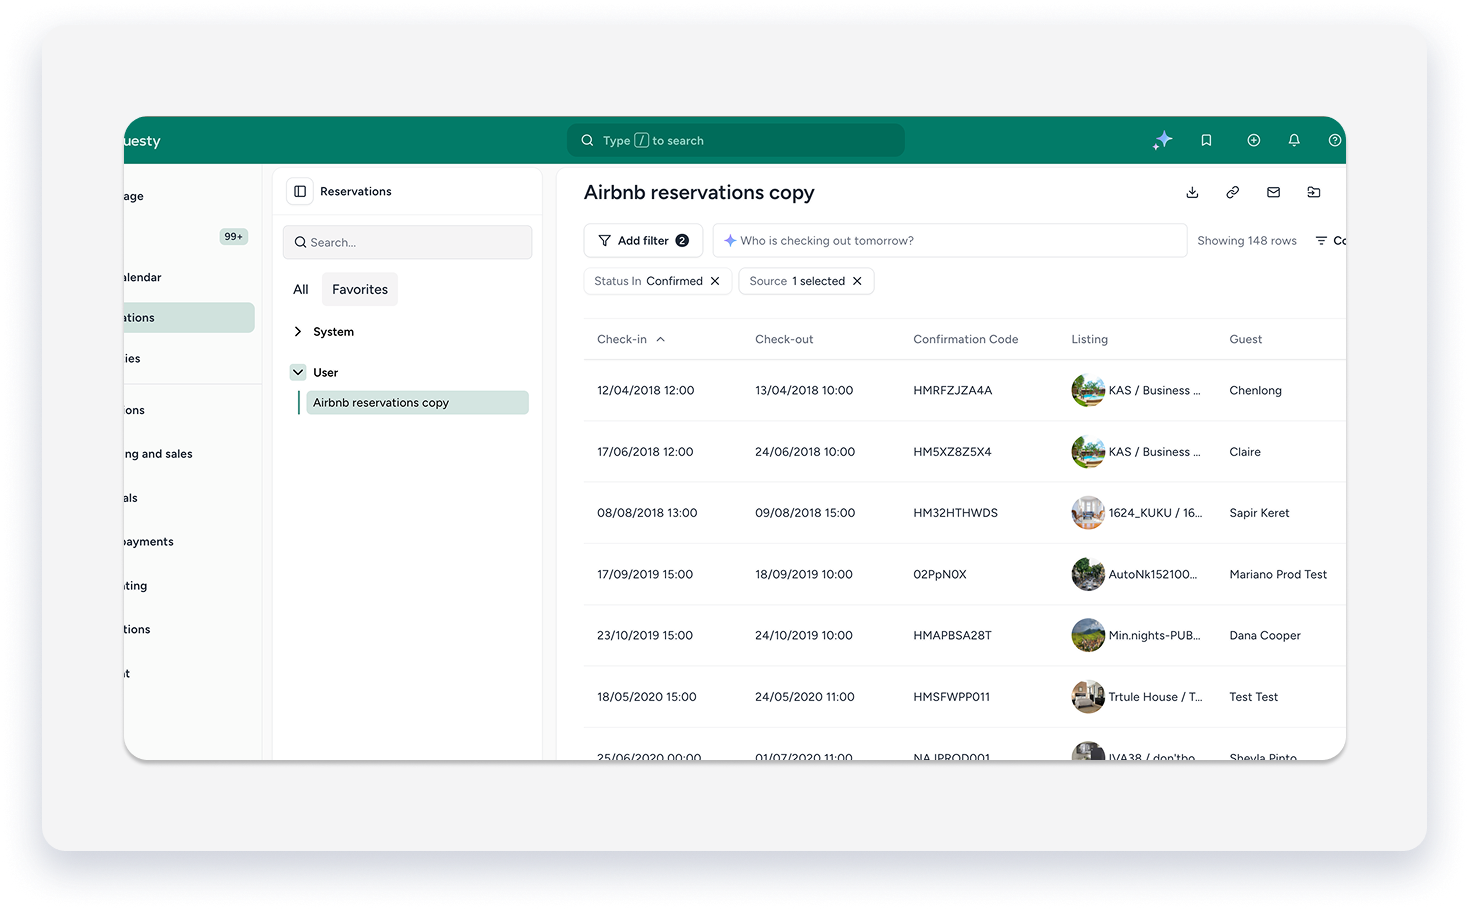
A panel on the left side of the page displays all your saved report views, making it easy to switch between them.
The views panel is organized two tabs:
- All: Every report view you have access to.
- Favorites: Views you have starred for quick access.
Each tab is divided into two sections:
- System: Standard, pre-built views provided by Guesty.
- User: Report views that you have created and saved.
From this panel, you can:
- Search for a specific view by its name.
- Click the star icon next to a view to add it to your "Favorites" section.
- Click any view's name to load that report instantly.
Follow the steps below to locate and open a report view.
Step by step:
- Sign in to your Guesty account.
-
In the side navigation menu, click
Reservations.
- In the views panel, click the tab and the section of the report.
- Click the name of the report you would like to view.
- To add a report to your Favorites section, click the right mouse button, then click Add to favorites.
To apply filters to your report
You can refine your report data by applying one or more filters. Filter controls appear as buttons along the top of the report.
- Sign in to your Guesty account.
-
In the side navigation menu, click
- In the views panel, click the tab and the section of the report.
- Click the report.
- In the top left corner of the report, click the button for the filter you want to apply
- In the panel that opens, set the values for your filter.
- Repeat this process to set additional filters. All selected filters are applied to the report at the same time.
As you apply filters, a running count of matching reservations (e.g., "391 Reservations") is displayed on the page.

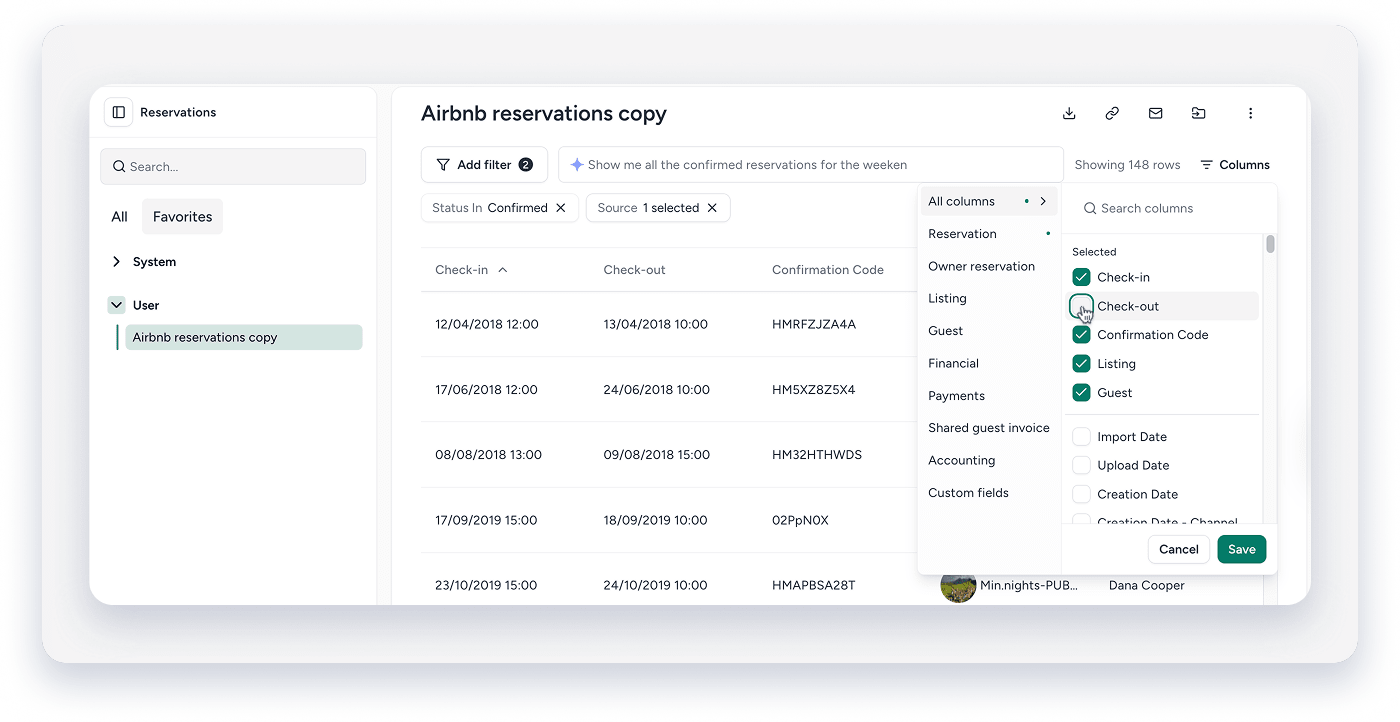
To customize report columns
You can choose which data columns are visible in your report to focus on the information that matters most.
- On the top-right corner, click
 .
. - Browse the available columns. You can also use the search bar to find a specific column by name.
- Select the checkbox next to a column to add it to the report, or clear the checkbox to hide it.
- Click Save to apply your changes. To exit without making changes, click Cancel.
Saving, renaming, and deleting report views
When you modify a report by changing its filters or columns, you can save your setup for future use.
To save a view:
- Click Save
- From the dropdown, select "Save current view" to change the view of the current report
- Or "Save as" to save this view as an additional report. In the pop-up, type the report name and click Save report.
To rename or delete a view
- In the page header, click
 .
. - From the dropdown, select Rename or Delete.
Note:
Guesty's built-in System views cannot be renamed or deleted. You can only modify views that you have created.
To share a report view
Share a custom report view with other team members, either as a one-time action or on a recurring schedule.
- In the page header, click
- From the dropdown, select Share.
- Select the team members you want to share the report with.
- (Optional) To send the report automatically on a schedule, set up a recurrence by choosing the days and time for delivery.
From the same dialog, you can also manage previously shared reports to edit their settings or remove access.
Important:
The ability to export data from the reservations report is based on user permissions. If you do not see an option to export, you may not have the required permissions for your role.