Managing user access across your main account and connected sub-accounts is essential for maintaining security and operational efficiency. Guesty uses Headquarter (HQ) roles to define what a user can see and do within your multi-account structure.
Roles and permissions apply at both the main HQ and sub-account levels. Permissions set on the main HQ account always override those on a sub-account. For example, if a user has access to a feature on a sub-account but the main HQ account restricts it, the user can’t access that feature.
To ensure consistent access across all connected sub-accounts, assign the correct roles and permissions on the main HQ account.
Use HQ for user creation
Creating users from the HQ account is the best approach in the following scenarios:
You need another Main account admin to help manage user and sub-account creation.
You want to create a Main account user who has access to all sub-accounts but doesn't have permission to create new users or sub-accounts.
You want to create a Main account user who only has access to specific sub-accounts.
Tip:
Most email providers allow you to use the "+" sign to create an alias. This is helpful if a user already has individual access to a sub-account but also needs a separate login for HQ access. This allows them to switch between the two instances using different credentials. For a sub-account login user@email.com, create a main account login user+hq@email.com.
HQ roles and access levels
The table below describes the two main HQ roles and their respective access levels.
| Role | Access level | Responsibilities |
|---|---|---|
| Main account admin | Full access to HQ and sub-accounts | Manages all sub-accounts. This role creates users and assigns roles at both the HQ and sub-account levels. |
| Main account user | Limited access | Access is restricted to specific assigned sub-accounts. The user only views these accounts in the "Sub-accounts Management" section. Specific permissions depend on the assigned sub-account role. |
Assign roles and permissions to a user
If you are a Main account admin, you can define a user's role and determine which specific accounts they can access.
Follow the steps below to update a user's permissions:
Sign in to your Guesty account.
In the top navigation bar, click Main-account.
Select User management from the dropdown menu.
Click the user's name to open their profile page.
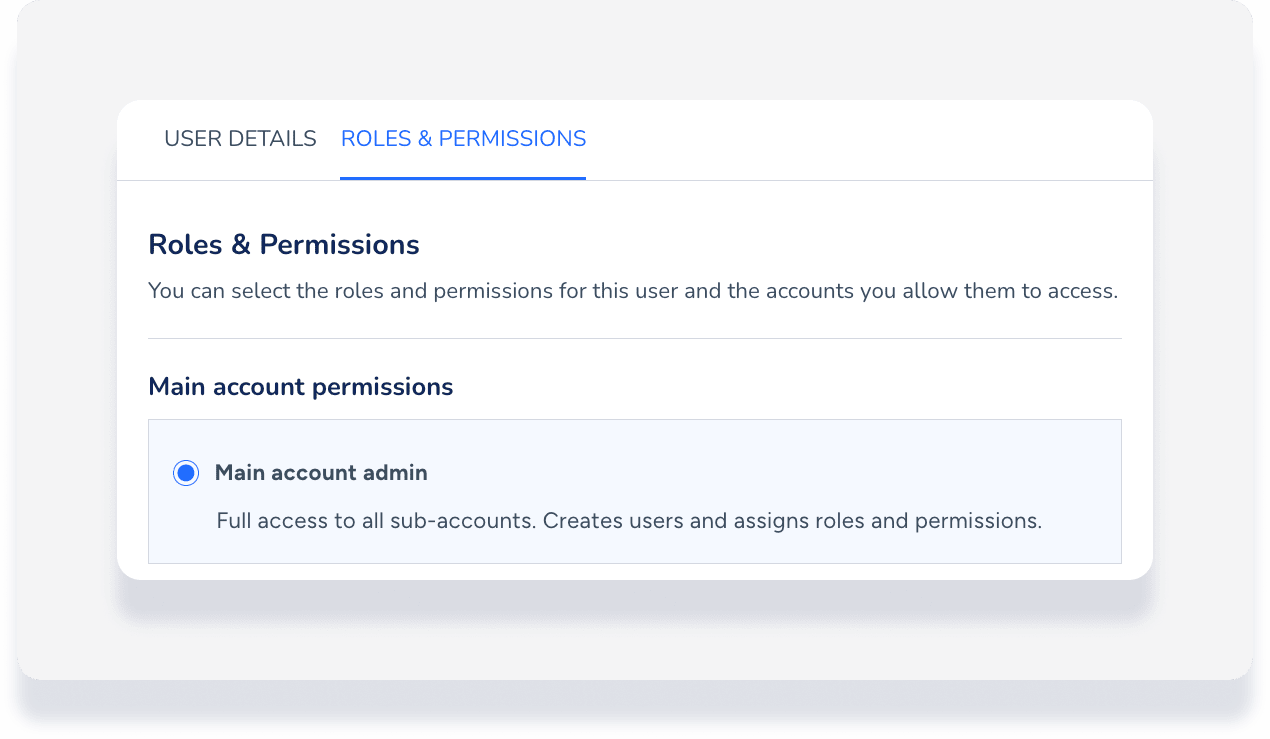
Click the Roles & permissions tab.
In the "Main account permissions" section, select either Main account admin or Main account user.
Note:
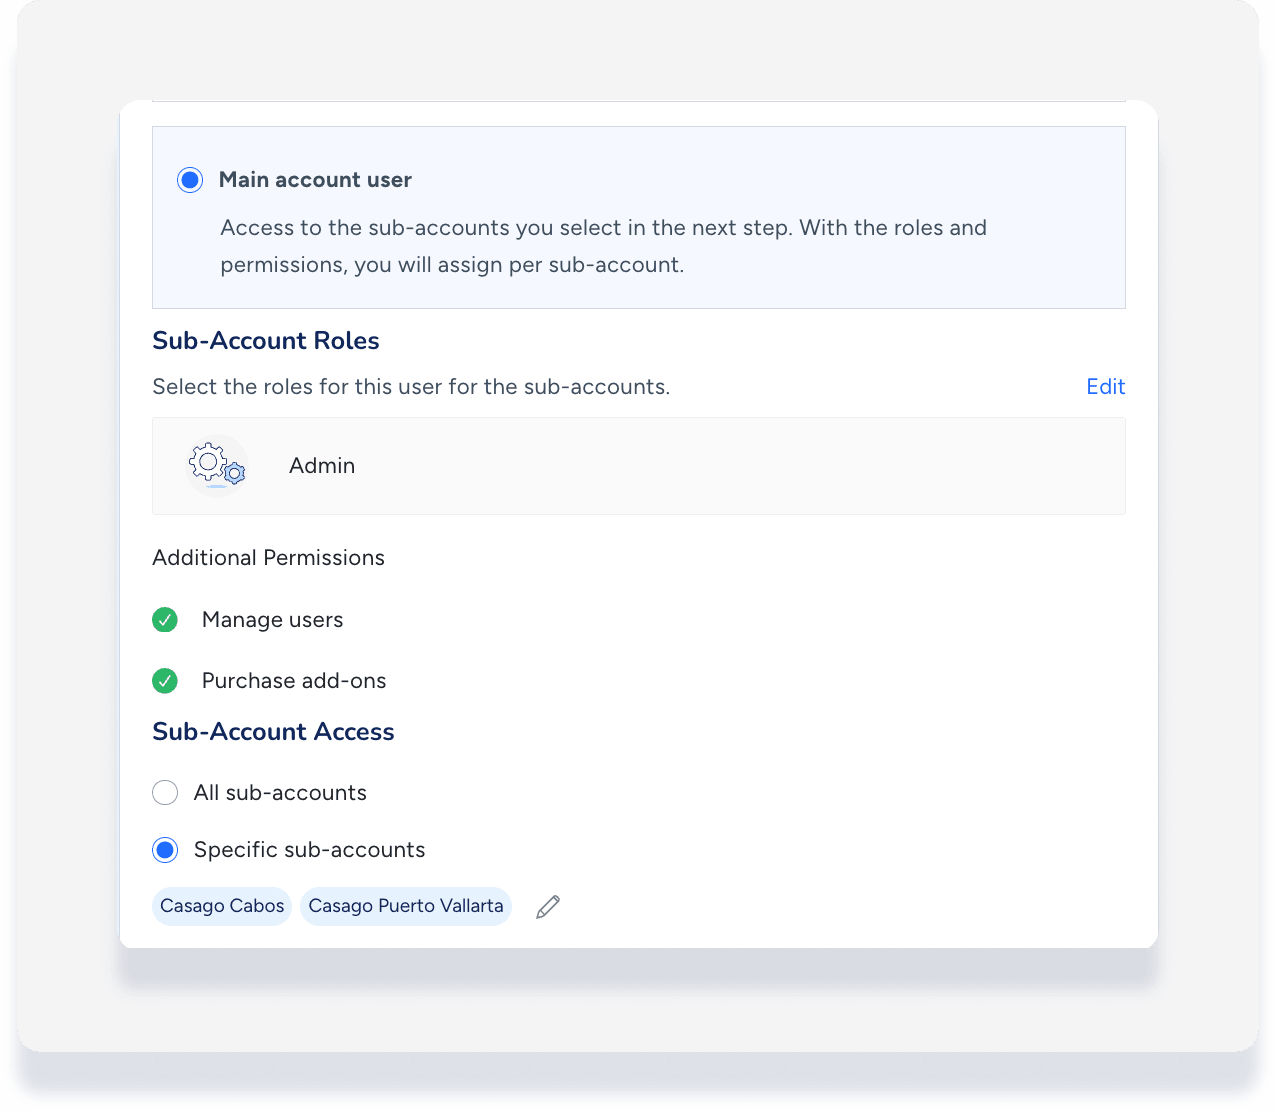
If you select Main account user, you must complete the additional steps below to assign sub-account roles and access.
In the "Sub-Account Roles" section, click Edit and select the relevant role.
Under "Sub-Account Access," choose the access level:
Select All sub-accounts to grant access to every sub-account.
Select Specific sub-accounts and choose the relevant accounts from the list.
Click Save.
Navigate between sub-accounts
HQ users can open multiple sub-account instances in different tabs or windows at the same time, but only one instance remains active for the user session at any given time.
To navigate between sub-accounts successfully from the HQ level, ensure your session is correctly synced to avoid session conflicts.
Step by step:
Log out of any individual sub-accounts and the HQ level completely.
Log in to the HQ layer only.
Navigate to the relevant sub-account from the HQ integration page.
Troubleshoot login issues
If a user has trouble accessing HQ or a specific sub-account instance, you can trigger a password reset for them.
Follow the steps below to reset a user's login:
Navigate to the User management section of the HQ or sub-account.
Locate the relevant user and click

Select the option to reset their login.
This sends an automated email to the user to reset their password.