The Guesty dispute management platform helps you handle GuestyPay chargebacks efficiently. Use this tool to review new cases, submit evidence (representments), and track the outcome of every dispute.
Get started with the dashboard
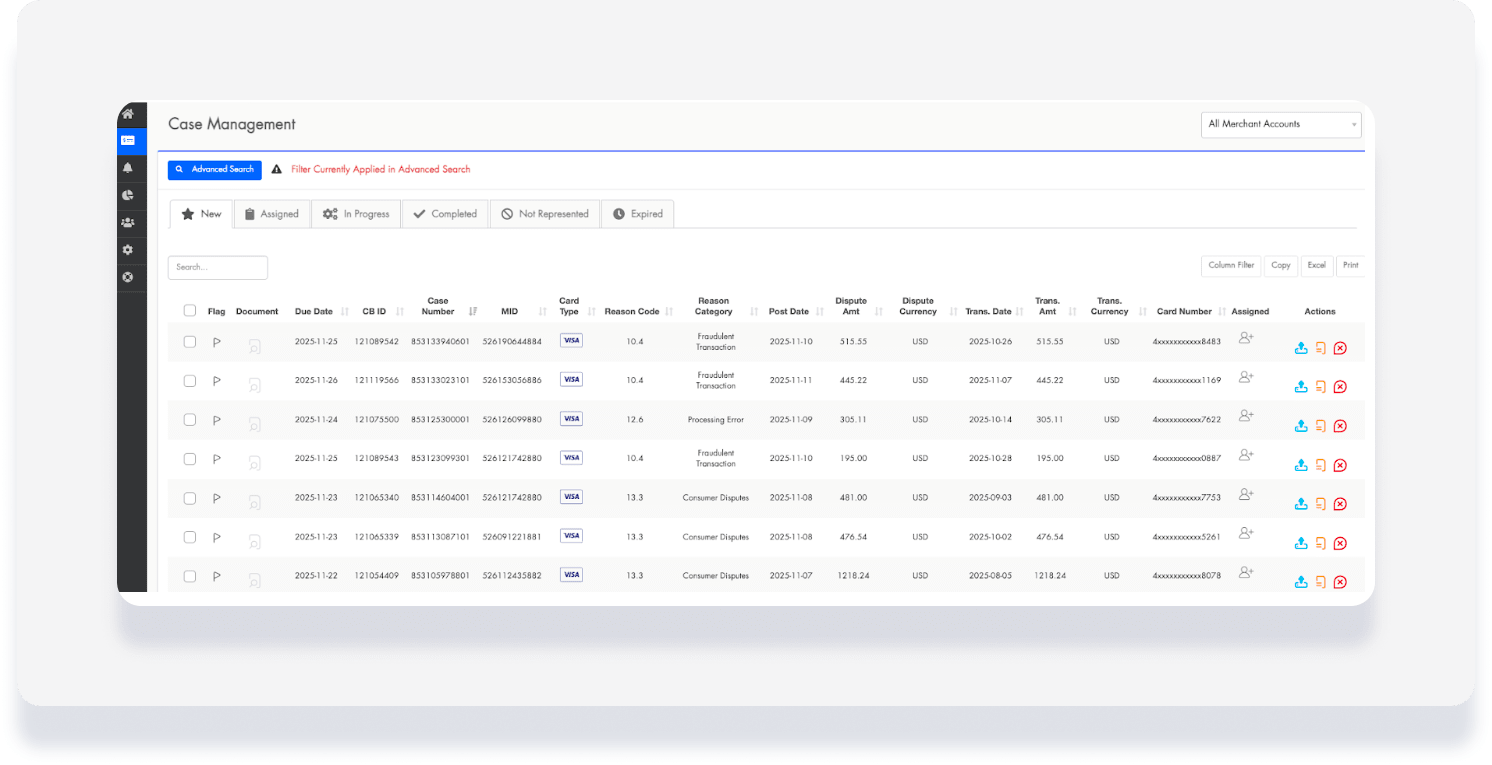
The dispute dashboard provides a centralized view of all current and past chargebacks. Use the Case Management tab to monitor your progress and take action on new disputes.
Key features
Status Tracking: Identify if cases are "New", "In Progress", "Submitted", "Won", or "Lost".
Filters and Search: Sort cases by status, reason code, date range, or the assigned team member.
Case Assignment: Assign specific disputes to team members to streamline your workflow.
Quick Actions: Open any case to upload evidence or update its status.
Best practices for winning disputes
Submit early: Always submit your response well before the deadline.
Be organized: Use clear file names for evidence, such as "Proof_of_Stay_Reservation123.pdf".
Stay factual: Keep your evidence short and directly related to the dispute reason code.
Review details: Double-check that transaction and guest details match your internal records before submitting.
Responding to a dispute
Follow the steps below to build and submit a response to a chargeback.
Step by step:
Sign in to your Guesty account.
- In the top navigation bar, click the mode selector and select Financials mode.
- Click Payment processing.
- In the GuestyPay section, click on Payment dashboard.
- You'll be redirected to the dashboard login page. Enter your username and password and click Sign in.
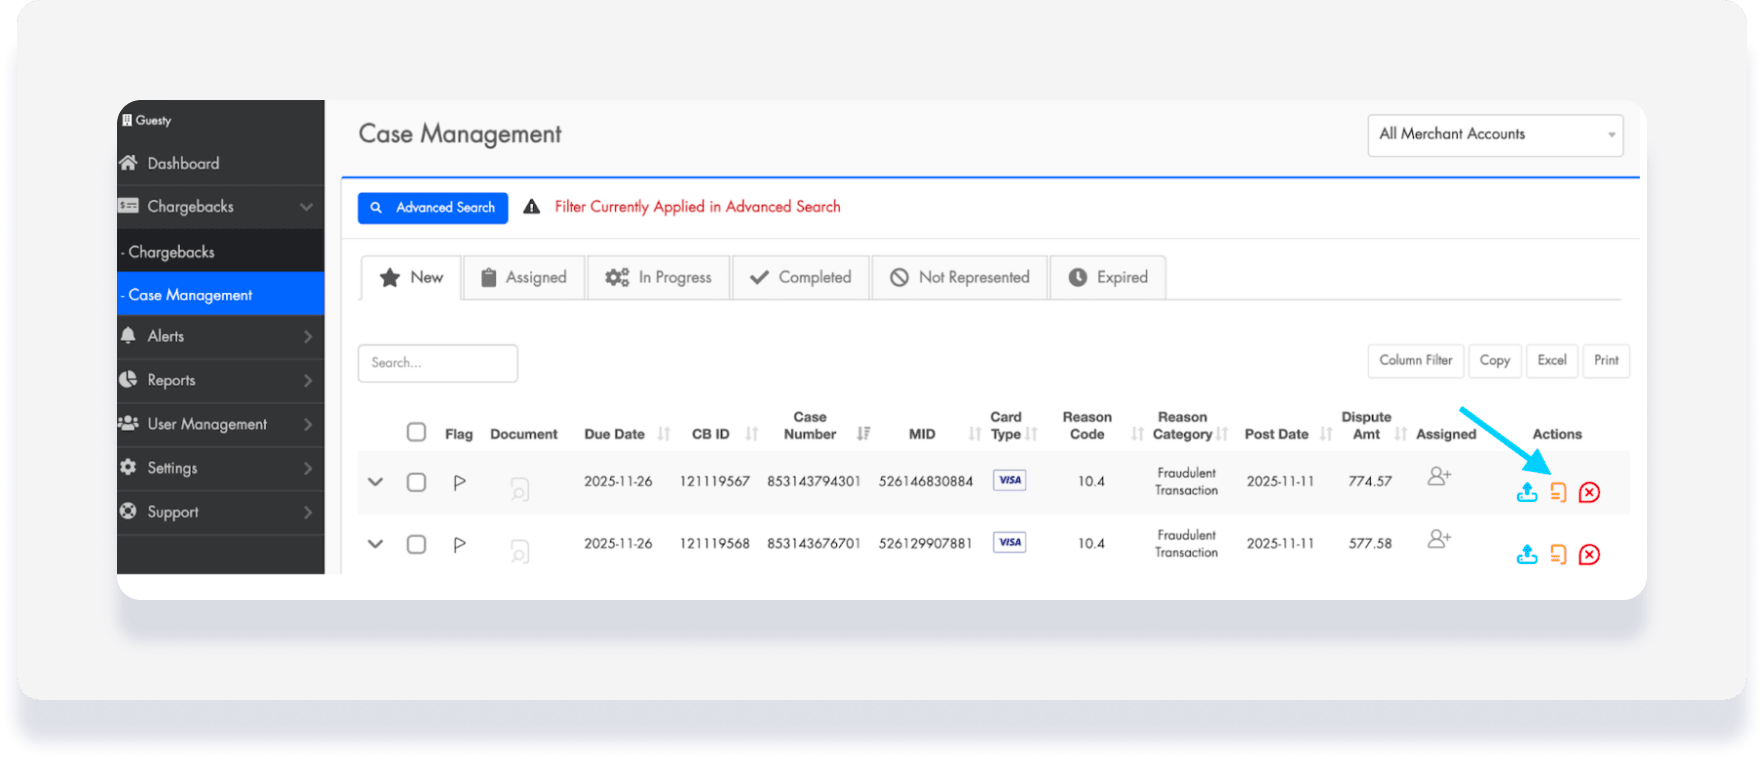
In the left-side menu, click Chargebacks and select Case Management.
Select the case you want to respond to.
Click Case Builder.
Select the Sales Method (Online, Phone, or Mail/Direct Email).
Enter the Customer information, including their name, email, and country.
In the Transaction Information section, ensure "No" is selected by default unless otherwise required.
Under Product Information, click Category and select Travel Services.
Fill out all remaining required fields regarding the service provided.
Upload Evidence: Attach supporting documents such as invoices, proof of stay, email logs, or your cancellation policy.
Click Save & Complete to submit the response.
Once submitted, the case status changes to "Under Review".
Track performance and settings
Analyze reports
Use the Reports tab to track your success rates and identify trends. View metrics such as:
Total chargebacks received vs. win rate percentage
Total amounts recovered
Top reason codes and loss trends
Manage alerts and users
Customize how your team interacts with the platform in the Settings and User Management tabs.
User Roles: Assign roles such as Admin, Agent/Case Handler, or Viewer.
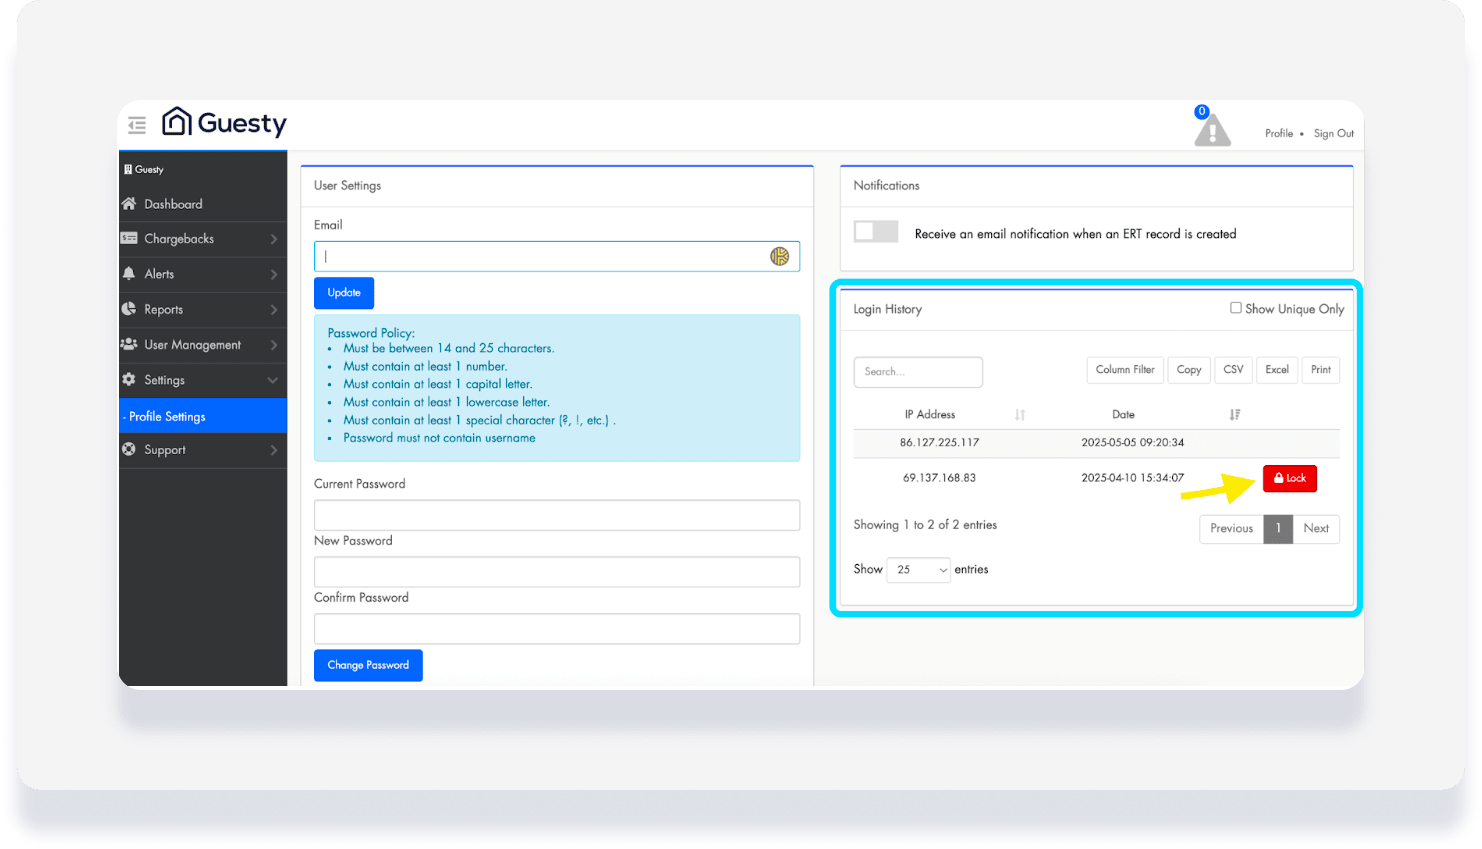
Profile Settings:
Update your email, change your password
Toggle on email notifications for new records or alerts
Security: View login history and manage IP access to block suspicious activity.
Add a new user
Important:
To maintain security, only grant Admin access to highly trusted personnel and periodically review user permissions.
In the left-side menu, click User Management.
Select Users.
Click + Add User
Fill out the user details and click Save.