Protect your properties and your peace of mind. Screen & Protect ensures you receive compensation for guest damages across all booking channels without uncomfortable confrontations. When you activate the plan, we screen guests using their email address or phone number to assess risk and provide coverage for damages.
Protection legibility
The protection plan applies to:
- New reservations created after you set up the plan
- Stays of up to 21 nights
Screen & Protect is available for accounts with properties in the following countries (click the country to view terms and conditions):
- Australia
- Brazil
- Canada
- Colombia
- France
- Ireland
- Italy
- New Zealand
- Norway
- Poland
- Spain
- Switzerland
- UAE
- UK
Coverage exclusions
While Screen & Protect covers most accidental damage, specific causes are excluded from the plan. Review the list below to understand the exceptions.
- Wear and tear
- Mechanical or electrical breakdown
- War
- Terrorism
- Nuclear reaction
- Radioactive contamination, intentional or expected loss
- Smoking
- Neglect
- Criminal acts
- Government action
- Seepage and/or pollution and/or contamination
- Pathogenic, biological, or chemical materials and microorganisms (mold)
Set up Screen & Protect
Follow the steps below to set up Screen & Protect.
Step by step:
- Sign in to your Guesty account.
- In the top navigation bar, click
 and select Guesty add-ons.
 - In the Guesty Shield thumbnail, click Learn more.
-
Click Global offering.

- Select the plan and click Next.
- All listings are included by default. To change this, click Edit and select which properties you wish to include.
- Click Next.
- Check the box to agree to the terms and conditions, then click Confirm.
- In the pop-up, click Setup additional fees to cover the plan costs, or click Skip this step to set up later. Learn more about additional fees.
After you select a plan, click Properties in the left sidebar to view which properties are covered.
In the Reservations report, view a list of all protected reservations. At the end of the month, Guesty bills you only for these reservations.
Add or remove properties
When you set up Screen & Protect, you select which properties to include. You can access Screen & Protect anytime to add or remove properties.
Step by step:
- Repeat steps 1-3 above.
- To the right of the relevant plan, click
 .
. - Click Next.
- Edit the properties as needed.
- Click Next.
- Check the box to agree to the terms and conditions, then click Confirm.
File a claim
To file a claim for damage coverage, contact us and provide the following information:
- A description of the inflicted damage
- The cost of the inflicted damage
- Pictures of the inflicted damage
- Receipts
You must submit a claim within 15 days of checkout.
Check if a reservation is covered
Step by Step:
- Sign in to your Guesty account.
- In the top menu, click the mode selector and select Operations.
- Click Reservations.
- Select the relevant reservation.
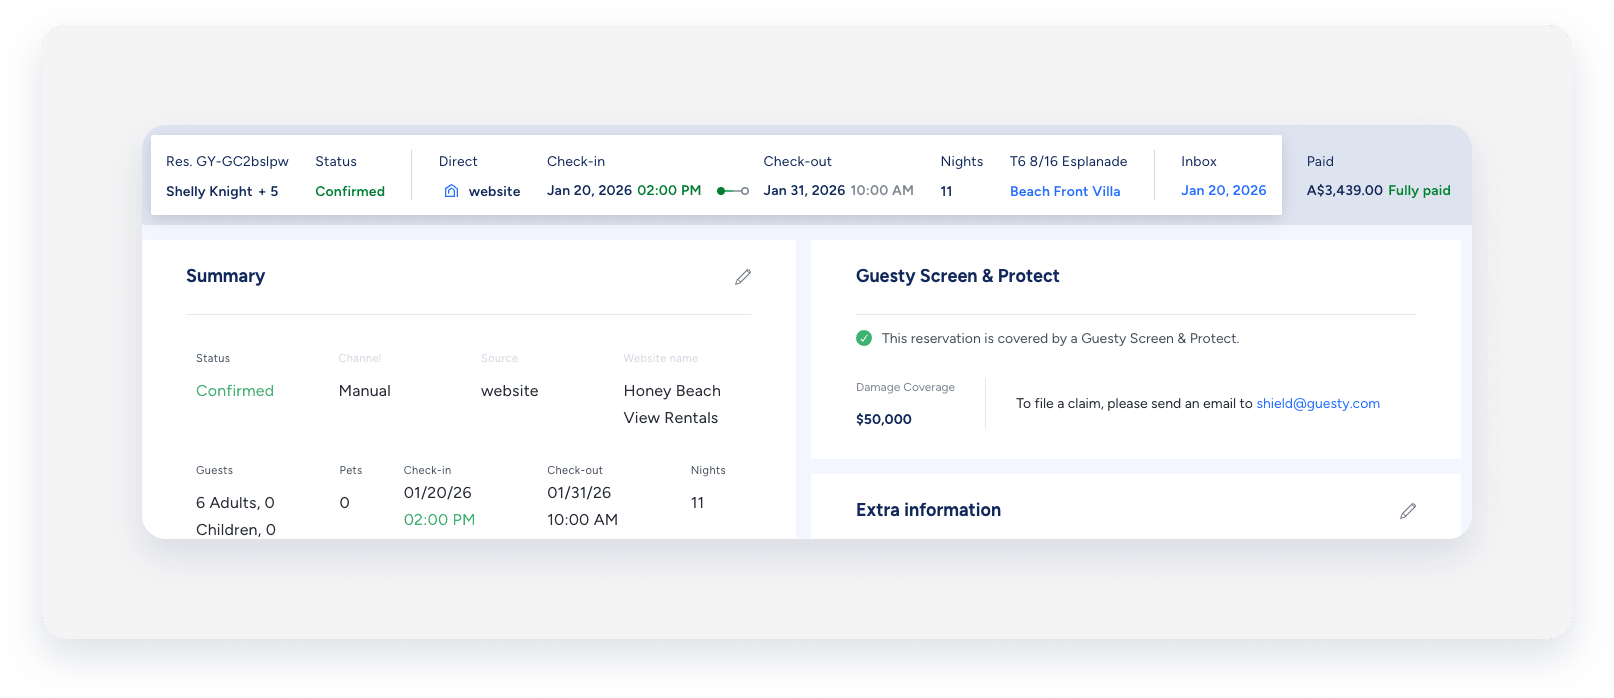
The "Shield Screen & Protect" section indicates if the reservation is covered.
